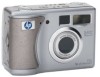
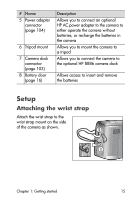
HP 935 hp photosmart 930 series digital camera user manual - Page 19
Installing the software, Windows
 |
UPC - 808736469753
View all HP 935 manuals
Add to My Manuals
Save this manual to your list of manuals |
Page 19 highlights
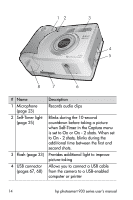
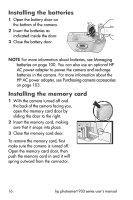
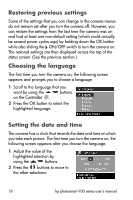
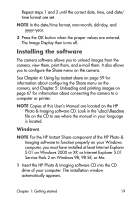
Repeat steps 1 and 2 until the correct date, time, and date/ time format are set. NOTE In the date/time format, mm=month, dd=day, and yyyy=year. 3 Press the OK button when the proper values are entered. The Image Display then turns off. Installing the software The camera software allows you to unload images from the camera, view them, print them, and e-mail them. It also allows you to configure the Share menu on the camera. See Chapter 4: Using hp instant share on page 59 for information about configuring the Share menu on the camera, and Chapter 5: Unloading and printing images on page 67 for information about connecting the camera to a computer or printer. NOTE Copies of this User's Manual are located on the HP Photo & Imaging software CD. Look in the \docs\Readme file on the CD to see where the manual in your language is located. Windows NOTE For the HP Instant Share component of the HP Photo & Imaging software to function properly on your Windows computer, you must have installed at least Internet Explorer 5.01 on Windows 2000 or XP, or Internet Explorer 5.01 Service Pack 2 on Windows 98, 98 SE, or Me. 1 Insert the HP Photo & Imaging software CD into the CD drive of your computer. The installation window automatically appears. Chapter 1: Getting started 19
-
 1
1 -
2
-
3
-
4
-
5
-
6
-
7
-
8
-
9
-
10
-
11
-
12
-
13
-
 14
14 -
 15
15 -
 16
16 -
 17
17 -
 18
18 -
 19
19 -
 20
20 -
 21
21 -
 22
22 -
 23
23 -
 24
24 -
25
-
26
-
27
-
28
-
29
-
30
-
31
-
32
-
33
-
34
-
35
-
36
-
37
-
38
-
39
-
40
-
41
-
42
-
43
-
44
-
45
-
46
-
47
-
48
-
49
-
50
-
51
-
52
-
53
-
54
-
55
-
56
-
57
-
58
-
59
-
60
-
61
-
62
-
63
-
64
-
65
-
66
-
67
-
68
-
69
-
70
-
71
-
72
-
73
-
74
-
75
-
76
-
77
-
78
-
79
-
80
-
81
-
82
-
83
-
84
-
85
-
86
-
87
-
88
-
89
-
90
-
91
-
92
-
93
-
94
-
95
-
96
-
97
-
98
-
99
-
100
-
101
-
102
-
103
-
104
-
105
-
106
-
107
-
108
-
109
-
110
-
111
-
112
-
113
-
114
-
115
-
116
-
117
-
118
 |
 |