HP 9500n HP Color LaserJet 9500n/9500hdn - User Reference Guide - Page 280
Media-handling issues, AUTO CONTINUE, PROCESSING JOB
 |
UPC - 808736429672
View all HP 9500n manuals
Add to My Manuals
Save this manual to your list of manuals |
Page 280 highlights
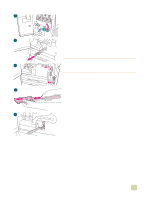
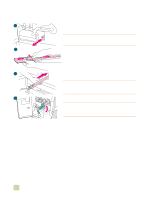
Media-handling issues Situation Solution Duplexer jams occur repeatedly. q Make sure that you are using the supported media weights and sizes. (See "Supported media sizes for input and output" on page 97.) q Remove the duplexer and make sure that no media remains in the printer. Stapler jams occur repeatedly. q Make sure that the job to be stapled is less than 5 mm (0.2 inch) thick. q The stapler might contain some trapped staple wires that are obstructing the magazine. Remove any loose staples and media particles from the inside of the stapler (see "To clear a staple jam from the optional stapler/stacker" on page 233 and "To clear a staple jam from the multifunction finisher" on page 235). The job was not stapled. Jobs that are sent to the stapler or multifunction finisher might not be stapled for one or more of the following reasons: q One-page jobs are not stapled. q The stapler is out of staples and AUTO CONTINUE is set to ON. q The wrong size or type of media was used for the job. q More than 50 pages were sent to the stapler, exceeding its capacity. q The stapler has bent or broken staples in the stapler head. q A staple jam was recently cleared (up to two sequential jobs might not be stapled). q The job was sent to a bin other than the stapler bin because the wrong size or type of media was used for the job. q The interface cable to the stapler unit might be defective or not connected correctly. The last page did not print and the Data light is on. q Make sure that you are using the correct printer driver. q Complex print job might still be processing. q The printer might be waiting for the end of a file command that did not come with the job. Press (SELECT) to send it. q Make sure that the printer is not paused. Make sure that the PROCESSING JOB message appears on the control panel. q Check for a LOAD PAPER message on the printer control panel. (See "Load media in the input trays" on page 29.) Network or shared printer problems occur. Check for network or shared printer problems by connecting your computer directly to the printer and printing from a software application that you know works correctly. If you suspect network problems, check with your network administrator or consult the network documentation that came with your printer network cards. The media is loaded into tray 1, and the load or manual feed message appears on the control panel. Load the correct media in the tray. (See "To load media in tray 1" on page 33.) If the correct media is already loaded, press (SELECT). 278 Solving print-quality problems ENWW
-
 1
1 -
2
-
3
-
4
-
5
-
6
-
7
-
8
-
9
-
10
-
11
-
12
-
13
-
14
-
15
-
16
-
17
-
18
-
19
-
20
-
21
-
22
-
23
-
24
-
25
-
26
-
27
-
28
-
29
-
30
-
31
-
32
-
33
-
34
-
35
-
36
-
37
-
38
-
39
-
40
-
41
-
42
-
43
-
44
-
45
-
46
-
47
-
48
-
49
-
50
-
51
-
52
-
53
-
54
-
55
-
56
-
57
-
58
-
59
-
60
-
61
-
62
-
63
-
64
-
65
-
66
-
67
-
68
-
69
-
70
-
71
-
72
-
73
-
74
-
75
-
76
-
77
-
78
-
79
-
80
-
81
-
82
-
83
-
84
-
85
-
86
-
87
-
88
-
89
-
90
-
91
-
92
-
93
-
94
-
95
-
96
-
97
-
98
-
99
-
100
-
101
-
102
-
103
-
104
-
105
-
106
-
107
-
108
-
109
-
110
-
111
-
112
-
113
-
114
-
115
-
116
-
117
-
118
-
119
-
120
-
121
-
122
-
123
-
124
-
125
-
126
-
127
-
128
-
129
-
130
-
131
-
132
-
133
-
134
-
135
-
136
-
137
-
138
-
139
-
140
-
141
-
142
-
143
-
144
-
145
-
146
-
147
-
148
-
149
-
150
-
151
-
152
-
153
-
154
-
155
-
156
-
157
-
158
-
159
-
160
-
161
-
162
-
163
-
164
-
165
-
166
-
167
-
168
-
169
-
170
-
171
-
172
-
173
-
174
-
175
-
176
-
177
-
178
-
179
-
180
-
181
-
182
-
183
-
184
-
185
-
186
-
187
-
188
-
189
-
190
-
191
-
192
-
193
-
194
-
195
-
196
-
197
-
198
-
199
-
200
-
201
-
202
-
203
-
204
-
205
-
206
-
207
-
208
-
209
-
210
-
211
-
212
-
213
-
214
-
215
-
216
-
217
-
218
-
219
-
220
-
221
-
222
-
223
-
224
-
225
-
226
-
227
-
228
-
229
-
230
-
231
-
232
-
233
-
234
-
235
-
236
-
237
-
238
-
239
-
240
-
241
-
242
-
243
-
244
-
245
-
246
-
247
-
248
-
249
-
250
-
251
-
252
-
253
-
254
-
255
-
256
-
257
-
258
-
259
-
260
-
261
-
262
-
263
-
264
-
265
-
266
-
267
-
268
-
269
-
270
-
271
-
272
-
273
-
274
-
 275
275 -
 276
276 -
 277
277 -
 278
278 -
 279
279 -
 280
280 -
 281
281 -
 282
282 -
 283
283 -
 284
284 -
 285
285 -
286
-
287
-
288
-
289
-
290
-
291
-
292
-
293
-
294
-
295
-
296
-
297
-
298
-
299
-
300
-
301
-
302
-
303
-
304
-
305
-
306
-
307
-
308
-
309
-
310
-
311
-
312
-
313
-
314
-
315
-
316
-
317
-
318
-
319
-
320
-
321
-
322
-
323
-
324
-
325
-
326
-
327
-
328
-
329
-
330
-
331
-
332
-
333
-
334
-
335
-
336
-
337
-
338
-
339
-
340
-
341
-
342
-
343
-
344
-
345
-
346
-
347
-
348
-
349
-
350
 |
 |
