HP D7560 User Guide - Page 121
Solution 1: Use TrueType or OpenType fonts, Solution 2: Align the printer
 |
UPC - 883585923687
View all HP D7560 manuals
Add to My Manuals
Save this manual to your list of manuals |
Page 121 highlights
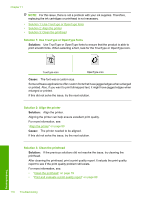
Chapter 11 NOTE: For this issue, there is not a problem with your ink supplies. Therefore, replacing the ink cartridges or printhead is not necessary. • Solution 1: Use TrueType or OpenType fonts • Solution 2: Align the printer • Solution 3: Clean the printhead Solution 1: Use TrueType or OpenType fonts Solution: Use TrueType or OpenType fonts to ensure that the product is able to print smooth fonts. When selecting a font, look for the TrueType or OpenType icon. TrueType icon OpenType icon Cause: The font was a custom size. Some software applications offer custom fonts that have jagged edges when enlarged or printed. Also, if you want to print bitmapped text, it might have jagged edges when enlarged or printed. If this did not solve the issue, try the next solution. Solution 2: Align the printer Solution: Align the printer. Aligning the printer can help ensure excellent print quality. For more information, see: "Align the printer" on page 80 Cause: The printer needed to be aligned. If this did not solve the issue, try the next solution. Solution 3: Clean the printhead Solution: If the previous solutions did not resolve the issue, try cleaning the printhead. After cleaning the printhead, print a print quality report. Evaluate the print quality report to see if the print quality problem still exists. For more information, see: • "Clean the printhead" on page 79 • "Print and evaluate a print quality report" on page 80 118 Troubleshooting Troubleshooting
-
 1
1 -
2
-
3
-
4
-
5
-
6
-
7
-
8
-
9
-
10
-
11
-
12
-
13
-
14
-
15
-
16
-
17
-
18
-
19
-
20
-
21
-
22
-
23
-
24
-
25
-
26
-
27
-
28
-
29
-
30
-
31
-
32
-
33
-
34
-
35
-
36
-
37
-
38
-
39
-
40
-
41
-
42
-
43
-
44
-
45
-
46
-
47
-
48
-
49
-
50
-
51
-
52
-
53
-
54
-
55
-
56
-
57
-
58
-
59
-
60
-
61
-
62
-
63
-
64
-
65
-
66
-
67
-
68
-
69
-
70
-
71
-
72
-
73
-
74
-
75
-
76
-
77
-
78
-
79
-
80
-
81
-
82
-
83
-
84
-
85
-
86
-
87
-
88
-
89
-
90
-
91
-
92
-
93
-
94
-
95
-
96
-
97
-
98
-
99
-
100
-
101
-
102
-
103
-
104
-
105
-
106
-
107
-
108
-
109
-
110
-
111
-
112
-
113
-
114
-
115
-
 116
116 -
 117
117 -
 118
118 -
 119
119 -
 120
120 -
 121
121 -
 122
122 -
 123
123 -
 124
124 -
 125
125 -
 126
126 -
127
-
128
-
129
-
130
-
131
-
132
-
133
-
134
-
135
-
136
-
137
-
138
-
139
-
140
-
141
-
142
-
143
-
144
-
145
-
146
-
147
-
148
-
149
-
150
-
151
-
152
-
153
-
154
-
155
-
156
-
157
-
158
-
159
-
160
-
161
-
162
-
163
-
164
-
165
-
166
-
167
-
168
-
169
-
170
-
171
-
172
-
173
-
174
-
175
-
176
-
177
-
178
-
179
-
180
-
181
-
182
-
183
-
184
-
185
-
186
-
187
-
188
-
189
-
190
-
191
-
192
-
193
-
194
-
195
-
196
-
197
-
198
-
199
-
200
-
201
-
202
-
203
-
204
-
205
-
206
-
207
-
208
-
209
-
210
-
211
-
212
-
213
-
214
-
215
-
216
-
217
-
218
-
219
-
220
-
221
-
222
-
223
-
224
-
225
-
226
-
227
-
228
-
229
-
230
-
231
-
232
-
233
-
234
-
235
-
236
-
237
 |
 |
