HP D7560 User Guide - Page 185
CAUTION, Solution 3: Close the print carriage latch, The electrical contacts needed to be cleaned.
 |
UPC - 883585923687
View all HP D7560 manuals
Add to My Manuals
Save this manual to your list of manuals |
Page 185 highlights
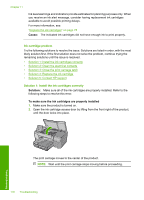
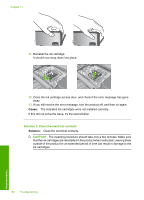
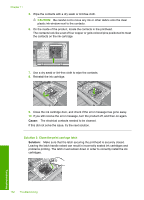
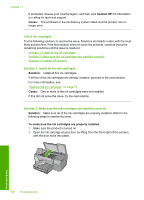
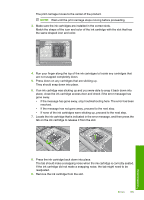
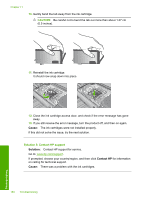
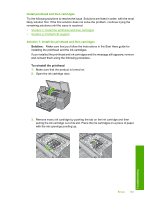
Chapter 11 5. Wipe the contacts with a dry swab or lint-free cloth. CAUTION: Be careful not to move any ink or other debris onto the clear plastic ink window next to the contacts. 6. On the inside of the product, locate the contacts in the printhead. The contacts look like a set of four copper or gold-colored pins positioned to meet the contacts on the ink cartridge. 7. Use a dry swab or lint-free cloth to wipe the contacts. 8. Reinstall the ink cartridge. 9. Close the ink cartridge door, and check if the error message has gone away. 10. If you still receive the error message, turn the product off, and then on again. Cause: The electrical contacts needed to be cleaned. If this did not solve the issue, try the next solution. Solution 3: Close the print carriage latch Solution: Make sure that the latch securing the printhead is securely closed. Leaving the latch handle raised can result in incorrectly seated ink cartridges and problems printing. The latch must remain down in order to correctly install the ink cartridges. Troubleshooting 182 Troubleshooting
-
 1
1 -
2
-
3
-
4
-
5
-
6
-
7
-
8
-
9
-
10
-
11
-
12
-
13
-
14
-
15
-
16
-
17
-
18
-
19
-
20
-
21
-
22
-
23
-
24
-
25
-
26
-
27
-
28
-
29
-
30
-
31
-
32
-
33
-
34
-
35
-
36
-
37
-
38
-
39
-
40
-
41
-
42
-
43
-
44
-
45
-
46
-
47
-
48
-
49
-
50
-
51
-
52
-
53
-
54
-
55
-
56
-
57
-
58
-
59
-
60
-
61
-
62
-
63
-
64
-
65
-
66
-
67
-
68
-
69
-
70
-
71
-
72
-
73
-
74
-
75
-
76
-
77
-
78
-
79
-
80
-
81
-
82
-
83
-
84
-
85
-
86
-
87
-
88
-
89
-
90
-
91
-
92
-
93
-
94
-
95
-
96
-
97
-
98
-
99
-
100
-
101
-
102
-
103
-
104
-
105
-
106
-
107
-
108
-
109
-
110
-
111
-
112
-
113
-
114
-
115
-
116
-
117
-
118
-
119
-
120
-
121
-
122
-
123
-
124
-
125
-
126
-
127
-
128
-
129
-
130
-
131
-
132
-
133
-
134
-
135
-
136
-
137
-
138
-
139
-
140
-
141
-
142
-
143
-
144
-
145
-
146
-
147
-
148
-
149
-
150
-
151
-
152
-
153
-
154
-
155
-
156
-
157
-
158
-
159
-
160
-
161
-
162
-
163
-
164
-
165
-
166
-
167
-
168
-
169
-
170
-
171
-
172
-
173
-
174
-
175
-
176
-
177
-
178
-
179
-
 180
180 -
 181
181 -
 182
182 -
 183
183 -
 184
184 -
 185
185 -
 186
186 -
 187
187 -
 188
188 -
 189
189 -
 190
190 -
191
-
192
-
193
-
194
-
195
-
196
-
197
-
198
-
199
-
200
-
201
-
202
-
203
-
204
-
205
-
206
-
207
-
208
-
209
-
210
-
211
-
212
-
213
-
214
-
215
-
216
-
217
-
218
-
219
-
220
-
221
-
222
-
223
-
224
-
225
-
226
-
227
-
228
-
229
-
230
-
231
-
232
-
233
-
234
-
235
-
236
-
237
 |
 |
