HP D7560 User Guide - Page 70
Create special projects from your photos, Optional Touch
 |
UPC - 883585923687
View all HP D7560 manuals
Add to My Manuals
Save this manual to your list of manuals |
Page 70 highlights
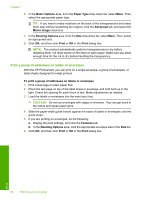
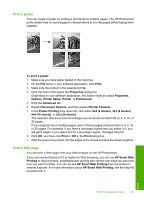
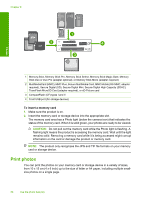
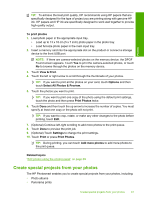
Photos TIP: To achieve the best print quality, HP recommends using HP papers that are specifically designed for the type of project you are printing along with genuine HP ink. HP papers and HP ink are specifically designed to work well together to provide high-quality output. To print photos 1. Load photo paper in the appropriate input tray. • Load up to 13 x 18 cm (5 x 7 inch) photo paper in the photo tray. • Load full-size photo paper in the main input tray. 2. Insert a memory card into the appropriate slot on the product or connect a storage device to the front USB port. NOTE: If there are camera-selected photos on the memory device, the DPOF Found screen appears. Touch Yes to print the camera-selected photos, or touch No to browse through the photos on the memory device. 3. Touch View & Print. 4. Touch the left or right arrow to scroll through the thumbnails of your photos. TIP: If you want to print all the photos on your card, touch Options and then touch Select All Photos & Preview. 5. Touch the photos you want to print. TIP: If you want to print one copy of the photo using the default print settings, touch the photo and then press Print Photos twice. 6. Touch Done and then touch the up arrow to increase the number of copies. You must specify at least one copy or the photo will not print. TIP: If you want to crop, rotate, or make any other changes to the photo before printing, touch Edit. 7. (Optional) Continue left-right scrolling to add more photos to the print queue. 8. Touch Done to preview the print job. 9. (Optional) Touch Settings to change the print settings. 10. Touch Print or press Print Photos. TIP: During printing, you can touch Add more photos to add more photos to the print queue. Related topics "Edit photos using the control panel" on page 69 Create special projects from your photos The HP Photosmart enables you to create special projects from your photos, including: • Photo albums • Panorama prints Create special projects from your photos 67
-
 1
1 -
2
-
3
-
4
-
5
-
6
-
7
-
8
-
9
-
10
-
11
-
12
-
13
-
14
-
15
-
16
-
17
-
18
-
19
-
20
-
21
-
22
-
23
-
24
-
25
-
26
-
27
-
28
-
29
-
30
-
31
-
32
-
33
-
34
-
35
-
36
-
37
-
38
-
39
-
40
-
41
-
42
-
43
-
44
-
45
-
46
-
47
-
48
-
49
-
50
-
51
-
52
-
53
-
54
-
55
-
56
-
57
-
58
-
59
-
60
-
61
-
62
-
63
-
64
-
 65
65 -
 66
66 -
 67
67 -
 68
68 -
 69
69 -
 70
70 -
 71
71 -
 72
72 -
 73
73 -
 74
74 -
 75
75 -
76
-
77
-
78
-
79
-
80
-
81
-
82
-
83
-
84
-
85
-
86
-
87
-
88
-
89
-
90
-
91
-
92
-
93
-
94
-
95
-
96
-
97
-
98
-
99
-
100
-
101
-
102
-
103
-
104
-
105
-
106
-
107
-
108
-
109
-
110
-
111
-
112
-
113
-
114
-
115
-
116
-
117
-
118
-
119
-
120
-
121
-
122
-
123
-
124
-
125
-
126
-
127
-
128
-
129
-
130
-
131
-
132
-
133
-
134
-
135
-
136
-
137
-
138
-
139
-
140
-
141
-
142
-
143
-
144
-
145
-
146
-
147
-
148
-
149
-
150
-
151
-
152
-
153
-
154
-
155
-
156
-
157
-
158
-
159
-
160
-
161
-
162
-
163
-
164
-
165
-
166
-
167
-
168
-
169
-
170
-
171
-
172
-
173
-
174
-
175
-
176
-
177
-
178
-
179
-
180
-
181
-
182
-
183
-
184
-
185
-
186
-
187
-
188
-
189
-
190
-
191
-
192
-
193
-
194
-
195
-
196
-
197
-
198
-
199
-
200
-
201
-
202
-
203
-
204
-
205
-
206
-
207
-
208
-
209
-
210
-
211
-
212
-
213
-
214
-
215
-
216
-
217
-
218
-
219
-
220
-
221
-
222
-
223
-
224
-
225
-
226
-
227
-
228
-
229
-
230
-
231
-
232
-
233
-
234
-
235
-
236
-
237
 |
 |
