HP LaserJet Pro M1530 HP LaserJet Pro M1530 - User Guide - Page 131
Delete speed dials, If you have more speed dials to program
 |
View all HP LaserJet Pro M1530 manuals
Add to My Manuals
Save this manual to your list of manuals |
Page 131 highlights
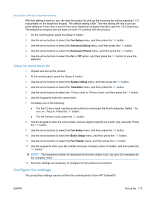
6. Use the alphanumeric buttons to enter the fax number. Include any pauses or other needed numbers, such as an area code, an access code for numbers outside a PBX system (usually a 9 or 0), or a long distance prefix. NOTE: When entering a fax number, press the # button until a comma (,) appears if you want to insert a pause in the dialing sequence, or press the * button until W appears if you want the product to wait for a dial tone. 7. Press the OK button. 8. Use the alphanumeric buttons to enter a name for the fax number. To do so, repeatedly press the alphanumeric button for the letter that you need until the letter appears. NOTE: To insert punctuation, press the asterisk (*) button repeatedly until the character that you want appears, and then press the up arrow button to go to the next space. 9. Press the OK button to save the information. 10. If you have more speed dials to program, repeat steps 1 through 9. Delete speed dials 1. On the control panel, press the Fax Menu button. 2. Use the arrow buttons to select the Phone Book Setup menu, and then press the OK button. 3. Use the arrow buttons to select the Individual Setup menu, and then press the OK button. 4. Use the arrow buttons button to select the Delete option, and then press the OK button. 5. Use the alphanumeric buttons to enter the number of the speed-dial entry you want to delete, and then press the OK button. 6. Press the OK button to confirm the deletion. ENWW Use the phone book 117
-
 1
1 -
2
-
3
-
4
-
5
-
6
-
7
-
8
-
9
-
10
-
11
-
12
-
13
-
14
-
15
-
16
-
17
-
18
-
19
-
20
-
21
-
22
-
23
-
24
-
25
-
26
-
27
-
28
-
29
-
30
-
31
-
32
-
33
-
34
-
35
-
36
-
37
-
38
-
39
-
40
-
41
-
42
-
43
-
44
-
45
-
46
-
47
-
48
-
49
-
50
-
51
-
52
-
53
-
54
-
55
-
56
-
57
-
58
-
59
-
60
-
61
-
62
-
63
-
64
-
65
-
66
-
67
-
68
-
69
-
70
-
71
-
72
-
73
-
74
-
75
-
76
-
77
-
78
-
79
-
80
-
81
-
82
-
83
-
84
-
85
-
86
-
87
-
88
-
89
-
90
-
91
-
92
-
93
-
94
-
95
-
96
-
97
-
98
-
99
-
100
-
101
-
102
-
103
-
104
-
105
-
106
-
107
-
108
-
109
-
110
-
111
-
112
-
113
-
114
-
115
-
116
-
117
-
118
-
119
-
120
-
121
-
122
-
123
-
124
-
125
-
 126
126 -
 127
127 -
 128
128 -
 129
129 -
 130
130 -
 131
131 -
 132
132 -
 133
133 -
 134
134 -
 135
135 -
 136
136 -
137
-
138
-
139
-
140
-
141
-
142
-
143
-
144
-
145
-
146
-
147
-
148
-
149
-
150
-
151
-
152
-
153
-
154
-
155
-
156
-
157
-
158
-
159
-
160
-
161
-
162
-
163
-
164
-
165
-
166
-
167
-
168
-
169
-
170
-
171
-
172
-
173
-
174
-
175
-
176
-
177
-
178
-
179
-
180
-
181
-
182
-
183
-
184
-
185
-
186
-
187
-
188
-
189
-
190
-
191
-
192
-
193
-
194
-
195
-
196
-
197
-
198
-
199
-
200
-
201
-
202
-
203
-
204
-
205
-
206
-
207
-
208
-
209
-
210
-
211
-
212
-
213
-
214
-
215
-
216
-
217
-
218
-
219
-
220
-
221
-
222
-
223
-
224
-
225
-
226
-
227
-
228
-
229
-
230
-
231
-
232
-
233
-
234
-
235
-
236
-
237
-
238
-
239
-
240
-
241
-
242
-
243
-
244
-
245
-
246
-
247
-
248
-
249
-
250
-
251
-
252
-
253
-
254
-
255
-
256
-
257
-
258
-
259
-
260
-
261
-
262
-
263
-
264
-
265
-
266
-
267
-
268
-
269
-
270
-
271
-
272
-
273
-
274
-
275
-
276
-
277
-
278
-
279
-
280
-
281
-
282
-
283
-
284
-
285
-
286
 |
 |
