HP OfficeJet Pro 6970 User Guide - Page 106
Network Configuration Report, Wireless Settings
 |
View all HP OfficeJet Pro 6970 manuals
Add to My Manuals
Save this manual to your list of manuals |
Page 106 highlights
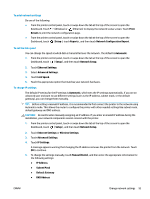
To print network settings Do one of the following: ● From the printer control panel, touch or swipe down the tab at the top of the screen to open the Dashboard. Touch (Wireless) or (Ethernet) to display the network status screen. Touch Print Details to print the network configuration page. ● From the printer control panel, touch or swipe down the tab at the top of the screen to open the Dashboard, touch ( Setup ), touch Reports , and then touch Network Configuration Report. To set the link speed You can change the speed at which data is transmitted over the network. The default is Automatic. 1. From the printer control panel, touch or swipe down the tab at the top of the screen to open the Dashboard, touch ( Setup ), and then touch Network Setup. 2. Touch Ethernet Settings. 3. Select Advanced Settings. 4. Touch Link Speed. 5. Touch the appropriate option that matches your network hardware. To change IP settings The default IP setting for the IP settings is Automatic, which sets the IP settings automatically. If you are an advanced user and want to use different settings (such as the IP address, subnet mask, or the default gateway), you can change them manually. TIP: Before setting a manual IP address, it is recommended to first connect the printer to the network using Automatic mode. This allows the router to configure the printer with other needed settings like subnet mask, default gateway and DNS address. CAUTION: Be careful when manually assigning an IP address. If you enter an invalid IP address during the installation, your network components cannot connect with the printer. 1. From the printer control panel, touch or swipe down the tab at the top of the screen to open the Dashboard, touch ( Setup ), and then touch Network Setup. 2. Touch Ethernet Settings or Wireless Settings. 3. Touch Advanced Settings. 4. Touch IP Settings. A message appears warning that changing the IP address removes the printer from the network. Touch OK to continue. 5. To change the settings manually, touch Manual (Static), and then enter the appropriate information for the following settings: ● IP Address ● Subnet Mask ● Default Gateway ● DNS Address ENWW Change network settings 93
-
 1
1 -
2
-
3
-
4
-
5
-
6
-
7
-
8
-
9
-
10
-
11
-
12
-
13
-
14
-
15
-
16
-
17
-
18
-
19
-
20
-
21
-
22
-
23
-
24
-
25
-
26
-
27
-
28
-
29
-
30
-
31
-
32
-
33
-
34
-
35
-
36
-
37
-
38
-
39
-
40
-
41
-
42
-
43
-
44
-
45
-
46
-
47
-
48
-
49
-
50
-
51
-
52
-
53
-
54
-
55
-
56
-
57
-
58
-
59
-
60
-
61
-
62
-
63
-
64
-
65
-
66
-
67
-
68
-
69
-
70
-
71
-
72
-
73
-
74
-
75
-
76
-
77
-
78
-
79
-
80
-
81
-
82
-
83
-
84
-
85
-
86
-
87
-
88
-
89
-
90
-
91
-
92
-
93
-
94
-
95
-
96
-
97
-
98
-
99
-
100
-
 101
101 -
 102
102 -
 103
103 -
 104
104 -
 105
105 -
 106
106 -
 107
107 -
 108
108 -
 109
109 -
 110
110 -
 111
111 -
112
-
113
-
114
-
115
-
116
-
117
-
118
-
119
-
120
-
121
-
122
-
123
-
124
-
125
-
126
-
127
-
128
-
129
-
130
-
131
-
132
-
133
-
134
-
135
-
136
-
137
-
138
-
139
-
140
-
141
-
142
-
143
-
144
-
145
-
146
-
147
-
148
-
149
-
150
-
151
-
152
-
153
-
154
-
155
-
156
-
157
-
158
-
159
-
160
-
161
-
162
-
163
-
164
-
165
-
166
-
167
-
168
-
169
-
170
 |
 |