HP Officejet g95 HP OfficeJet G Series - (English) User Guide for Windows - Page 37
Network Scan Setup, Send To, Image Type, Preview each START SCAN, Scan Reservation, Scan Now,
 |
View all HP Officejet g95 manuals
Add to My Manuals
Save this manual to your list of manuals |
Page 37 highlights
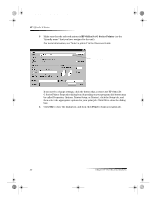
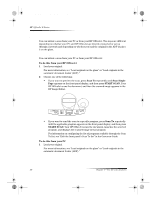
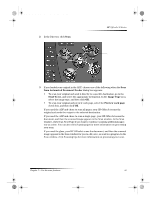
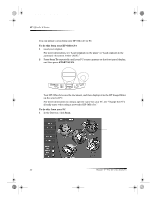
AvPrn.book Page 33 Monday, February 28, 2000 11:13 AM HP OfficeJet G Series 2 After the Network Scan Setup dialog box appears, choose one of the following: • To scan your original and send it directly to a specific destination, go to the Send To list, and select the appropriate destination. In the Image Type area, select the image type, and then click OK. • To scan your original and preview each page, select the Preview each page check box, and then click OK. The Scan Reservation dialog box appears, and the HP OfficeJet is temporarily reserved for your scan. 3 Go to the HP OfficeJet, and load your original. For more information, see “Load originals on the glass” or “Load originals in the automatic document feeder (ADF).” 4 Choose one of the following: • To continue from the HP OfficeJet, press START SCAN. If you did not select Preview each page, the HP OfficeJet scans the original and sends the output to the selected destination. • To continue from your PC, go to the Scan Reservation dialog box, and click Scan Now. If you used the glass, or if you used the ADF and selected Preview each page, the HP OfficeJet scans the first (or only) original and then displays it in the Scan window for you to edit, save, or send to a program. 5 If you used the ADF and have additional pages to scan, click Scan Next Page when you are ready to continue. Chapter 7—Use the scan features 33
-
 1
1 -
2
-
3
-
4
-
5
-
6
-
7
-
8
-
9
-
10
-
11
-
12
-
13
-
14
-
15
-
16
-
17
-
18
-
19
-
20
-
21
-
22
-
23
-
24
-
25
-
26
-
27
-
28
-
29
-
30
-
31
-
 32
32 -
 33
33 -
 34
34 -
 35
35 -
 36
36 -
 37
37 -
 38
38 -
 39
39 -
 40
40 -
 41
41 -
 42
42 -
43
-
44
-
45
-
46
-
47
-
48
-
49
-
50
-
51
-
52
-
53
-
54
-
55
-
56
-
57
-
58
 |
 |