HP iPAQ rx4200 HP iPAQ Product Information Guide - Page 38
Viewing Appointments, Scheduling an Appointment
 |
View all HP iPAQ rx4200 manuals
Add to My Manuals
Save this manual to your list of manuals |
Page 38 highlights
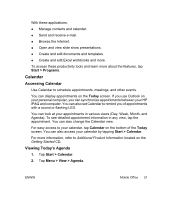
English TIP To quickly view today's agenda, on the Today screen, tap one of your upcoming appointments. Viewing Appointments To view an appointment on your calendar: 1. Tap Start > Calendar. 2. Tap the appointment to view. To view appointments for the week: 1. Tap Start > Calendar. 2. Tap Menu > View > Week. NOTE You can also view appointments for the month or year by tapping the appropriate selection. Scheduling an Appointment 1. Tap Start > Calendar. 2. Tap Menu > New Appointment. 3. Enter a name for the appointment and information such as start and end times. To schedule an all-day event, in the All Day box, tap Yes. 4. When finished, tap OK to return to the calendar. NOTE All-day events do not occupy blocks of time in Calendar; instead, they appear in banners at the top of the calendar. To cancel an appointment, tap the appointment and tap Menu > Delete. TIP To have the time entered automatically in Day view, tap the time slot for the new appointment, and tap Menu > New Appointment. 32 HP iPAQ Product Information Guide ENWW
-
 1
1 -
2
-
3
-
4
-
5
-
6
-
7
-
8
-
9
-
10
-
11
-
12
-
13
-
14
-
15
-
16
-
17
-
18
-
19
-
20
-
21
-
22
-
23
-
24
-
25
-
26
-
27
-
28
-
29
-
30
-
31
-
32
-
 33
33 -
 34
34 -
 35
35 -
 36
36 -
 37
37 -
 38
38 -
 39
39 -
 40
40 -
 41
41 -
 42
42 -
 43
43 -
44
-
45
-
46
-
47
-
48
-
49
-
50
-
51
-
52
-
53
-
54
-
55
-
56
-
57
 |
 |
