HP iPAQ rx4200 HP iPAQ Product Information Guide - Page 40
Creating a Contact
 |
View all HP iPAQ rx4200 manuals
Add to My Manuals
Save this manual to your list of manuals |
Page 40 highlights
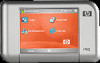
English If you use Outlook on your computer, synchronize contacts between your HP iPAQ and your personal computer. Creating a Contact 1. Tap Start > Contacts. 2. Tap New and enter the contact information. 3. When finished, tap OK. NOTE If your contact list has been filtered by a category when you create a contact, that category is automatically assigned to the new contact. To include a nickname, title, and more, while creating a contact, tap the Name arrow. If most of the contacts you create have phone numbers that begin with the same area code, in Contacts, tap Menu > Options and enter that area code in the Area code box. For more information about creating contacts, tap Start > Help on your HP iPAQ. 34 HP iPAQ Product Information Guide ENWW
-
 1
1 -
2
-
3
-
4
-
5
-
6
-
7
-
8
-
9
-
10
-
11
-
12
-
13
-
14
-
15
-
16
-
17
-
18
-
19
-
20
-
21
-
22
-
23
-
24
-
25
-
26
-
27
-
28
-
29
-
30
-
31
-
32
-
33
-
34
-
 35
35 -
 36
36 -
 37
37 -
 38
38 -
 39
39 -
 40
40 -
 41
41 -
 42
42 -
 43
43 -
 44
44 -
 45
45 -
46
-
47
-
48
-
49
-
50
-
51
-
52
-
53
-
54
-
55
-
56
-
57
 |
 |
