IBM JS20 User Guide - Page 34
Opening, blade, server, cover, Installing, drives
 |
UPC - 000435230263
View all IBM JS20 manuals
Add to My Manuals
Save this manual to your list of manuals |
Page 34 highlights
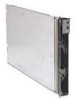
Opening the blade server cover The following illustration shows how to open the cover on the blade server. Cover pins Blade-cover release (blue) Blade-cover release (blue) Complete the following steps to open the blade server cover: 1. Read the safety information beginning on page v and "Installation guidelines" on page 19. 2. Carefully place the blade server on a flat, static-protective surface, with the cover side up. 3. Press the blue blade-cover release on each side of the blade server and lift the cover open, as shown in the illustration. 4. Lift the cover from the blade server and set it aside. Statement 21: CAUTION: Hazardous energy is present when the blade server is connected to the power source. Always replace the blade cover before installing the blade server. Installing IDE hard disk drives The blade server has two connectors on the system board for installing optional 2.5-inch integrated drive electronics (IDE) hard disk drives. Each IDE connector is on a separate channel. Some models come with at least one IDE hard disk drive already installed. Note: Some hard disk drives have Phillips screws; therefore, make sure that a Phillips screwdriver is available. 22 BladeCenter JS20 Type 8842: Installation and User's Guide
-
 1
1 -
2
-
3
-
4
-
5
-
6
-
7
-
8
-
9
-
10
-
11
-
12
-
13
-
14
-
15
-
16
-
17
-
18
-
19
-
20
-
21
-
22
-
23
-
24
-
25
-
26
-
27
-
28
-
 29
29 -
 30
30 -
 31
31 -
 32
32 -
 33
33 -
 34
34 -
 35
35 -
 36
36 -
 37
37 -
 38
38 -
 39
39 -
40
-
41
-
42
-
43
-
44
-
45
-
46
-
47
-
48
-
49
-
50
-
51
-
52
-
53
-
54
-
55
-
56
-
57
-
58
-
59
-
60
-
61
-
62
-
63
-
64
-
65
-
66
-
67
-
68
-
69
-
70
-
71
-
72
-
73
-
74
-
75
-
76
-
77
-
78
-
79
-
80
-
81
-
82
-
83
-
84
-
85
-
86
-
87
-
88
-
89
-
90
-
91
-
92
-
93
-
94
-
95
-
96
-
97
-
98
-
99
-
100
-
101
-
102
-
103
-
104
-
105
-
106
-
107
-
108
-
109
-
110
-
111
-
112
-
113
-
114
-
115
-
116
-
117
-
118
-
119
-
120
-
121
-
122
-
123
-
124
-
125
-
126
-
127
-
128
-
129
-
130
-
131
-
132
 |
 |
