IBM x3500 User Guide - Page 47
Installing, memory, module
 |
UPC - 883436005760
View all IBM x3500 manuals
Add to My Manuals
Save this manual to your list of manuals |
Page 47 highlights
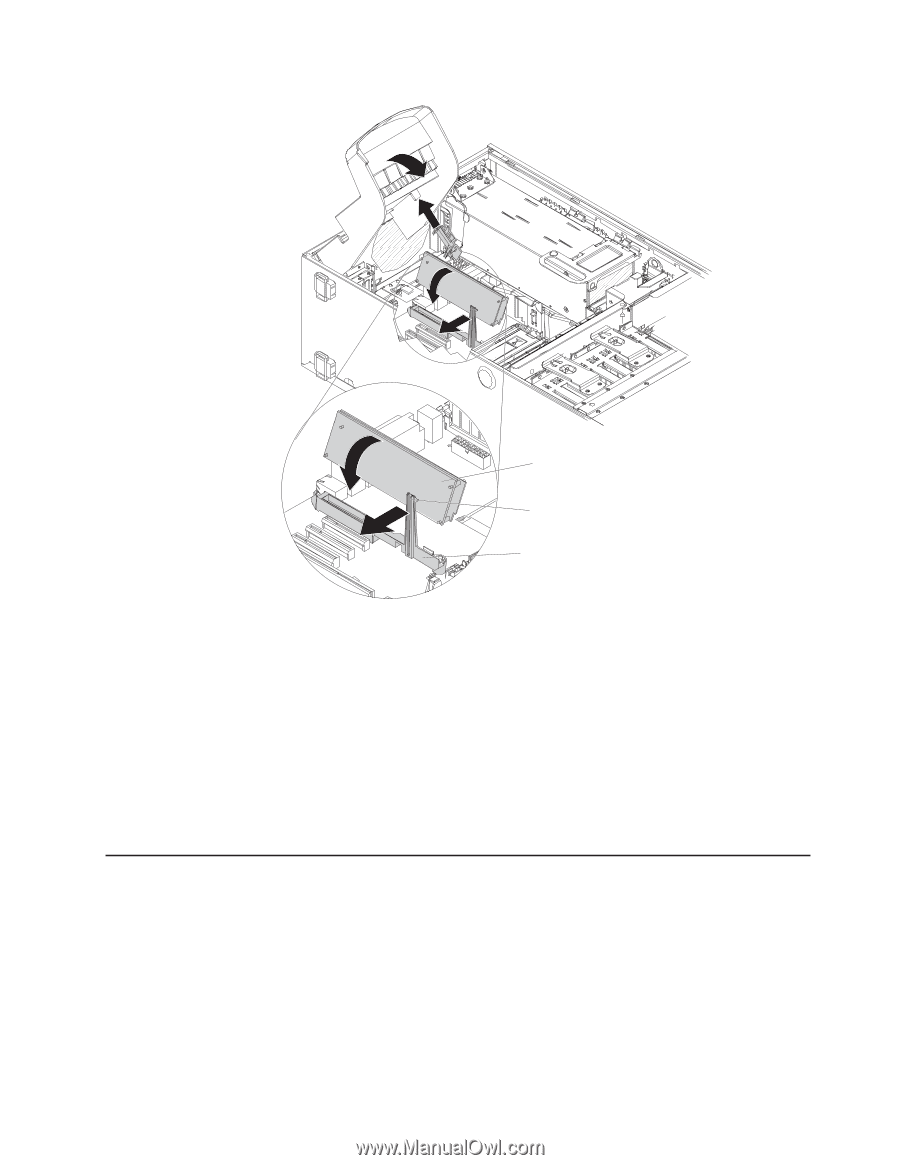
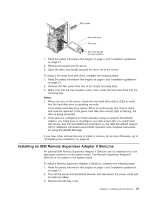
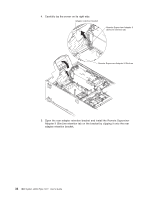
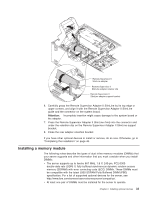
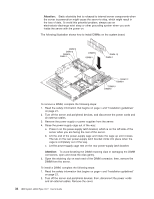
Remote Supervisor II SlimLine adapter Remote Supervisor II SlimLine adapter retainer clip Remote Supervisor II SlimLine adapter support bracket 6. Carefully grasp the Remote Supervisor Adapter II SlimLine by its top edge or upper corners, and align it with the Remote Supervisor Adapter II SlimLine guide and the connector on the system board. Attention: Incomplete insertion might cause damage to the system board or the adapter. 7. Press the Remote Supervisor Adapter II SlimLine firmly into the connector and under the retention clip on the Remote Supervisor Adapter II SlimLine support bracket. 8. Close the rear adapter retention bracket. If you have other optional devices to install or remove, do so now. Otherwise, go to "Completing the installation" on page 46. Installing a memory module The following notes describe the types of dual inline memory modules (DIMMs) that your server supports and other information that you must consider when you install DIMMs: v The server supports up to twelve 667 MHz, 1.8 V, 240-pin, PC2-5300 double-data-rate (DDR) II, fully buffered synchronous dynamic random-access memory (SDRAM) with error correcting code (ECC) DIMMs. These DIMMs must be compatible with the latest 5300 SDRAM Fully Buffered DIMM (FBD) specification. For a list of supported optional devices for the server, see http://www.ibm.com/servers/eserver/serverproven/compat/us/. v At least one pair of DIMMs must be installed for the server to operate. Chapter 2. Installing optional devices 33
-
 1
1 -
2
-
3
-
4
-
5
-
6
-
7
-
8
-
9
-
10
-
11
-
12
-
13
-
14
-
15
-
16
-
17
-
18
-
19
-
20
-
21
-
22
-
23
-
24
-
25
-
26
-
27
-
28
-
29
-
30
-
31
-
32
-
33
-
34
-
35
-
36
-
37
-
38
-
39
-
40
-
41
-
 42
42 -
 43
43 -
 44
44 -
 45
45 -
 46
46 -
 47
47 -
 48
48 -
 49
49 -
 50
50 -
 51
51 -
 52
52 -
53
-
54
-
55
-
56
-
57
-
58
-
59
-
60
-
61
-
62
-
63
-
64
-
65
-
66
-
67
-
68
-
69
-
70
-
71
-
72
-
73
-
74
-
75
-
76
-
77
-
78
-
79
-
80
-
81
-
82
-
83
-
84
-
85
-
86
-
87
-
88
-
89
-
90
-
91
-
92
-
93
-
94
-
95
-
96
-
97
-
98
-
99
-
100
-
101
-
102
-
103
-
104
 |
 |