Konica Minolta C83hc High Chroma Plockmatic SD-350/SD-500 System Operator Manu - Page 16
User interface, Control panel, The Start screen, Settings for Booklet Production, Detailed Settings
 |
View all Konica Minolta C83hc High Chroma manuals
Add to My Manuals
Save this manual to your list of manuals |
Page 16 highlights
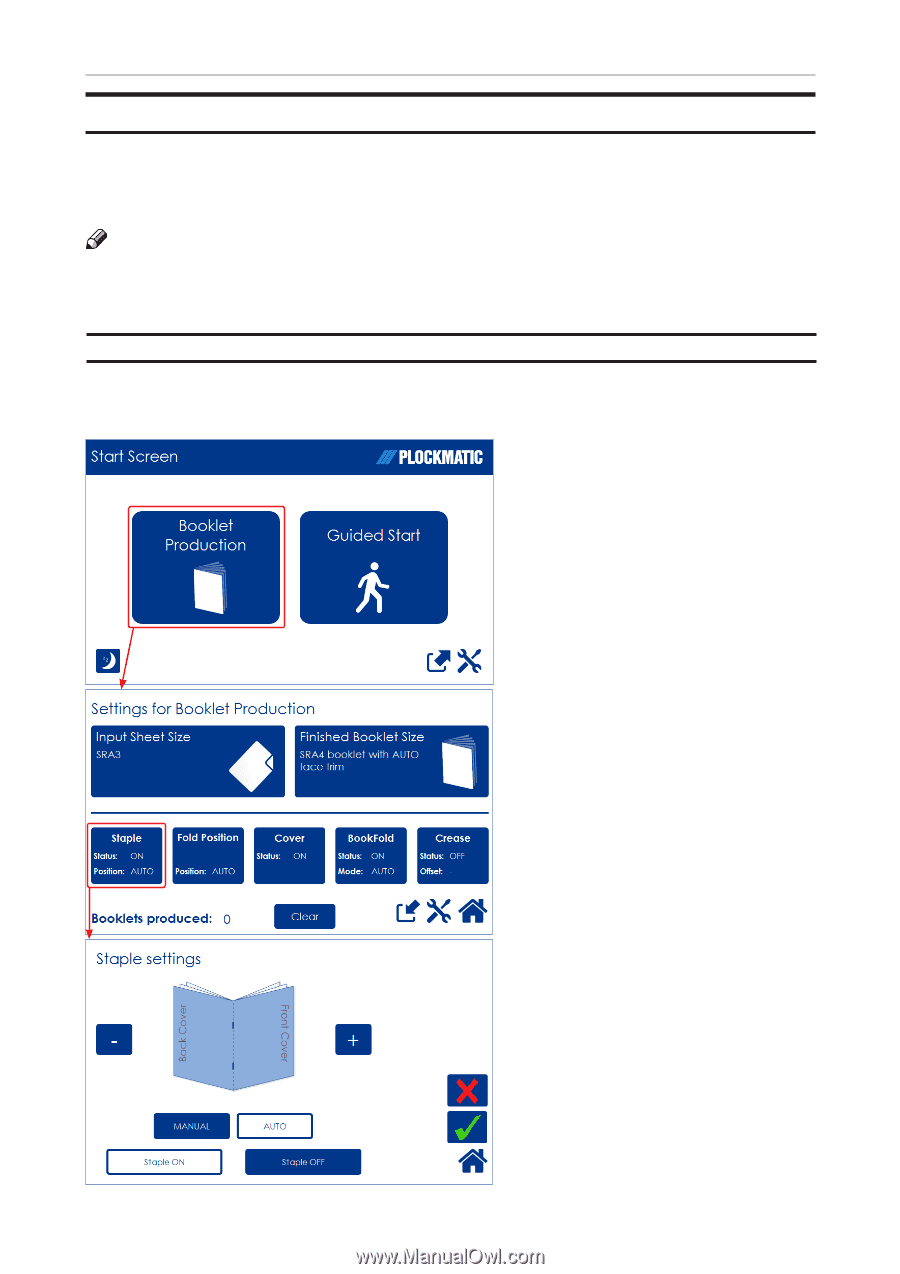
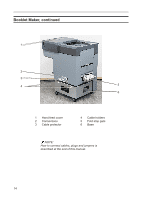
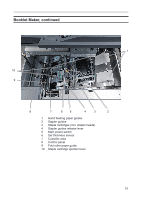
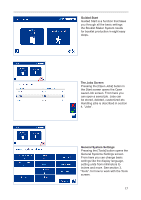
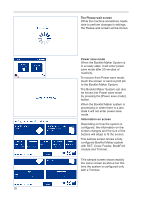
User interface The Plockmatic SD-500 or SD-350 Production Booklet Maker System is controlled from a panel located on the Booklet Maker. The control panel will allow you to set up, adjust and operate the complete system. An optional "Live logo" makes state of system visible from a distance. NOTE: Depending on modules and features installed, the screen may look different from what you see here. Some functions are greyed out or not visible at all and remaining buttons may stretch to fit the screen. This manual will most often show a fully configured system. Control panel The control panel is of touch screen type. Point at the screen and press the "button" to reach the desired function or change the desired setting. The Start screen When the system power is switched on, the Start screen will be shown. From here you can choose to set up Booklet Production, perform a Guided Start, retrieve stored jobs or access the General System Settings. Settings for Booklet Production Pressing the [Booklet Production] button in the Start Screen opens the Settings for Booklet Production screen. From here you can reach all detailed settings for setting up the job. A counter shows the number of booklets produced. Clear will reset. If the Booklet Maker and/or the RCT is not docked, it will be shown here. Detailed Settings Pressing, for example, the [Staple] button in the Settings for Booklet Production screen opens the Staple settings screen. Here you can perform detailed settings concerning stapling. Explore this and other settings more thoroughly in section 2, "Making Booklets." 16
-
 1
1 -
2
-
3
-
4
-
5
-
6
-
7
-
8
-
9
-
10
-
 11
11 -
 12
12 -
 13
13 -
 14
14 -
 15
15 -
 16
16 -
 17
17 -
 18
18 -
 19
19 -
 20
20 -
 21
21 -
22
-
23
-
24
-
25
-
26
-
27
-
28
-
29
-
30
-
31
-
32
-
33
-
34
-
35
-
36
-
37
-
38
-
39
-
40
-
41
-
42
-
43
-
44
-
45
-
46
-
47
-
48
-
49
-
50
-
51
-
52
-
53
-
54
-
55
-
56
-
57
-
58
-
59
-
60
-
61
-
62
-
63
-
64
-
65
-
66
-
67
-
68
-
69
-
70
-
71
-
72
-
73
-
74
-
75
-
76
-
77
-
78
-
79
-
80
-
81
-
82
-
83
-
84
-
85
-
86
-
87
-
88
-
89
-
90
-
91
-
92
-
93
-
94
-
95
-
96
-
97
-
98
-
99
-
100
-
101
-
102
-
103
-
104
-
105
-
106
-
107
-
108
 |
 |