Konica Minolta C83hc High Chroma Plockmatic SD-350/SD-500 System Operator Manu - Page 46
Fold position, Adjusting fold position, Cover, General
 |
View all Konica Minolta C83hc High Chroma manuals
Add to My Manuals
Save this manual to your list of manuals |
Page 46 highlights
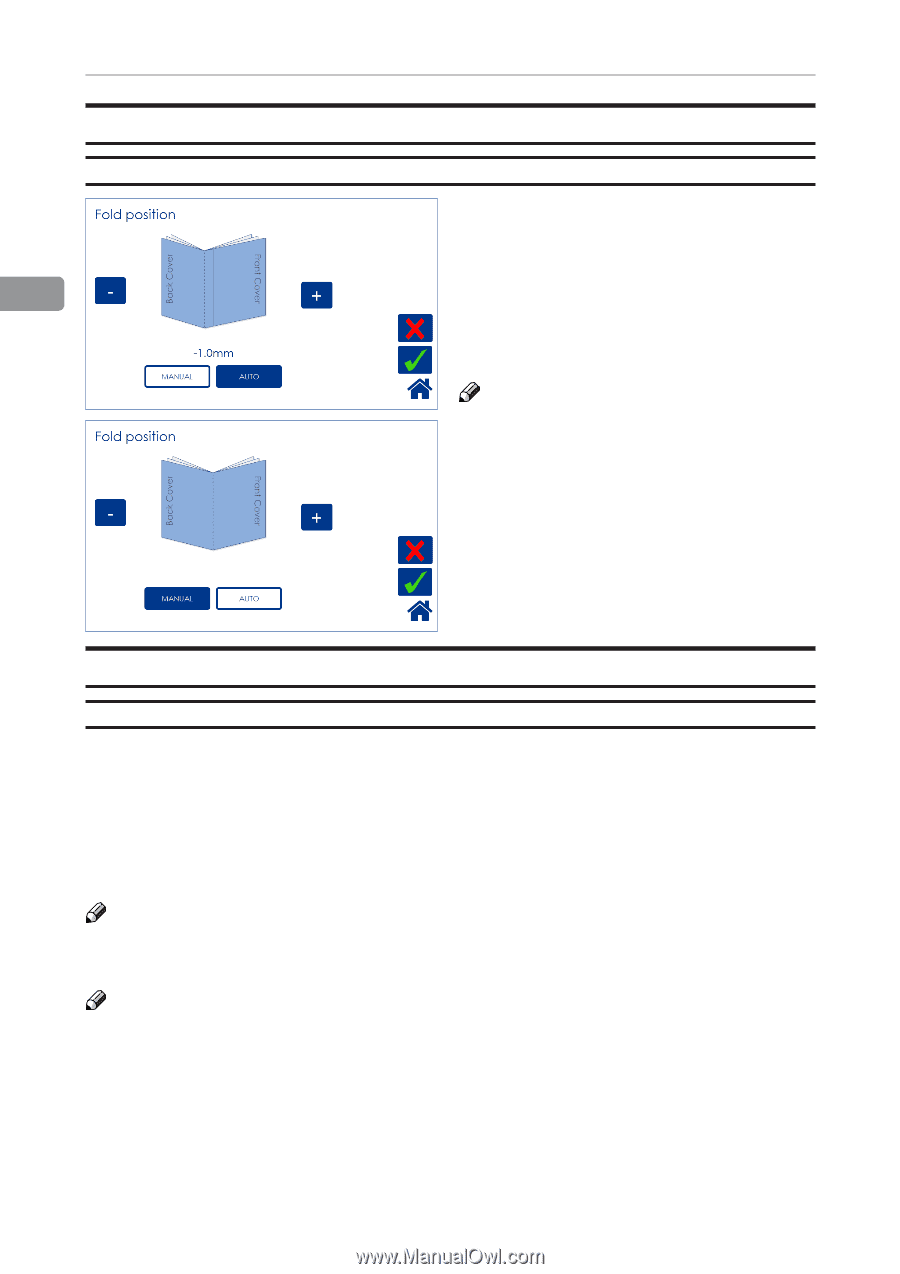
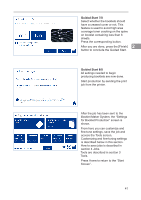
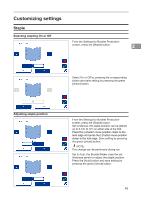
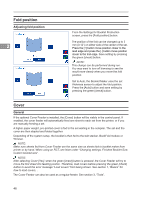
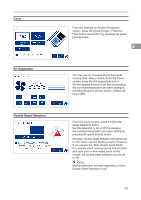
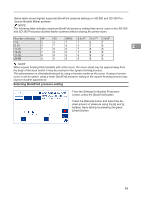
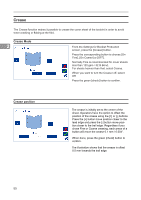
Fold position Adjusting fold position 2 From the Settings for Booklet Production screen, press the [Fold position] button. The position of the fold can be changed up to 3 mm (0.12") on either side of the center of the set. Press the [+] button move position closer to the lead edge and press the [-] button move position closer to the trail edge. Save setting by pressing the green [check] button. NOTE: This change can be performed during run. You may want to turn off trimming to see the result more clearly when you move the fold position. Set to Auto, the Booklet Maker uses the set thickness sensor to adjust the fold position. Press the [Auto] button and save setting by pressing the green [check] button. Cover General If the optional Cover Feeder is installed, the [Cover] button will be visible in the control panel. If enabled, the cover feeder will automatically feed one sheet to each set from the printer, or if you are manually feeding a set. A higher paper weight, pre-printed cover is fed to the set waiting in the compiler. The set and the cover are then stapled and folded together. Depending of the system setup, the booklet is then fed to the belt stacker, BookFold module or Trimmer. NOTE: Make sure sheets fed from Cover Feeder are the same size as sheets fed to booklet maker from printer or by hand. When using an RCT, see Note under "Changing settings, Finished Booklet Size, Custom booklet size". NOTE: After selecting Cover [Yes], when the green [check] button is pressed, the Cover Feeder will try to move the first sheet into feeding postion. Therefore, load covers before pressing the green [check] button to avoid the error message "Load covers" from being shown. See section 1, "Basics" for how to load covers, . The Cover Feeder can also be used as a regular feeder. See section 3, "Tools". 46
-
 1
1 -
2
-
3
-
4
-
5
-
6
-
7
-
8
-
9
-
10
-
11
-
12
-
13
-
14
-
15
-
16
-
17
-
18
-
19
-
20
-
21
-
22
-
23
-
24
-
25
-
26
-
27
-
28
-
29
-
30
-
31
-
32
-
33
-
34
-
35
-
36
-
37
-
38
-
39
-
40
-
 41
41 -
 42
42 -
 43
43 -
 44
44 -
 45
45 -
 46
46 -
 47
47 -
 48
48 -
 49
49 -
 50
50 -
 51
51 -
52
-
53
-
54
-
55
-
56
-
57
-
58
-
59
-
60
-
61
-
62
-
63
-
64
-
65
-
66
-
67
-
68
-
69
-
70
-
71
-
72
-
73
-
74
-
75
-
76
-
77
-
78
-
79
-
80
-
81
-
82
-
83
-
84
-
85
-
86
-
87
-
88
-
89
-
90
-
91
-
92
-
93
-
94
-
95
-
96
-
97
-
98
-
99
-
100
-
101
-
102
-
103
-
104
-
105
-
106
-
107
-
108
 |
 |