Konica Minolta Kodak Scan Station 710 Operation Guide - Page 23
Edit menu, Scanner menu, Scanner>Add Scanner
 |
View all Konica Minolta Kodak Scan Station 710 manuals
Add to My Manuals
Save this manual to your list of manuals |
Page 23 highlights
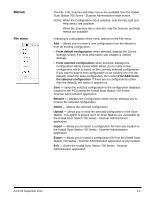
Edit menu Scanner menu 3-6 Following is a description of the menu options on the Edit menu. Device Settings - allows you to configure the parameters that the Scan Station needs to send emails, communicate with an Active Directory Server for security purposes, set Scan Station defaults and configure fax settings. For more information, see Chapter 4, Device Settings. Scan Settings - allows you to set basic image processing settings, such as, color/grayscale/black and white, output file format, compression, and some advanced options like Hole Fill, Streak Filter, etc. For more information, see Chapter 5, Scan Settings. Destinations - allows you to add or modify destinations (e.g., email, network folder, printer, FTP site, etc.) that define where the scanned output will be sent. For more information, see Chapter 6, Creating Destinations. Groups - allows you to create or modify a group of users from an Active Directory Server. Other users that are not in an Active Directory Server group can also be added. For more information, see Chapter 7, Adding and Managing Groups. Jobs - allows you to create or modify jobs which are a collection of scan settings, destinations and groups of users. For more information, see Chapter 8, Creating Jobs. Following is a description of the menu options on the Scanner menu. Refer to Chapter 9, Monitoring and Managing Your Scan Stations for more information and procedures regarding these options. Add Scanner - displays the Add Scanner dialog box, which allows you to register Scan Stations that you want to manage remotely. Discover Devices - allows you to scan a range of IP addresses and automatically register any Scan Station within that range that responds to the request. NOTE: Any Scan Station that has previously had its Remote Access Password set will not respond to the discovery request. If this is the case, you will need to manually add the Scan Station by selecting Scanner>Add Scanner and enter the Scan Station's name or IP address and the Scan Station's password. Modify Scanner - allows you to rename the selected Scan Station and configure network settings. Delete Scanner - deletes the selected Scan Station(s) from the list of administered Scan Stations. Select All - allows you to select all the Scan Stations that are displayed in the list; you can also press Ctrl+A to select all Scan Stations. Deselect All - allows you to deselect all the Scan Stations that are currently selected; you can also press Ctrl+D to deselect all Scan Stations. A-61796 September 2014
-
 1
1 -
2
-
3
-
4
-
5
-
6
-
7
-
8
-
9
-
10
-
11
-
12
-
13
-
14
-
15
-
16
-
17
-
 18
18 -
 19
19 -
 20
20 -
 21
21 -
 22
22 -
 23
23 -
 24
24 -
 25
25 -
 26
26 -
 27
27 -
 28
28 -
29
-
30
-
31
-
32
-
33
-
34
-
35
-
36
-
37
-
38
-
39
-
40
-
41
-
42
-
43
-
44
-
45
-
46
-
47
-
48
-
49
-
50
-
51
-
52
-
53
-
54
-
55
-
56
-
57
-
58
-
59
-
60
-
61
-
62
-
63
-
64
-
65
-
66
-
67
-
68
-
69
-
70
-
71
-
72
-
73
-
74
-
75
-
76
-
77
-
78
-
79
-
80
-
81
-
82
-
83
-
84
-
85
-
86
-
87
-
88
-
89
-
90
-
91
-
92
-
93
-
94
-
95
-
96
-
97
-
98
-
99
-
100
-
101
-
102
-
103
-
104
-
105
-
106
-
107
-
108
-
109
-
110
-
111
-
112
-
113
-
114
-
115
-
116
-
117
-
118
-
119
-
120
-
121
-
122
-
123
-
124
-
125
-
126
-
127
-
128
-
129
-
130
-
131
-
132
-
133
-
134
-
135
-
136
-
137
-
138
-
139
-
140
-
141
-
142
-
143
-
144
-
145
-
146
 |
 |
