LG LX290 User Guide - Page 84
Camera Mode Options, Cheese, Ready 123, Smile or Off. - manual
 |
View all LG LX290 manuals
Add to My Manuals
Save this manual to your list of manuals |
Page 84 highlights
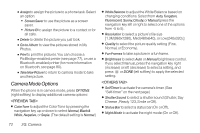
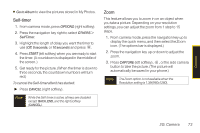
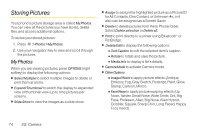
Ⅲ Assign to assign the picture to a phone task. Select an option: Ⅲ Screen Saver to use the picture as a screen saver. Ⅲ Picture ID to assign the picture to a contact or for all calls. Ⅲ Delete to delete the picture you just took. Ⅲ Go to Album to view the pictures stored in My Photos. Ⅲ Print to print the pictures. You can choose a PictBridge-enabled printer (see page 77), or use a Bluetooth-enabled printer (for more information on Bluetooth, see page 80). Ⅲ Take New Picture to return to camera mode to take another picture. Camera Mode Options When the phone is in camera mode, press OPTIONS (right softkey) to display additional camera options: ⅷ ColorTone to adjust the ColorTone by pressing the navigation key up or down to select Normal, Black & White, Negative, or Sepia. (The default setting is Normal.) ⅷ White Balance to adjust the White Balance based on changing conditions. Select from Auto,Tungsten, Fluorescent, Sunny, Cloudy, or Manual (press the navigation key left or right to select one of the options from -5 to 5). ⅷ Resolution to select a picture's file size [1.3M(960x1280), Med(480x640), or Low(240x320).] ⅷ Quality to select the picture quality setting (Fine, Normal, or Economy). ⅷ Fun Frames to take a picture in a fun frame. ⅷ Brightness to select Auto or Manual brightness control. If you select Manual, press the navigation key right (increase) or left (decrease) to select a setting, and press or DONE (left softkey) to apply the selected setting. ⅷ SelfTimer to activate the camera's timer. (See "Self-timer" on the next page.) ⅷ Shutter Sound to select a shutter sound (Shutter, Say Cheese , Ready 123, Smile or Off). ⅷ Status Bar to select a status bar (On or Off). ⅷ Night Mode to activate the night mode (On or Off). 72 2G. Camera
-
 1
1 -
2
-
3
-
4
-
5
-
6
-
7
-
8
-
9
-
10
-
11
-
12
-
13
-
14
-
15
-
16
-
17
-
18
-
19
-
20
-
21
-
22
-
23
-
24
-
25
-
26
-
27
-
28
-
29
-
30
-
31
-
32
-
33
-
34
-
35
-
36
-
37
-
38
-
39
-
40
-
41
-
42
-
43
-
44
-
45
-
46
-
47
-
48
-
49
-
50
-
51
-
52
-
53
-
54
-
55
-
56
-
57
-
58
-
59
-
60
-
61
-
62
-
63
-
64
-
65
-
66
-
67
-
68
-
69
-
70
-
71
-
72
-
73
-
74
-
75
-
76
-
77
-
78
-
 79
79 -
 80
80 -
 81
81 -
 82
82 -
 83
83 -
 84
84 -
 85
85 -
 86
86 -
 87
87 -
 88
88 -
 89
89 -
90
-
91
-
92
-
93
-
94
-
95
-
96
-
97
-
98
-
99
-
100
-
101
-
102
-
103
-
104
-
105
-
106
-
107
-
108
-
109
-
110
-
111
-
112
-
113
-
114
-
115
-
116
-
117
-
118
-
119
-
120
-
121
-
122
-
123
-
124
-
125
-
126
-
127
-
128
-
129
-
130
-
131
-
132
-
133
-
134
-
135
-
136
-
137
-
138
-
139
-
140
-
141
 |
 |