Lenovo Storage N3310 (English) User Guide and Hardware Maintenance Manual - Le - Page 61
Reinstalling the cooling shroud, this topic.
 |
View all Lenovo Storage N3310 manuals
Add to My Manuals
Save this manual to your list of manuals |
Page 61 highlights
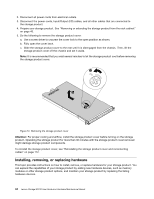
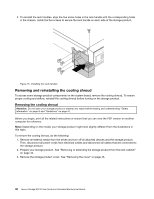
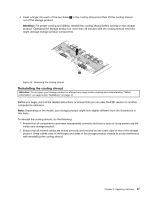
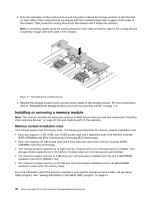
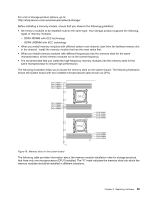
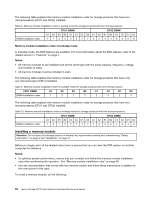
4. Insert a finger into each of the two holes 1 in the cooling shroud and then lift the cooling shroud out of the storage product. Attention: For proper cooling and airflow, reinstall the cooling shroud before turning on the storage product. Operating the storage product for more than 30 minutes with the cooling shroud removed might damage storage product components. Figure 16. Removing the cooling shroud Reinstalling the cooling shroud Attention: Do not open your storage product or attempt any repair before reading and understanding "Safety information" on page iii and "Guidelines" on page 41. Before you begin, print all the related instructions or ensure that you can view the PDF version on another computer for reference. Note: Depending on the model, your storage product might look slightly different from the illustrations in this topic. To reinstall the cooling shroud, do the following: 1. Ensure that all components have been reassembled correctly and that no tools or loose screws are left inside your storage product. 2. Ensure that all internal cables are routed correctly and secured by any cable clips or ties in the storage product. Keep cables clear of the hinges and sides of the storage product chassis to avoid interference with reinstalling the cooling shroud. Chapter 6. Replacing hardware 47
-
 1
1 -
2
-
3
-
4
-
5
-
6
-
7
-
8
-
9
-
10
-
11
-
12
-
13
-
14
-
15
-
16
-
17
-
18
-
19
-
20
-
21
-
22
-
23
-
24
-
25
-
26
-
27
-
28
-
29
-
30
-
31
-
32
-
33
-
34
-
35
-
36
-
37
-
38
-
39
-
40
-
41
-
42
-
43
-
44
-
45
-
46
-
47
-
48
-
49
-
50
-
51
-
52
-
53
-
54
-
55
-
 56
56 -
 57
57 -
 58
58 -
 59
59 -
 60
60 -
 61
61 -
 62
62 -
 63
63 -
 64
64 -
 65
65 -
 66
66 -
67
-
68
-
69
-
70
-
71
-
72
-
73
-
74
-
75
-
76
-
77
-
78
-
79
-
80
-
81
-
82
-
83
-
84
-
85
-
86
-
87
-
88
-
89
-
90
-
91
-
92
-
93
-
94
-
95
-
96
-
97
-
98
-
99
-
100
-
101
-
102
-
103
-
104
-
105
-
106
-
107
-
108
-
109
-
110
-
111
-
112
-
113
-
114
-
115
-
116
-
117
-
118
-
119
-
120
-
121
-
122
-
123
-
124
-
125
-
126
-
127
-
128
-
129
-
130
-
131
-
132
-
133
-
134
-
135
-
136
-
137
-
138
-
139
-
140
-
141
-
142
-
143
-
144
-
145
-
146
-
147
-
148
-
149
-
150
-
151
-
152
 |
 |
