Lexmark MS811 User's Guide - Page 166
Printing confidential and other held jobs, For confidential print jobs, navigate
 |
View all Lexmark MS811 manuals
Add to My Manuals
Save this manual to your list of manuals |
Page 166 highlights
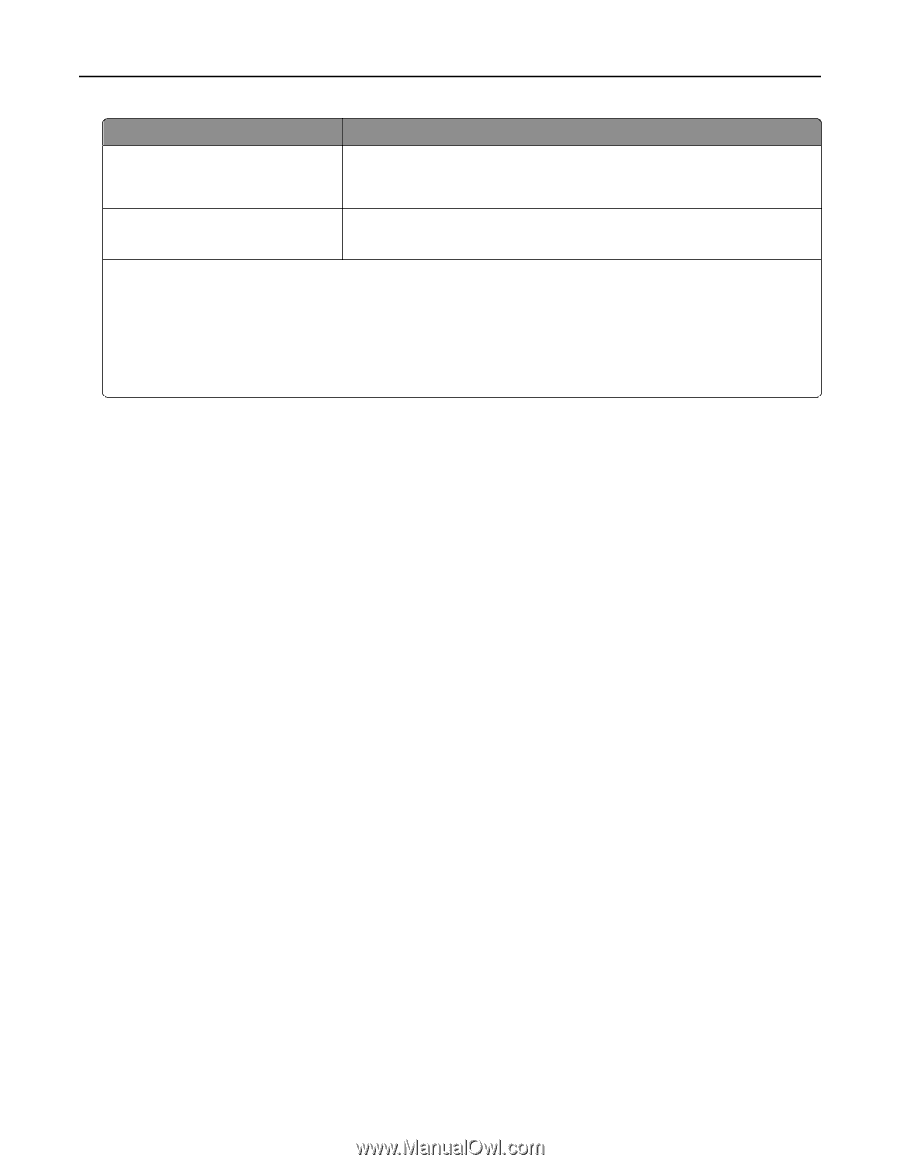
Using MS812de 166 Use To Verify Job Expiration Print one copy of a print job and hold the remaining copies. It allows you to examine if the first copy is satisfactory. The print job is automatically deleted from the printer memory when all copies are printed. Reserve Job Expiration Store print jobs for printing at a later time. Note: The print jobs are held until deleted from the Held Jobs menu. Notes: • Confidential, Verify, Reserve, and Repeat print jobs may be deleted if the printer requires extra memory to process additional held jobs. • You can set the printer to store print jobs in the printer memory until you start the print job from the printer control panel. • All print jobs that can be initiated by the user at the printer are called held jobs. 2 Touch Submit. Printing confidential and other held jobs Note: Confidential and Verify print jobs are automatically deleted from memory after printing. Repeat and Reserve jobs are held in the printer until you delete them. For Windows users 1 With a document open, click File > Print. 2 Click Properties, Preferences, Options, or Setup. 3 Click Print and Hold. 4 Select the print job type (Confidential, Repeat, Reserve, or Verify), and then assign a user name. For a confidential print job, also enter a four‑digit PIN. 5 Click OK or Print. 6 From the printer home screen, release the print job. • For confidential print jobs, navigate to: Held jobs > select your user name > Confidential Jobs > enter the PIN > select the print job > specify the number of copies > Print • For other print jobs, navigate to: Held jobs > select your user name > select the print job > specify the number of copies > Print For Macintosh users 1 With a document open, choose File > Print. If necessary, click the disclosure triangle to see more options. 2 From the print options or Copies & Pages pop‑up menu, choose Job Routing. 3 Select the print job type (Confidential, Repeat, Reserve, or Verify), and then assign a user name. For a confidential print job, also enter a four‑digit PIN. 4 Click OK or Print.
-
 1
1 -
2
-
3
-
4
-
5
-
6
-
7
-
8
-
9
-
10
-
11
-
12
-
13
-
14
-
15
-
16
-
17
-
18
-
19
-
20
-
21
-
22
-
23
-
24
-
25
-
26
-
27
-
28
-
29
-
30
-
31
-
32
-
33
-
34
-
35
-
36
-
37
-
38
-
39
-
40
-
41
-
42
-
43
-
44
-
45
-
46
-
47
-
48
-
49
-
50
-
51
-
52
-
53
-
54
-
55
-
56
-
57
-
58
-
59
-
60
-
61
-
62
-
63
-
64
-
65
-
66
-
67
-
68
-
69
-
70
-
71
-
72
-
73
-
74
-
75
-
76
-
77
-
78
-
79
-
80
-
81
-
82
-
83
-
84
-
85
-
86
-
87
-
88
-
89
-
90
-
91
-
92
-
93
-
94
-
95
-
96
-
97
-
98
-
99
-
100
-
101
-
102
-
103
-
104
-
105
-
106
-
107
-
108
-
109
-
110
-
111
-
112
-
113
-
114
-
115
-
116
-
117
-
118
-
119
-
120
-
121
-
122
-
123
-
124
-
125
-
126
-
127
-
128
-
129
-
130
-
131
-
132
-
133
-
134
-
135
-
136
-
137
-
138
-
139
-
140
-
141
-
142
-
143
-
144
-
145
-
146
-
147
-
148
-
149
-
150
-
151
-
152
-
153
-
154
-
155
-
156
-
157
-
158
-
159
-
160
-
 161
161 -
 162
162 -
 163
163 -
 164
164 -
 165
165 -
 166
166 -
 167
167 -
 168
168 -
 169
169 -
 170
170 -
 171
171 -
172
-
173
-
174
-
175
-
176
-
177
-
178
-
179
-
180
-
181
-
182
-
183
-
184
-
185
-
186
-
187
-
188
-
189
-
190
-
191
-
192
-
193
-
194
-
195
-
196
-
197
-
198
-
199
-
200
-
201
-
202
-
203
-
204
-
205
-
206
-
207
-
208
-
209
-
210
-
211
-
212
-
213
-
214
-
215
-
216
-
217
-
218
-
219
-
220
-
221
-
222
-
223
-
224
-
225
-
226
-
227
-
228
-
229
-
230
-
231
-
232
-
233
-
234
-
235
-
236
-
237
-
238
-
239
-
240
-
241
-
242
-
243
-
244
-
245
-
246
-
247
-
248
-
249
-
250
-
251
-
252
-
253
-
254
-
255
-
256
-
257
-
258
-
259
-
260
-
261
-
262
-
263
-
264
-
265
-
266
-
267
-
268
-
269
-
270
-
271
-
272
-
273
-
274
-
275
-
276
-
277
-
278
-
279
-
280
-
281
-
282
-
283
-
284
-
285
-
286
-
287
-
288
-
289
-
290
-
291
-
292
-
293
-
294
-
295
-
296
-
297
-
298
-
299
-
300
-
301
-
302
-
303
-
304
-
305
-
306
-
307
-
308
-
309
-
310
-
311
-
312
-
313
-
314
-
315
-
316
-
317
-
318
-
319
-
320
-
321
-
322
-
323
-
324
-
325
-
326
-
327
-
328
-
329
-
330
-
331
-
332
-
333
-
334
-
335
-
336
-
337
-
338
-
339
-
340
-
341
-
342
-
343
-
344
-
345
-
346
-
347
-
348
-
349
-
350
-
351
-
352
-
353
-
354
-
355
-
356
-
357
-
358
-
359
-
360
-
361
-
362
-
363
-
364
 |
 |