Lexmark MX431 Users Guide PDF - Page 55
Scanning to a Cloud Connector profile, Warning-Potential Damage, Cloud Connector, Scan Here
 |
View all Lexmark MX431 manuals
Add to My Manuals
Save this manual to your list of manuals |
Page 55 highlights
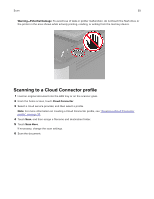
Scan 55 Warning-Potential Damage: To avoid loss of data or printer malfunction, do not touch the flash drive or the printer in the area shown while actively printing, reading, or writing from the memory device. Scanning to a Cloud Connector profile 1 Load an original document into the ADF tray or on the scanner glass. 2 From the home screen, touch Cloud Connector. 3 Select a cloud service provider, and then select a profile. Note: For more information on creating a Cloud Connector profile, see "Creating a Cloud Connector profile" on page 35. 4 Touch Scan, and then assign a filename and destination folder. 5 Touch Scan Here. If necessary, change the scan settings. 6 Scan the document.
-
 1
1 -
2
-
3
-
4
-
5
-
6
-
7
-
8
-
9
-
10
-
11
-
12
-
13
-
14
-
15
-
16
-
17
-
18
-
19
-
20
-
21
-
22
-
23
-
24
-
25
-
26
-
27
-
28
-
29
-
30
-
31
-
32
-
33
-
34
-
35
-
36
-
37
-
38
-
39
-
40
-
41
-
42
-
43
-
44
-
45
-
46
-
47
-
48
-
49
-
 50
50 -
 51
51 -
 52
52 -
 53
53 -
 54
54 -
 55
55 -
 56
56 -
 57
57 -
 58
58 -
 59
59 -
 60
60 -
61
-
62
-
63
-
64
-
65
-
66
-
67
-
68
-
69
-
70
-
71
-
72
-
73
-
74
-
75
-
76
-
77
-
78
-
79
-
80
-
81
-
82
-
83
-
84
-
85
-
86
-
87
-
88
-
89
-
90
-
91
-
92
-
93
-
94
-
95
-
96
-
97
-
98
-
99
-
100
-
101
-
102
-
103
-
104
-
105
-
106
-
107
-
108
-
109
-
110
-
111
-
112
-
113
-
114
-
115
-
116
-
117
-
118
-
119
-
120
-
121
-
122
-
123
-
124
-
125
-
126
-
127
-
128
-
129
-
130
-
131
-
132
-
133
-
134
-
135
-
136
-
137
-
138
-
139
-
140
-
141
-
142
-
143
-
144
-
145
-
146
-
147
-
148
-
149
-
150
-
151
-
152
-
153
-
154
-
155
-
156
-
157
-
158
-
159
-
160
-
161
-
162
-
163
-
164
-
165
-
166
-
167
-
168
-
169
-
170
-
171
-
172
-
173
-
174
-
175
-
176
-
177
-
178
-
179
-
180
-
181
-
182
-
183
-
184
-
185
-
186
-
187
-
188
-
189
-
190
-
191
-
192
-
193
-
194
-
195
-
196
-
197
-
198
-
199
-
200
-
201
-
202
-
203
-
204
-
205
-
206
-
207
-
208
-
209
-
210
-
211
 |
 |
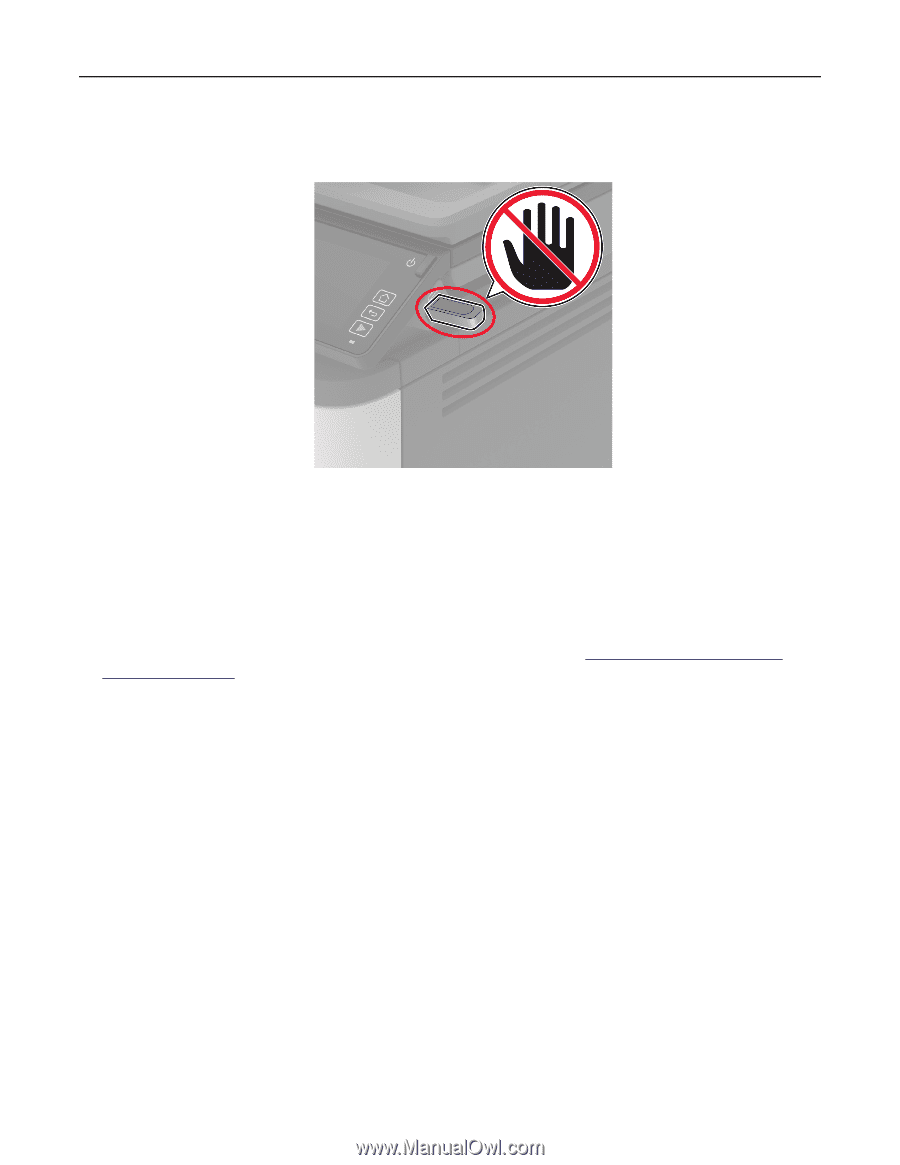
Warning—Potential Damage:
To avoid loss of data or printer malfunction, do not touch the flash drive or
the printer in the area shown while actively printing, reading, or writing from the memory device.
Scanning to a Cloud Connector profile
1
Load an original document into the ADF tray or on the scanner glass.
2
From the home screen, touch
Cloud Connector
.
3
Select a cloud service provider, and then select a profile.
Note:
For more information on creating a Cloud Connector profile, see
“Creating a Cloud Connector
profile”
on page
35
.
4
Touch
Scan
, and then assign a filename and destination folder.
5
Touch
Scan Here
.
If necessary, change the scan settings.
6
Scan the document.
Scan
55