Lexmark X422 X422 MFP Setup Guide - Page 5

Contents - driver

Page 5 highlights

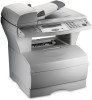
Contents Step 1: Install drivers for local printing and scanning . . . . 1 Windows 2 Macintosh 3 UNIX/Linux 4 Step 2: Unpack the MFP 5 Unpacking 5 Placing the MFP 6 Step 3: Set up MFP and options 9 Installing options on your MFP 9 Setting up the optional 250-sheet or 500-sheet drawer . . . . .10 Attach the scanner automatic document feeder (ADF) tray . .11 Unlock the scanner 12 Step 4: Install optional memory cards 13 Opening the side door 13 Removing the system board access shield 14 Installing an MFP memory card 15 Installing an optional flash memory or font card 15 Reattaching the system board access shield 17 Reattaching the side door 17 Step 5: Prepare the MFP 19 Raising the paper rest 19 Attaching a control panel overlay 20 Contents iii

  • 1
  • 2
  • 3
  • 4
  • 5
  • 6
  • 7
  • 8
  • 9
  • 10
  • 11
  • 12
  • 13
  • 14
  • 15
  • 16
  • 17
  • 18
  • 19
  • 20
  • 21
  • 22
  • 23
  • 24
  • 25
  • 26
  • 27
  • 28
  • 29
  • 30
  • 31
  • 32
  • 33
  • 34
  • 35
  • 36
  • 37
  • 38
  • 39
  • 40
  • 41
  • 42
  • 43
  • 44
  • 45
  • 46
  • 47
  • 48
  • 49
  • 50
  • 51
  • 52
  • 53
  • 54
  • 55
  • 56
  • 57
  • 58
  • 59
  • 60
  • 61
  • 62
  • 63
  • 64
  • 65
  • 66
  • 67
  • 68
  • 69
  • 70
  • 71
  • 72
  • 73
  • 74
  • 75
  • 76
  • 77
  • 78
  • 79
  • 80
  • 81
  • 82

iii
Contents
Contents
Step 1:
Install drivers for local printing and scanning . . . . 1
Windows . . . . . . . . . . . . . . . . . . . . . . . . . . . . . . . . . . . . . . . . . .2
Macintosh . . . . . . . . . . . . . . . . . . . . . . . . . . . . . . . . . . . . . . . . .3
UNIX/Linux
. . . . . . . . . . . . . . . . . . . . . . . . . . . . . . . . . . . . . . . .4
Step 2:
Unpack the MFP
. . . . . . . . . . . . . . . . . . . . . . . . . . . . 5
Unpacking . . . . . . . . . . . . . . . . . . . . . . . . . . . . . . . . . . . . . . . . .5
Placing the MFP . . . . . . . . . . . . . . . . . . . . . . . . . . . . . . . . . . . .6
Step 3:
Set up MFP and options . . . . . . . . . . . . . . . . . . . . . . 9
Installing options on your MFP . . . . . . . . . . . . . . . . . . . . . . . . .9
Setting up the optional 250-sheet or 500-sheet drawer
. . . . .10
Attach the scanner automatic document feeder (ADF) tray
. .11
Unlock the scanner . . . . . . . . . . . . . . . . . . . . . . . . . . . . . . . . .12
Step 4:
Install optional memory cards . . . . . . . . . . . . . . . . 13
Opening the side door
. . . . . . . . . . . . . . . . . . . . . . . . . . . . . .13
Removing the system board access shield
. . . . . . . . . . . . . .14
Installing an MFP memory card
. . . . . . . . . . . . . . . . . . . . . . .15
Installing an optional flash memory or font card . . . . . . . . . . .15
Reattaching the system board access shield . . . . . . . . . . . . .17
Reattaching the side door . . . . . . . . . . . . . . . . . . . . . . . . . . . .17
Step 5:
Prepare the MFP . . . . . . . . . . . . . . . . . . . . . . . . . . . 19
Raising the paper rest . . . . . . . . . . . . . . . . . . . . . . . . . . . . . . .19
Attaching a control panel overlay
. . . . . . . . . . . . . . . . . . . . . .20