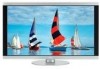
NEC M40-2-AV M40/46-2 user's manual - Page 22
Connections
 |
UPC - 805736024913
View all NEC M40-2-AV manuals
Add to My Manuals
Save this manual to your list of manuals |
Page 22 highlights
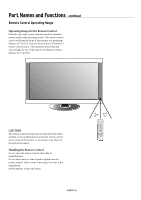
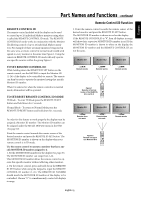
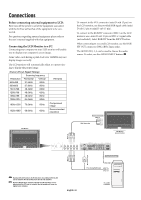
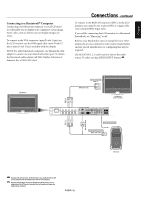
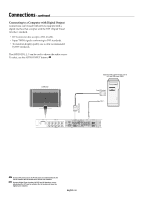
Connections Before connecting external equipment to LCD: First turn off the power to all of the equipment associated with the LCD as well as that of the equipment to be connected. For questions regarding external equipment please refer to the user's manual supplied with that equipment. Connecting the LCD Monitor to a PC Connecting your computer to your LCD monitor will enable you to display your computer's screen image. Some video cards having a pixel clock over 162MHz may not display images correctly. The LCD monitor will automatically adjust to a preset timing to display the proper image. Scanning frequency Resolution Horizontal Vertical 640x480 31.5kHz 60Hz 800x600 37.9kHz 60Hz 1024x768 48.4kHz 60Hz 1280x768 48.0kHz 60Hz 1360x768 48.0kHz 60Hz 1280x1024 64.0kHz 60Hz Remarks 1600x1200 75.0kHz 1920x1080 66.6kHz 60Hz 60Hz Compressed image Recommended resolution LCD Monitor To connect to the VGA connector (mini D-sub 15 pin) on the LCD monitor, use the provided RGB signal cable (mini D-sub 15 pin to mini D-sub 15 pin). To connect to the RGB/HV connector (BNC) on the LCD monitor, use a mini D-sub 15 pin to BNC x 5 signal cable (not included). Select RGB/HV from the INPUT button. When connecting to a second LCD monitor, use the RGB/ HV OUT connector (BNC)(BNC Input only). The AUDIO IN1, 2, 3 can be used to choose the audio source. To select, use the AUDIO INPUT button. To RGB/HV Input BNC x 5 (BNC Input only) LCD Monitor (second monitor) BNC x 5 AC IN RGB/HV OUT R G B H V R G B H V RGB/HV IN HDMI DVD/HD IN VIDEO Y Cb/Pb Cr/Pr S-VIDEO IN OUT R AUDIO AUDIO OUT R VGA(D-SUB) DVI(DVI-D) PC IN L L IN AUDIO3 IN AUDIO2 IN AUDIO1 IN IN SPEAKER R L - - - From Audio Output Mini D-sub 15 pin BNC x 5 Denotes AV unit function. All AV functions are enabled with the AV unit is installed. Not all models have the AV unit installed. Denotes Digital Tuner function. All DTV and AV functions are enabled when the DTV unit is installed. Not all models will have the digital tuner installed. English-18 From Analog RGB Output PC or IBM compatible
-
 1
1 -
2
-
3
-
4
-
5
-
6
-
7
-
8
-
9
-
10
-
11
-
12
-
13
-
14
-
15
-
16
-
 17
17 -
 18
18 -
 19
19 -
 20
20 -
 21
21 -
 22
22 -
 23
23 -
 24
24 -
 25
25 -
 26
26 -
 27
27 -
28
-
29
-
30
-
31
-
32
-
33
-
34
-
35
-
36
-
37
-
38
-
39
-
40
-
41
-
42
-
43
-
44
-
45
-
46
-
47
-
48
-
49
-
50
-
51
-
52
-
53
-
54
-
55
-
56
-
57
-
58
-
59
-
60
-
61
-
62
-
63
-
64
-
65
-
66
-
67
-
68
-
69
-
70
-
71
-
72
-
73
-
74
-
75
-
76
-
77
-
78
-
79
-
80
-
81
-
82
-
83
-
84
-
85
-
86
-
87
-
88
-
89
-
90
-
91
-
92
-
93
-
94
-
95
-
96
-
97
-
98
-
99
-
100
-
101
-
102
-
103
-
104
-
105
-
106
-
107
-
108
-
109
-
110
-
111
-
112
-
113
-
114
-
115
-
116
-
117
-
118
-
119
-
120
-
121
-
122
-
123
-
124
-
125
-
126
-
127
-
128
-
129
-
130
-
131
-
132
-
133
-
134
-
135
-
136
-
137
-
138
-
139
-
140
-
141
-
142
-
143
-
144
-
145
-
146
-
147
-
148
-
149
-
150
-
151
-
152
 |
 |
