Netgear WAX204 User Manual - Page 27
Find the IP address of the access point when you cannot use routerlogin.net
 |
View all Netgear WAX204 manuals
Add to My Manuals
Save this manual to your list of manuals |
Page 27 highlights
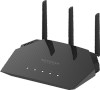
WiFi 6 AX1800 Dual Band Wireless Access Point WAX204 The serial number consists of 13 digits. The serial number is printed on the access point label. 5. From the Date Of Purchase menu, select the date that you purchased the access point. 6. Click the REGISTER button. The access point is registered with NETGEAR. An confirmation email that includes the registration key is sent to your NETGEAR account email address. 7. If the My Products page does not display, click My Product from the menu. 8. Select the radio button for the newly registered access point. 9. Scroll down and click the VIEW REGISTRATION KEY button. A pop-up window with the registration key displays. Find the IP address of the access point when you cannot use routerlogin.net Under the following circumstances, when the access point is in access point mode, you cannot use http://www.routerlogin.net to log in to the access point: • Your computer or mobile device is not directly connected to the access point network even it is on the same network as the access point. • Your computer or mobile device is directly connected to the access point, but the access point is using a static IP address. Note: If the access point can reach its DNS server only over the Internet (for example, the IP address of the DNS server is 8.8.8.8), you cannot use http://www.routerlogin.net. However, if the DNS server is the IP address of the router to which the access point connects but the router's Internet connection is down, you can use http://www.routerlogin.net because the access point can still reach the router. • Your network includes another NETGEAR device that is also accessible by using http://www.routerlogin.net. In such a situation, if you use http://www.routerlogin.net, you might log in to the access point or you might log in to the other NETGEAR device, depending on your network situation. Installation and Initial Log-in 27 User Manual
-
 1
1 -
2
-
3
-
4
-
5
-
6
-
7
-
8
-
9
-
10
-
11
-
12
-
13
-
14
-
15
-
16
-
17
-
18
-
19
-
20
-
21
-
 22
22 -
 23
23 -
 24
24 -
 25
25 -
 26
26 -
 27
27 -
 28
28 -
 29
29 -
 30
30 -
 31
31 -
 32
32 -
33
-
34
-
35
-
36
-
37
-
38
-
39
-
40
-
41
-
42
-
43
-
44
-
45
-
46
-
47
-
48
-
49
-
50
-
51
-
52
-
53
-
54
-
55
-
56
-
57
-
58
-
59
-
60
-
61
-
62
-
63
-
64
-
65
-
66
-
67
-
68
-
69
-
70
-
71
-
72
-
73
-
74
-
75
-
76
-
77
-
78
-
79
-
80
-
81
-
82
-
83
-
84
-
85
-
86
-
87
-
88
-
89
-
90
-
91
-
92
-
93
-
94
-
95
-
96
-
97
-
98
-
99
-
100
-
101
-
102
-
103
-
104
-
105
-
106
-
107
-
108
-
109
-
110
-
111
-
112
-
113
-
114
-
115
-
116
-
117
-
118
-
119
-
120
-
121
-
122
-
123
-
124
-
125
-
126
-
127
-
128
-
129
-
130
-
131
-
132
-
133
-
134
-
135
-
136
-
137
-
138
-
139
-
140
-
141
-
142
-
143
-
144
-
145
-
146
-
147
-
148
-
149
-
150
-
151
-
152
-
153
-
154
-
155
-
156
-
157
-
158
-
159
-
160
-
161
-
162
-
163
-
164
-
165
-
166
-
167
-
168
-
169
-
170
-
171
-
172
-
173
-
174
-
175
-
176
-
177
-
178
-
179
-
180
-
181
-
182
-
183
-
184
-
185
-
186
-
187
-
188
-
189
-
190
-
191
-
192
-
193
-
194
-
195
-
196
-
197
-
198
-
199
-
200
-
201
-
202
-
203
-
204
-
205
-
206
-
207
-
208
-
209
-
210
-
211
-
212
-
213
-
214
-
215
-
216
-
217
-
218
-
219
-
220
-
221
-
222
-
223
-
224
-
225
-
226
-
227
-
228
-
229
-
230
-
231
-
232
-
233
-
234
-
235
-
236
-
237
-
238
-
239
-
240
-
241
-
242
-
243
-
244
-
245
-
246
 |
 |
