Netgear WAX204 User Manual - Page 32
Connect a wired or WiFi device to the access point’s network after installation
 |
View all Netgear WAX204 manuals
Add to My Manuals
Save this manual to your list of manuals |
Page 32 highlights
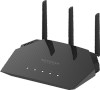
WiFi 6 AX1800 Dual Band Wireless Access Point WAX204 The page refreshes with the language that you selected. Connect a wired or WiFi device to the access point's network after installation After you install the access point in your network (see Set up the access point and complete the initial log-in process on page 17), you can connect devices to the access point's LAN through Ethernet cables or to the access point's WiFi network over a WiFi connection. If the device that you are trying to connect is set up to use a static IP address, change the settings of your device so that it uses Dynamic Host Configuration Protocol (DHCP) and can receive an IP address through or from the access point. Note: Connecting to the access point's network is not the same as connecting to the local browser UI to view or manage the access point's settings. For information about logging in to the access point local browser UI, see Log in to the access point after initial setup on page 30. Connect to the access point through an Ethernet cable You can connect a computer or other LAN device to the access point using an Ethernet cable and join the access point's local area network (LAN). To connect a computer or LAN device to the access point with an Ethernet cable: 1. Make sure that the access point is receiving power and is connected to the Internet (both its Power LED and Internet LED are lit). 2. Connect an Ethernet cable to an Ethernet port on the computer or LAN device. 3. Connect the other end of the Ethernet cable to one of the LAN ports on the access point. You can use any of the four LAN ports on the access point. Note: You can also connect the computer to a switch or hub that is connected to one of the LAN ports on the access point. Your computer or LAN device connects to the local area network (LAN). A message might display on your computer screen to notify you that an Ethernet cable is connected. Installation and Initial Log-in 32 User Manual
-
 1
1 -
2
-
3
-
4
-
5
-
6
-
7
-
8
-
9
-
10
-
11
-
12
-
13
-
14
-
15
-
16
-
17
-
18
-
19
-
20
-
21
-
22
-
23
-
24
-
25
-
26
-
 27
27 -
 28
28 -
 29
29 -
 30
30 -
 31
31 -
 32
32 -
 33
33 -
 34
34 -
 35
35 -
 36
36 -
 37
37 -
38
-
39
-
40
-
41
-
42
-
43
-
44
-
45
-
46
-
47
-
48
-
49
-
50
-
51
-
52
-
53
-
54
-
55
-
56
-
57
-
58
-
59
-
60
-
61
-
62
-
63
-
64
-
65
-
66
-
67
-
68
-
69
-
70
-
71
-
72
-
73
-
74
-
75
-
76
-
77
-
78
-
79
-
80
-
81
-
82
-
83
-
84
-
85
-
86
-
87
-
88
-
89
-
90
-
91
-
92
-
93
-
94
-
95
-
96
-
97
-
98
-
99
-
100
-
101
-
102
-
103
-
104
-
105
-
106
-
107
-
108
-
109
-
110
-
111
-
112
-
113
-
114
-
115
-
116
-
117
-
118
-
119
-
120
-
121
-
122
-
123
-
124
-
125
-
126
-
127
-
128
-
129
-
130
-
131
-
132
-
133
-
134
-
135
-
136
-
137
-
138
-
139
-
140
-
141
-
142
-
143
-
144
-
145
-
146
-
147
-
148
-
149
-
150
-
151
-
152
-
153
-
154
-
155
-
156
-
157
-
158
-
159
-
160
-
161
-
162
-
163
-
164
-
165
-
166
-
167
-
168
-
169
-
170
-
171
-
172
-
173
-
174
-
175
-
176
-
177
-
178
-
179
-
180
-
181
-
182
-
183
-
184
-
185
-
186
-
187
-
188
-
189
-
190
-
191
-
192
-
193
-
194
-
195
-
196
-
197
-
198
-
199
-
200
-
201
-
202
-
203
-
204
-
205
-
206
-
207
-
208
-
209
-
210
-
211
-
212
-
213
-
214
-
215
-
216
-
217
-
218
-
219
-
220
-
221
-
222
-
223
-
224
-
225
-
226
-
227
-
228
-
229
-
230
-
231
-
232
-
233
-
234
-
235
-
236
-
237
-
238
-
239
-
240
-
241
-
242
-
243
-
244
-
245
-
246
 |
 |
