Netgear WNR3500Lv1 WNR3500L Setup Manual - Page 29
User Manual
 |
View all Netgear WNR3500Lv1 manuals
Add to My Manuals
Save this manual to your list of manuals |
Page 29 highlights
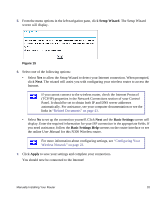
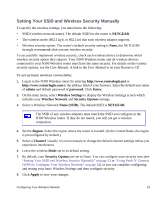
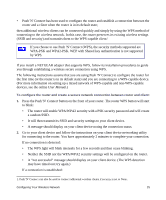
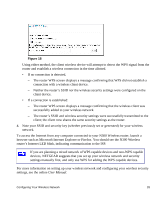
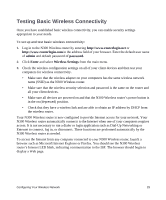
• Push 'N' Connect has been used to configure the router and establish a connection between the router and a client when the router is in its default state; then additional wireless clients can be connected quickly and simply by using the WPS method of connecting to the wireless network. In this case, the router preserves its existing wireless settings (SSID and security) and transmits them to the WPS-capable client.1 If you choose to use Push 'N' Connect (WPS), the security methods supported are WPA-PSK and WPA2-PSK. WEP with Shared key authentication is not supported by WPS. If you install a NETGEAR adapter that supports WPS, follow its installation procedures to guide you through establishing a wireless secure connection using WPS. The following instructions assume that you are using Push 'N' Connect to configure the router for the first time (or the router is in its default state) and you are connecting to a WPS-capable device. (For more information on setting up a mixed network of WPS-capable and non-WPS-capable devices, see the online User Manual.) To configure the router and create a secure network connection between router and client: 1. Press the Push 'N' Connect button on the front of your router. The router WPS button will start to blink: • The router will enable WPA/WPA2 security with a PSK security password and will create a random SSID. • It will then transmit its SSID and security settings to your client device. • A message should display on your client device noting the connection status. 2. Go to your client device and follow the instructions on your client device networking utility for connecting to the router. You have approximately 2 minutes to complete your connection. If no connection is detected: • The WPS light will blink intensely for a few seconds and then cease blinking. • Neither the SSID nor the WPA/WPA2 security settings will be configured on the router. • A "not successful" message should display on your client device. (The WPS detection may have timed out; try again.) If a connection is established: 1. Push 'N' Connect can also be used to connect additional wireless clients if security is set to None. Configuring Your Wireless Network 25
-
 1
1 -
2
-
3
-
4
-
5
-
6
-
7
-
8
-
9
-
10
-
11
-
12
-
13
-
14
-
15
-
16
-
17
-
18
-
19
-
20
-
21
-
22
-
23
-
 24
24 -
 25
25 -
 26
26 -
 27
27 -
 28
28 -
 29
29 -
 30
30 -
 31
31 -
 32
32 -
 33
33 -
 34
34 -
35
-
36
-
37
-
38
-
39
-
40
-
41
-
42
-
43
-
44
-
45
-
46
-
47
-
48
 |
 |