Oki MPS480mb MPS480mb User Guide (English) - Page 65
Reception Mode, Adding a telephone handset
 |
View all Oki MPS480mb manuals
Add to My Manuals
Save this manual to your list of manuals |
Page 65 highlights
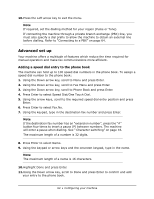
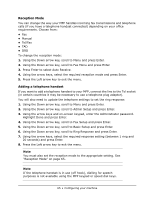
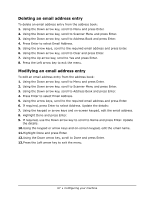
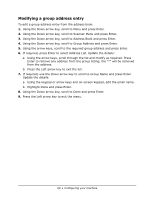
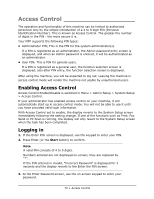
Reception Mode You can change the way your MFP handles incoming fax transmissions and telephone calls (if you have a telephone handset connected) depending on your office requirements. Choose from: • Fax • Manual • Tel/Fax • TAD • DRD To change the reception mode: 1. Using the Down arrow key, scroll to Menu and press Enter. 2. Using the Down arrow key, scroll to Fax Menu and press Enter. 3. Press Enter to select Auto Receive. 4. Using the arrow keys, select the required reception mode and press Enter. 5. Press the Left arrow key to exit the menu. Adding a telephone handset If you want to add a telephone handset to your MFP, connect the line to the Tel socket (in certain countries it may be necessary to use a telephone plug adaptor). You will also need to update the telephone settings to set the ring response: 1. Using the Down arrow key, scroll to Menu and press Enter. 2. Using the Down arrow key, scroll to Admin Setup and press Enter. 3. Using the arrow keys and on-screen keypad, enter the Administrator password. Highlight Done and press Enter. 4. Using the Down arrow key, scroll to Fax Setup and press Enter. 5. Using the Down arrow key, scroll to Basic Setup and press Enter. 6. Using the Down arrow key, scroll to Ring Response and press Enter. 7. Using the arrow keys, select the required response setting (between 1 ring and 20 seconds) and press Enter. 8. Press the Left arrow key to exit the menu. Note You must also set the reception mode to the appropriate setting. See "Reception Mode" on page 65. Note If the telephone handset is in use (off hook), dialling for speech purposes is not available using the MFP keypad or speed dial keys. 65 • Configuring your machine
-
 1
1 -
2
-
3
-
4
-
5
-
6
-
7
-
8
-
9
-
10
-
11
-
12
-
13
-
14
-
15
-
16
-
17
-
18
-
19
-
20
-
21
-
22
-
23
-
24
-
25
-
26
-
27
-
28
-
29
-
30
-
31
-
32
-
33
-
34
-
35
-
36
-
37
-
38
-
39
-
40
-
41
-
42
-
43
-
44
-
45
-
46
-
47
-
48
-
49
-
50
-
51
-
52
-
53
-
54
-
55
-
56
-
57
-
58
-
59
-
 60
60 -
 61
61 -
 62
62 -
 63
63 -
 64
64 -
 65
65 -
 66
66 -
 67
67 -
 68
68 -
 69
69 -
 70
70 -
71
-
72
-
73
-
74
-
75
-
76
-
77
-
78
-
79
-
80
-
81
-
82
-
83
-
84
-
85
-
86
-
87
-
88
-
89
-
90
-
91
-
92
-
93
-
94
-
95
-
96
-
97
-
98
-
99
-
100
-
101
-
102
-
103
-
104
-
105
-
106
-
107
-
108
-
109
-
110
-
111
-
112
-
113
-
114
-
115
-
116
-
117
-
118
-
119
-
120
-
121
-
122
-
123
-
124
-
125
-
126
-
127
-
128
-
129
-
130
-
131
-
132
-
133
-
134
-
135
-
136
-
137
-
138
-
139
-
140
-
141
-
142
-
143
-
144
-
145
-
146
-
147
-
148
-
149
-
150
-
151
-
152
-
153
-
154
-
155
-
156
-
157
-
158
-
159
-
160
-
161
-
162
-
163
-
164
-
165
-
166
-
167
-
168
-
169
-
170
-
171
-
172
-
173
-
174
-
175
-
176
 |
 |
