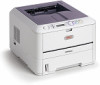
Oki MPS480mb MPS480mb User Guide (English) - Page 77
Scanning
 |
View all Oki MPS480mb manuals
Add to My Manuals
Save this manual to your list of manuals |
Page 77 highlights
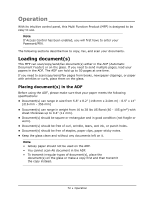
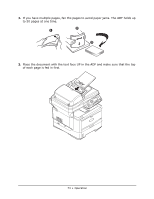
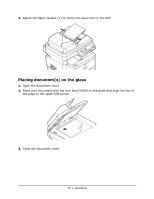
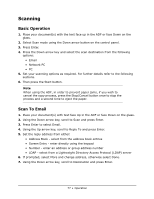
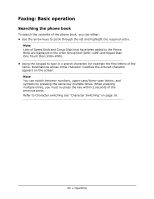
Scanning Basic Operation 1. Place your document(s) with the text face up in the ADF or face Down on the glass. 2. Select Scan mode using the Down arrow button on the control panel. 3. Press Enter. 4. Press the Down arrow key and select the scan destination from the following options: • Email • Network PC • PC 5. Set your scanning options as required. For further details refer to the following sections. 6. Then press the Start button. Note When using the ADF, in order to prevent paper jams, if you wish to cancel the copy process, press the Stop/Cancel button once to stop the process and a second time to eject the paper. Scan To Email 1. Place your document(s) with text face Up in the ADF or face Down on the glass. 2. Using the Down arrow key, scroll to Scan and press Enter. 3. Press Enter to select Email. 4. Using the Up arrow key, scroll to Reply To and press Enter. 5. Set the reply address from either: • Address Book - select from the address book entries • Screen Entry - enter directly using the keypad • Number - enter an address or group address number • LDAP - select from a Lightweight Directory Access Protocol (LDAP) server 6. If prompted, select More and change address, otherwise select Done. 7. Using the Down arrow key, scroll to Destination and press Enter. 77 • Operation
-
 1
1 -
2
-
3
-
4
-
5
-
6
-
7
-
8
-
9
-
10
-
11
-
12
-
13
-
14
-
15
-
16
-
17
-
18
-
19
-
20
-
21
-
22
-
23
-
24
-
25
-
26
-
27
-
28
-
29
-
30
-
31
-
32
-
33
-
34
-
35
-
36
-
37
-
38
-
39
-
40
-
41
-
42
-
43
-
44
-
45
-
46
-
47
-
48
-
49
-
50
-
51
-
52
-
53
-
54
-
55
-
56
-
57
-
58
-
59
-
60
-
61
-
62
-
63
-
64
-
65
-
66
-
67
-
68
-
69
-
70
-
71
-
 72
72 -
 73
73 -
 74
74 -
 75
75 -
 76
76 -
 77
77 -
 78
78 -
 79
79 -
 80
80 -
 81
81 -
 82
82 -
83
-
84
-
85
-
86
-
87
-
88
-
89
-
90
-
91
-
92
-
93
-
94
-
95
-
96
-
97
-
98
-
99
-
100
-
101
-
102
-
103
-
104
-
105
-
106
-
107
-
108
-
109
-
110
-
111
-
112
-
113
-
114
-
115
-
116
-
117
-
118
-
119
-
120
-
121
-
122
-
123
-
124
-
125
-
126
-
127
-
128
-
129
-
130
-
131
-
132
-
133
-
134
-
135
-
136
-
137
-
138
-
139
-
140
-
141
-
142
-
143
-
144
-
145
-
146
-
147
-
148
-
149
-
150
-
151
-
152
-
153
-
154
-
155
-
156
-
157
-
158
-
159
-
160
-
161
-
162
-
163
-
164
-
165
-
166
-
167
-
168
-
169
-
170
-
171
-
172
-
173
-
174
-
175
-
176
 |
 |
