Optoma FHDQ130 FHDQ130 User Manual - Page 12
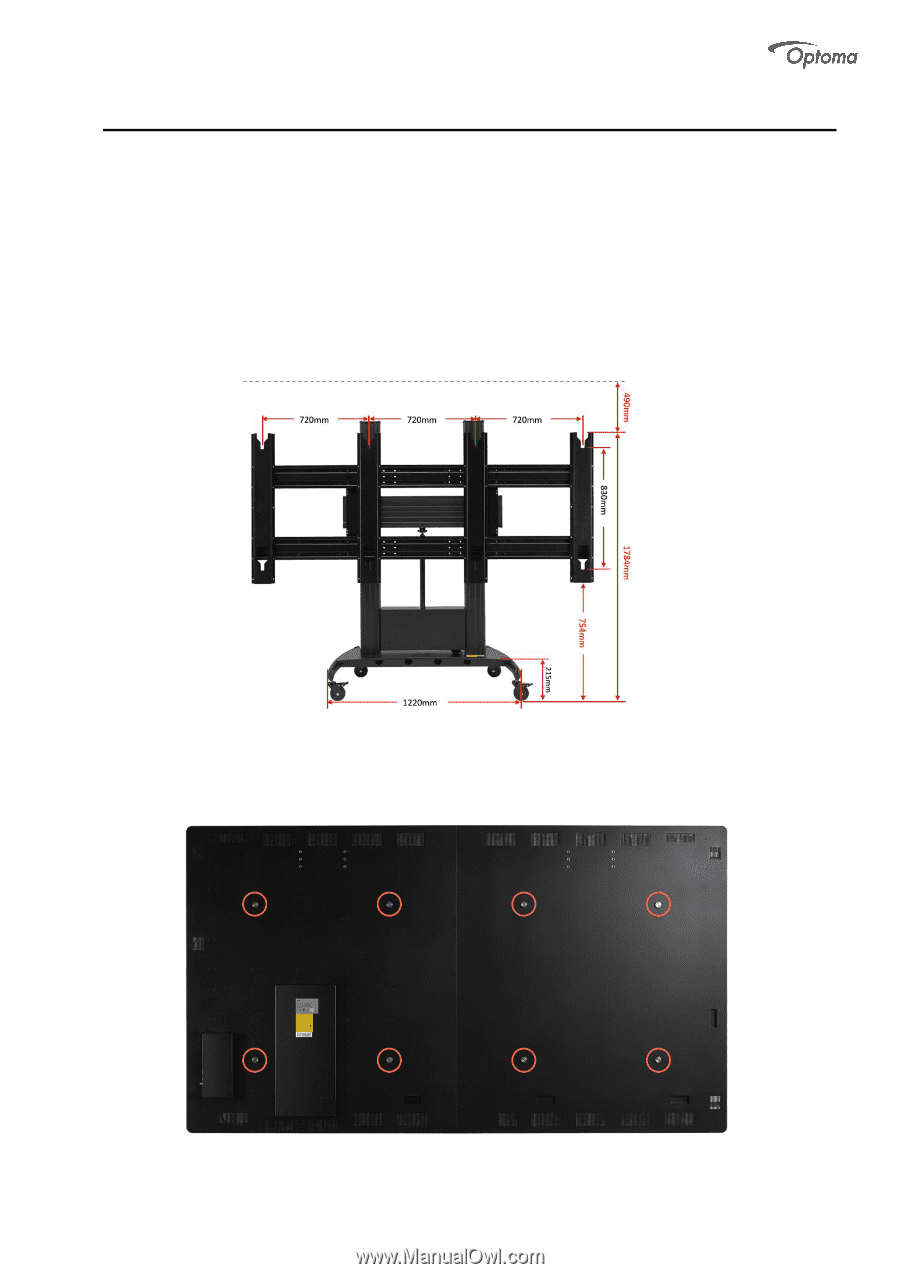
Floor Stand
 |
View all Optoma FHDQ130 manuals
Add to My Manuals
Save this manual to your list of manuals |
Page 12 highlights
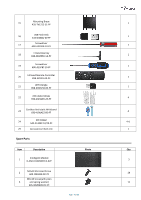
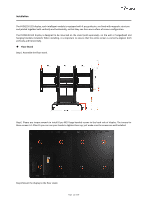
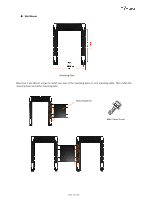
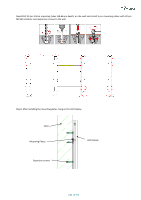
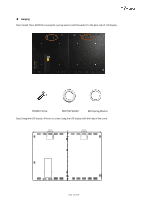
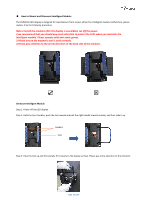
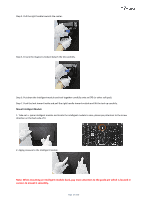
Installation The FHDQ130 LED display, each intelligent module is equipped with 4 pcs guide pin, are fixed with magnetic structure and jointed together both vertically and horizontally, so that they can form one surface of screen-configuration. The FHDQ130 LED display is designed to be mounted on the stand (sold separately), on the wall or hanged(wall and hanging brackets included). When installing, it is important to ensure that the entire screen is correctly aligned, both vertically and horizontally. ◆ Floor Stand Step1. Assemble the floor stand. Step2. Please use torque wrench to install 8 pcs M10 large-headed screws to the back side of display. The torque for these screws is 1.2Nm.Or you can use your hands to tighten them up, just make sure the screws are well installed. Step3.Mount the display to the floor stand. Page 12 of 64
-
 1
1 -
2
-
3
-
4
-
5
-
6
-
 7
7 -
 8
8 -
 9
9 -
 10
10 -
 11
11 -
 12
12 -
 13
13 -
 14
14 -
 15
15 -
 16
16 -
 17
17 -
18
-
19
-
20
-
21
-
22
-
23
-
24
-
25
-
26
-
27
-
28
-
29
-
30
-
31
-
32
-
33
-
34
-
35
-
36
-
37
-
38
-
39
-
40
-
41
-
42
-
43
-
44
-
45
-
46
-
47
-
48
-
49
-
50
-
51
-
52
-
53
-
54
-
55
-
56
-
57
-
58
-
59
-
60
-
61
-
62
-
63
-
64
 |
 |