Optoma FHDQ130 FHDQ130 User Manual - Page 52
Network and Management
 |
View all Optoma FHDQ130 manuals
Add to My Manuals
Save this manual to your list of manuals |
Page 52 highlights
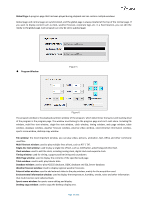
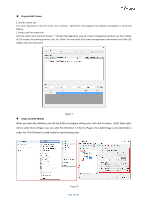
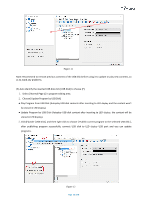
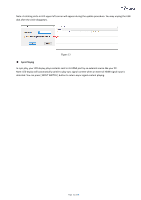
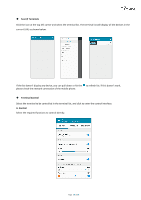
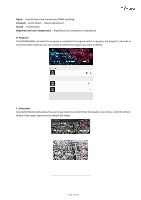
Network and Management ◆ Connection and Management (1)LAN connection: Connect LED display to LAN through WIFI or LAN port. (2) Network management: After the controlled terminal (PC, Mobile devices, etc) and LED display are connected into the same LAN, unplug the USB cable,select [LAN] ,right-click and choose[Refresh], FHDQ130 processor will auto identify LED display and place it into Default Group. You can manage your LED display under Default Group. Figure 1 ◆ Add Group and Device (1)Add Group: select [LAN] , right-click to choose [Add Group]. (2) Add Device: Select any player group you need, and right-click to choose [Manually Add Player], then input LED display's corresponding IP (Even if your device did not connect to network). Figure 2 Page 52 of 64
-
 1
1 -
2
-
3
-
4
-
5
-
6
-
7
-
8
-
9
-
10
-
11
-
12
-
13
-
14
-
15
-
16
-
17
-
18
-
19
-
20
-
21
-
22
-
23
-
24
-
25
-
26
-
27
-
28
-
29
-
30
-
31
-
32
-
33
-
34
-
35
-
36
-
37
-
38
-
39
-
40
-
41
-
42
-
43
-
44
-
45
-
46
-
 47
47 -
 48
48 -
 49
49 -
 50
50 -
 51
51 -
 52
52 -
 53
53 -
 54
54 -
 55
55 -
 56
56 -
 57
57 -
58
-
59
-
60
-
61
-
62
-
63
-
64
 |
 |