Optoma FHDQ130 FHDQ130 User Manual - Page 40
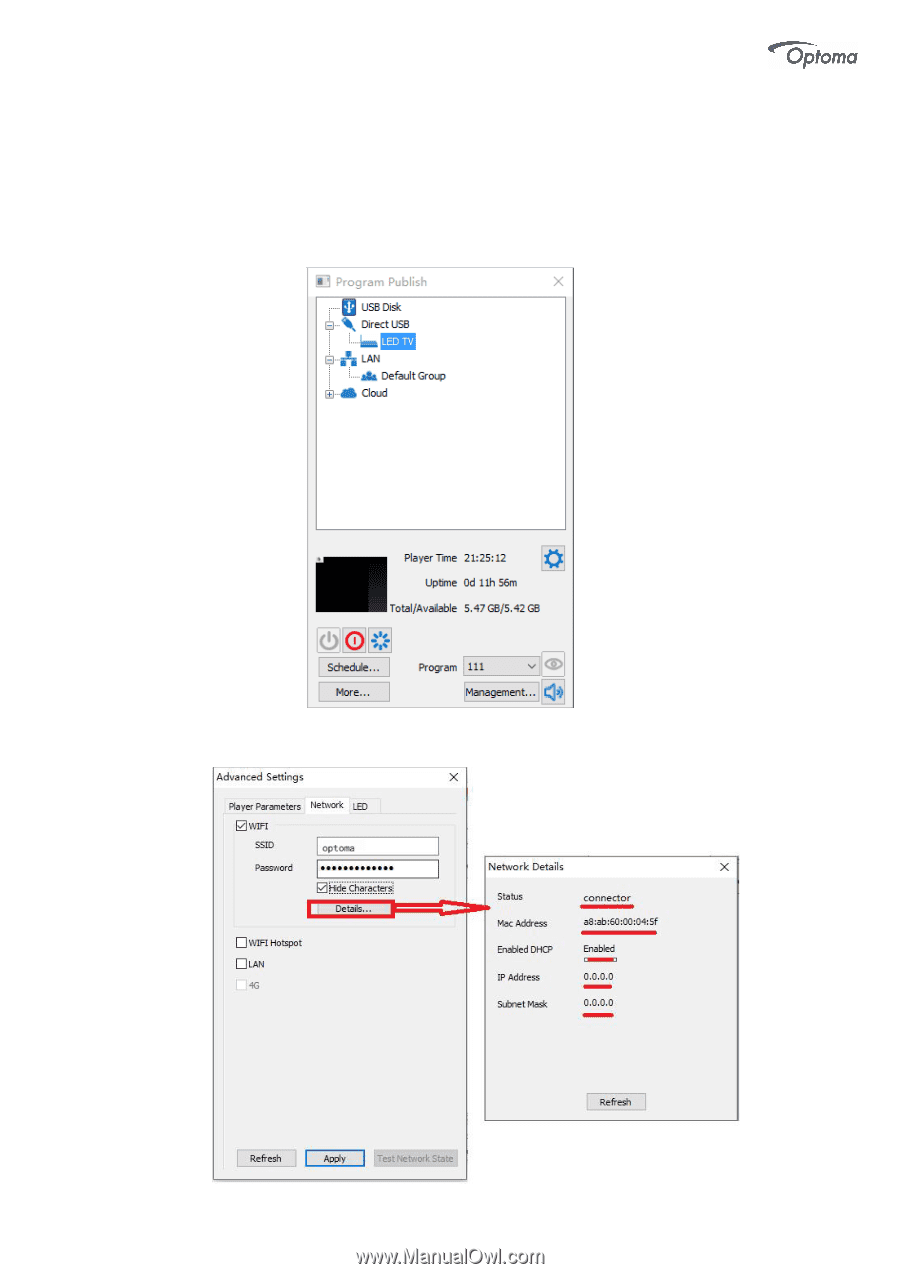
after connecting successfully, then click [More] and input password
 |
View all Optoma FHDQ130 manuals
Add to My Manuals
Save this manual to your list of manuals |
Page 40 highlights
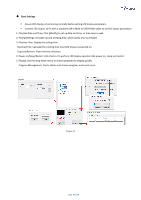
3. WIFI Before using WiFi please connect USB dongle (provided) to the USB 2.0 port of the AIO QUAD and power on. (1) Click LED display after connecting successfully, then click [More] and input password 'optoma' in the pop-up window, you will see the interface showed below. Check [WIFI] in network tab, and input your WIFI login information for [SSID] and [Password], then click [Apply] and [Refresh] to complete setting, click [ Detail...] to check connection status. Figure 27 Figure 28 Page 40 of 64
-
 1
1 -
2
-
3
-
4
-
5
-
6
-
7
-
8
-
9
-
10
-
11
-
12
-
13
-
14
-
15
-
16
-
17
-
18
-
19
-
20
-
21
-
22
-
23
-
24
-
25
-
26
-
27
-
28
-
29
-
30
-
31
-
32
-
33
-
34
-
 35
35 -
 36
36 -
 37
37 -
 38
38 -
 39
39 -
 40
40 -
 41
41 -
 42
42 -
 43
43 -
 44
44 -
 45
45 -
46
-
47
-
48
-
49
-
50
-
51
-
52
-
53
-
54
-
55
-
56
-
57
-
58
-
59
-
60
-
61
-
62
-
63
-
64
 |
 |
Page
40 of 64
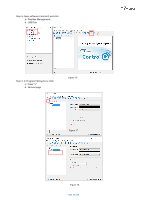
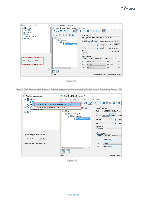
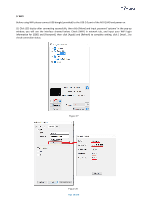
3. WIFI
Before using WiFi please connect USB dongle (provided) to the USB 2.0 port of the AIO QUAD and power on.
(1) Click LED
display
after connecting successfully, then click [More] and input password
‘
optoma
’
in the pop-up
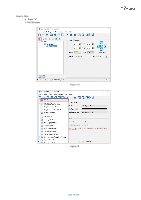
window, you will see the interface showed below. Check [WIFI] in network tab, and input your WIFI login
information for [SSID] and [Password], then click [Apply] and [Refresh] to complete setting, click [ Detail...] to
check connection status.
Figure 27
Figure 28