Panasonic KX-P3696 Operating Instructions - Page 39

Setup

Page 39 highlights

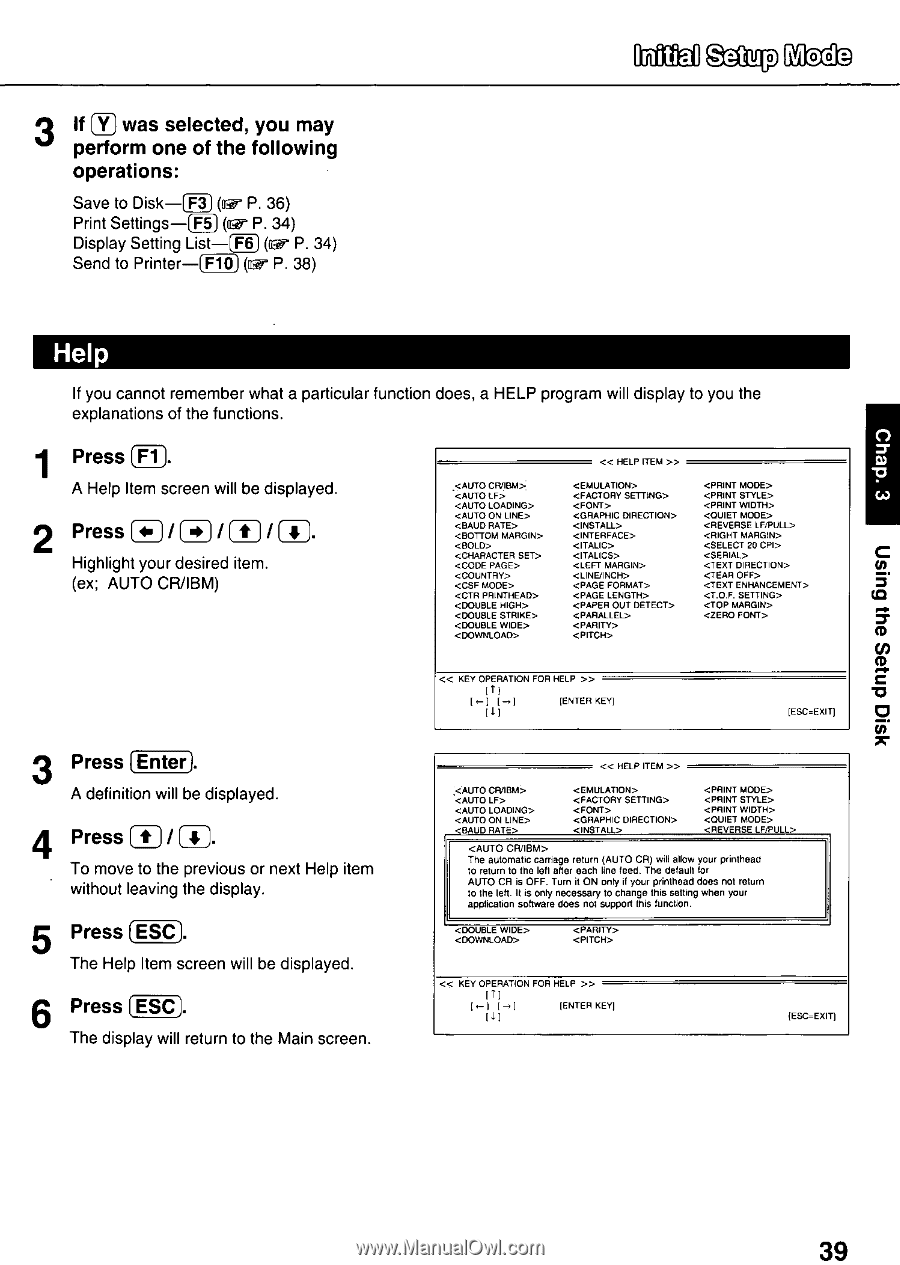
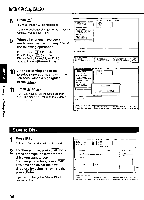
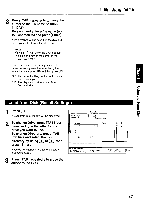
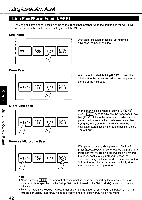
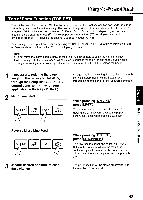
Asm dnies eqi 6u!en 3 If Y) was selected, you may perform one of the following operations: Save to Disk -(F3) (u P. 36) Print Settings-(F5) (ffgr P. 34) Display Setting List-(F6) (Er P. 34) Send to Printer-(F10) Ow P. 38) Setup Mode Help If you cannot remember what a particular function does, a HELP program will display to you the explanations of the functions. 1 Press Fl A Help Item screen will be displayed. 2 Press t /( Highlight your desired item. (ex; AUTO CR/IBM) « HELP ITEM » « KEY OPERATION FOR HELP » t 1]- 1 (ENTER KEY] IESC=Exin 3 Press Enter) A definition will be displayed. 4 Press (jt• / 4, To move to the previous or next Help item without leaving the display. 5 Press ESC 1. The Help Item screen will be displayed. 6 Press (ESC The display will return to the Main screen. « HELP ITEM » The automatic carriage return (AUTO CR) will allow your prinlheac 10 return to the left after each line feed. The default for AUTO CR is OFF. Turn it ON ony if your printhead does not return to the left. It iS Only necessary to change this setting when your application software does not support this function. > IT] [I-I [ , i (ENTER KEY] II) IESC=EXIT) 39

  • 1
  • 2
  • 3
  • 4
  • 5
  • 6
  • 7
  • 8
  • 9
  • 10
  • 11
  • 12
  • 13
  • 14
  • 15
  • 16
  • 17
  • 18
  • 19
  • 20
  • 21
  • 22
  • 23
  • 24
  • 25
  • 26
  • 27
  • 28
  • 29
  • 30
  • 31
  • 32
  • 33
  • 34
  • 35
  • 36
  • 37
  • 38
  • 39
  • 40
  • 41
  • 42
  • 43
  • 44
  • 45
  • 46
  • 47
  • 48
  • 49
  • 50
  • 51
  • 52
  • 53
  • 54
  • 55
  • 56
  • 57
  • 58
  • 59
  • 60
  • 61
  • 62
  • 63
  • 64
  • 65
  • 66
  • 67
  • 68
  • 69
  • 70
  • 71
  • 72
  • 73
  • 74
  • 75
  • 76

Setup
Mode
3
If
Y)
was
selected,
you
may
perform
one
of
the
following
operations:
Save
to
Disk
—(F3)
(u
P.
36)
Print
Settings
—(F5)
(ffgr
P.
34)
Display
Setting
List
—(F6)
(Er
P.
34)
Send
to
Printer
—(F10)
Ow
P.
38)
Help
1
2
3
4
5
6
If
you
cannot
remember
what
a
particular
function
does,
a
HELP
program
will
display
to
you
the
explanations
of
the
functions.
Press
Fl
A
Help
Item
screen
will
be
displayed.
Press••
/
/
t
/(
Highlight
your
desired
item.
(ex;
AUTO
CR/IBM)
Press
Enter)
A
definition
will
be
displayed.
Press
(
jt•
/
4,
To
move
to
the
previous
or
next
Help
item
without
leaving
the
display.
Press
ESC
1.
The
Help
Item
screen
will
be
displayed.
Press
(ESC
The
display
will
return
to
the
Main
screen.
<AUTO
CWIBM>
<AUTO
LF>
<AUTO
LOADING>
<AUTO
ON
LINE>
<BAUD
RATE>
<BOTTOM
MARGIN>
<BOLD>
<CHARACTER
SET>
<CODE
PAGE>
<COUNTRY>
<CSF
MODE>
<CTR
PRINTHEAD>
<DOUBLE
HIGH>
<DOUBLE
STRIKE>
<DOUBLE
WIDE>
<DOWNLOAD>
«
HELP
ITEM
»
<EMULATION>
<FACTORY
SETTING>
<FONT>
<GRAPHIC
DIRECTION>
<INSTALL>
<INTERFACE>
<ITALIC>
<ITALICS>
<LEFT
MARGIN>
<LINE/INCH>
<PAGE
FORMAT>
<PAGE
LENGTH>
<PAPER
OUT
DETECT>
<PARALLEL>
<PARITY>
<PITCH>
<PRINT
MODE>
<PRINT
STYLE>
<PRINT
WIDTH>
<QUIET
MODE>
<REVERSE
LE/PULL>
<RIGHT
MARGIN>
<SELECT
20
CPI>
<SERIAL>
<TEXT
DIRECTION>
<TEAR
OFF>
<TEXT
ENHANCEMENT>
<T.0
F.
SETTING>
<TOP
MARGIN>
<ZERO
FONT>
«
KEY
OPERATION
FOR
HELP
»
t
1]
-
1
(ENTER
KEY]
IESC=Exin
«
HELP
ITEM
»
<AUTO
CRABM>
<EMULATION>
<PRINT
MODE>
<AUTO
LF>
<FACTORY
SETTING>
<PRINT
STYLE>
<AUTO
LOADING>
<FONT>
<PRINT
WIDTH>
<AUTO
ON
LINE>
<GRAPHIC
DIRECTION>
<QUIET
MODE>
<BAUD
RATE>
<INSTALL>
<REVERSE
LF/PULL>
<AUTO
CRABM>
The
automatic
carriage
return
(AUTO
CR)
will
allow
your
prinlheac
10
return
to
the
left
after
each
line
feed.
The
default
for
AUTO
CR is
OFF.
Turn
it
ON
ony
if
your
printhead
does
not
return
to
the
left.
It
iS
Only
necessary
to
change
this
setting
when
your
application
software
does
not
support
this
function.
<DOUBLE
WIDE>
<PARITY>
<DOWNLOAD>
<PITCH>
<<
KEY
OPERATION
FOR
HELP
>>
IT]
[I-I
[
, i
(ENTER
KEY]
II)
IESC=EXIT)
Asm
dnies
eqi
6u!en
39