Pfaff creative 1467 Owner's Manual - Page 107
Darning, straight, stitch
 |
View all Pfaff creative 1467 manuals
Add to My Manuals
Save this manual to your list of manuals |
Page 107 highlights
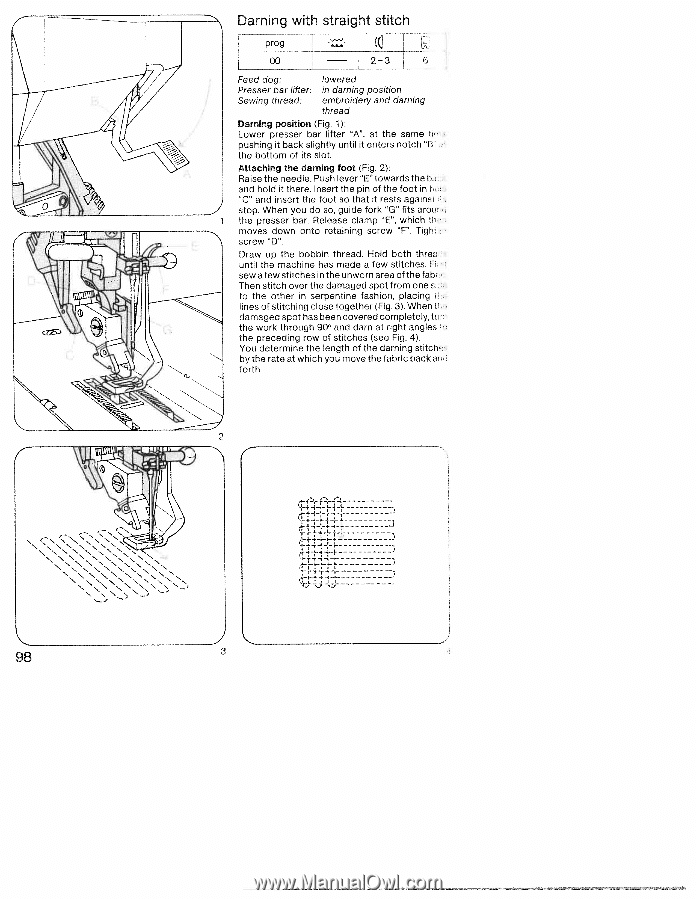
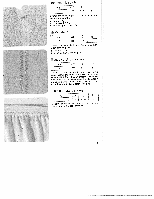
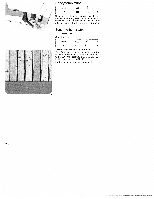
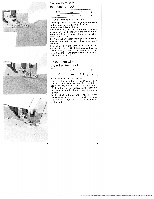
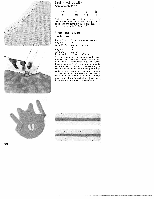
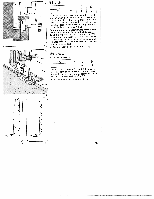
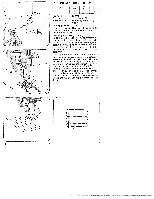
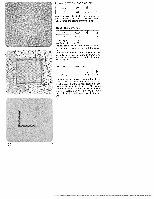
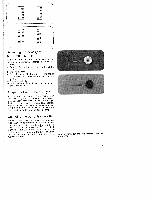
_____ Darning with straight stitch -n prog -- (J 00 L__ - - 2-3 6 L Feed dog: Presser bar lifter: Sewing thread: lowered in darning position embroidery and darning thread Darning position (Fig. 1): Lower presser bar lifter "A". at the same t pushing it back slightly until it enters notch "B the bottom of its slot. Attaching the darning foot (Fig. 2): Raise the needle. Push lever "E" towards the b and hold it there. Insert the pin of the foot in h "C" and insert the foot so that it rests against stop. When you do so, guide fork "G" fits aroh the presser bar. Release clamp "E", which ft moves down onto retaining screw "F". Tigh; screw "D". Draw up the bobbin thread. Hold both three until the machine has made a few stitches. F sew a few stitches in the unworn area of the fah Then stitch over the damaged spot from one s to the other in serpentine fashion, placing I lines of stitching close together (Fig. 3). When I damaged spot has been covered completely, U the work through 90° and darn at right angles the preceding row of stitches (see Fig. 4). You determine the length of the darning stitch by the rate at which you move the fabric back af forth. 2 -, L 98 3
-
 1
1 -
2
-
3
-
4
-
5
-
6
-
7
-
8
-
9
-
10
-
11
-
12
-
13
-
14
-
15
-
16
-
17
-
18
-
19
-
20
-
21
-
22
-
23
-
24
-
25
-
26
-
27
-
28
-
29
-
30
-
31
-
32
-
33
-
34
-
35
-
36
-
37
-
38
-
39
-
40
-
41
-
42
-
43
-
44
-
45
-
46
-
47
-
48
-
49
-
50
-
51
-
52
-
53
-
54
-
55
-
56
-
57
-
58
-
59
-
60
-
61
-
62
-
63
-
64
-
65
-
66
-
67
-
68
-
69
-
70
-
71
-
72
-
73
-
74
-
75
-
76
-
77
-
78
-
79
-
80
-
81
-
82
-
83
-
84
-
85
-
86
-
87
-
88
-
89
-
90
-
91
-
92
-
93
-
94
-
95
-
96
-
97
-
98
-
99
-
100
-
101
-
 102
102 -
 103
103 -
 104
104 -
 105
105 -
 106
106 -
 107
107 -
 108
108 -
 109
109 -
 110
110 -
 111
111 -
 112
112 -
113
-
114
-
115
-
116
-
117
-
118
-
119
-
120
-
121
-
122
-
123
-
124
-
125
-
126
-
127
-
128
-
129
-
130
-
131
-
132
-
133
-
134
-
135
-
136
-
137
-
138
-
139
-
140
-
141
-
142
-
143
-
144
-
145
-
146
-
147
-
148
-
149
-
150
-
151
-
152
-
153
-
154
-
155
-
156
-
157
-
158
-
159
-
160
-
161
-
162
-
163
-
164
-
165
-
166
-
167
-
168
-
169
-
170
-
171
-
172
-
173
-
174
-
175
-
176
-
177
-
178
-
179
-
180
-
181
-
182
-
183
-
184
-
185
-
186
-
187
-
188
-
189
-
190
-
191
-
192
 |
 |