Pfaff creative 1467 Owner's Manual - Page 56
Eyelet, embroidery
 |
View all Pfaff creative 1467 manuals
Add to My Manuals
Save this manual to your list of manuals |
Page 56 highlights
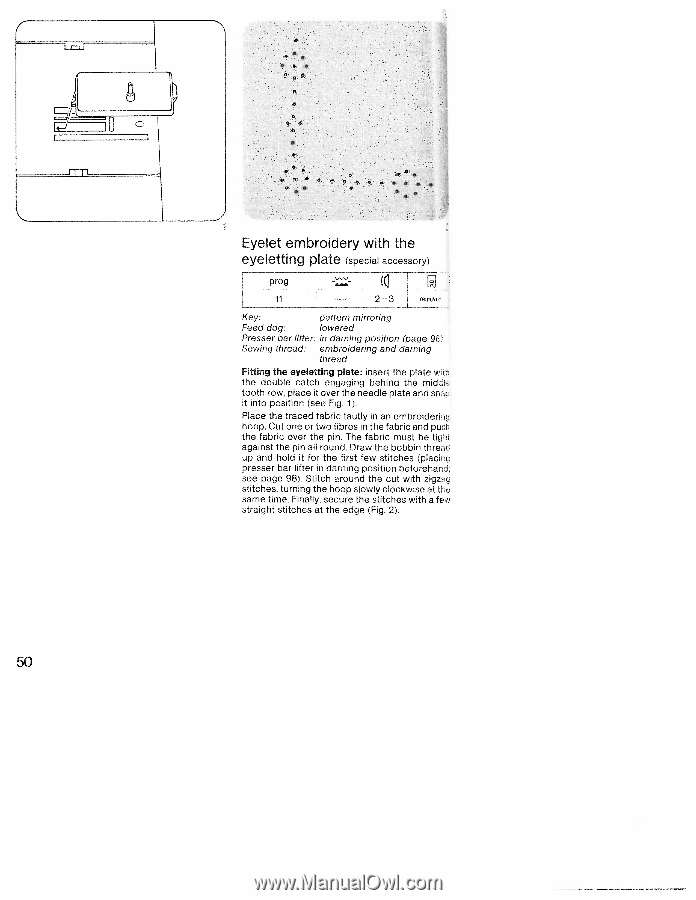
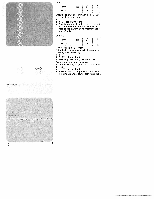
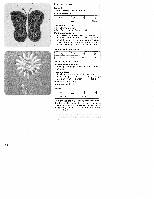
e S S S S SS S S S S S5 •e s S S Eyelet embroidery with the eyeletting plate (special accessory) prog r --' 11 2-3 remov - Key: pattern mirroring Feed dog: lowered Presser bar lifter: in darning position (page 9l Sewing thread: embroidering and darning thread Fitting the eyeletting plate: insert the plate w ti the double catch engaging behind the midh tooth row, place it over the needle plate and sn it into position (see Fig. 1). Place the traced fabric tautly in an embroideri i. hoop. Cut one or two fibres in the fabric and Pu h the fabric over the pin. The fabric must be tiç,it against the pin all round. Draw the bobbin thre: d up and hold it for the first few stitches (pIaci q presser bar lifter in darning position beforehari, see page 98). Stitch around the cut with zigzg stitches, turning the hoop slowly clockwise at tt e same time. Finally, secure the stitches with a few straight stitches at the edge (Fig. 2). 50
-
 1
1 -
2
-
3
-
4
-
5
-
6
-
7
-
8
-
9
-
10
-
11
-
12
-
13
-
14
-
15
-
16
-
17
-
18
-
19
-
20
-
21
-
22
-
23
-
24
-
25
-
26
-
27
-
28
-
29
-
30
-
31
-
32
-
33
-
34
-
35
-
36
-
37
-
38
-
39
-
40
-
41
-
42
-
43
-
44
-
45
-
46
-
47
-
48
-
49
-
50
-
 51
51 -
 52
52 -
 53
53 -
 54
54 -
 55
55 -
 56
56 -
 57
57 -
 58
58 -
 59
59 -
 60
60 -
 61
61 -
62
-
63
-
64
-
65
-
66
-
67
-
68
-
69
-
70
-
71
-
72
-
73
-
74
-
75
-
76
-
77
-
78
-
79
-
80
-
81
-
82
-
83
-
84
-
85
-
86
-
87
-
88
-
89
-
90
-
91
-
92
-
93
-
94
-
95
-
96
-
97
-
98
-
99
-
100
-
101
-
102
-
103
-
104
-
105
-
106
-
107
-
108
-
109
-
110
-
111
-
112
-
113
-
114
-
115
-
116
-
117
-
118
-
119
-
120
-
121
-
122
-
123
-
124
-
125
-
126
-
127
-
128
-
129
-
130
-
131
-
132
-
133
-
134
-
135
-
136
-
137
-
138
-
139
-
140
-
141
-
142
-
143
-
144
-
145
-
146
-
147
-
148
-
149
-
150
-
151
-
152
-
153
-
154
-
155
-
156
-
157
-
158
-
159
-
160
-
161
-
162
-
163
-
164
-
165
-
166
-
167
-
168
-
169
-
170
-
171
-
172
-
173
-
174
-
175
-
176
-
177
-
178
-
179
-
180
-
181
-
182
-
183
-
184
-
185
-
186
-
187
-
188
-
189
-
190
-
191
-
192
 |
 |