Pfaff creative 1467 Owner's Manual - Page 87
right
 |
View all Pfaff creative 1467 manuals
Add to My Manuals
Save this manual to your list of manuals |
Page 87 highlights
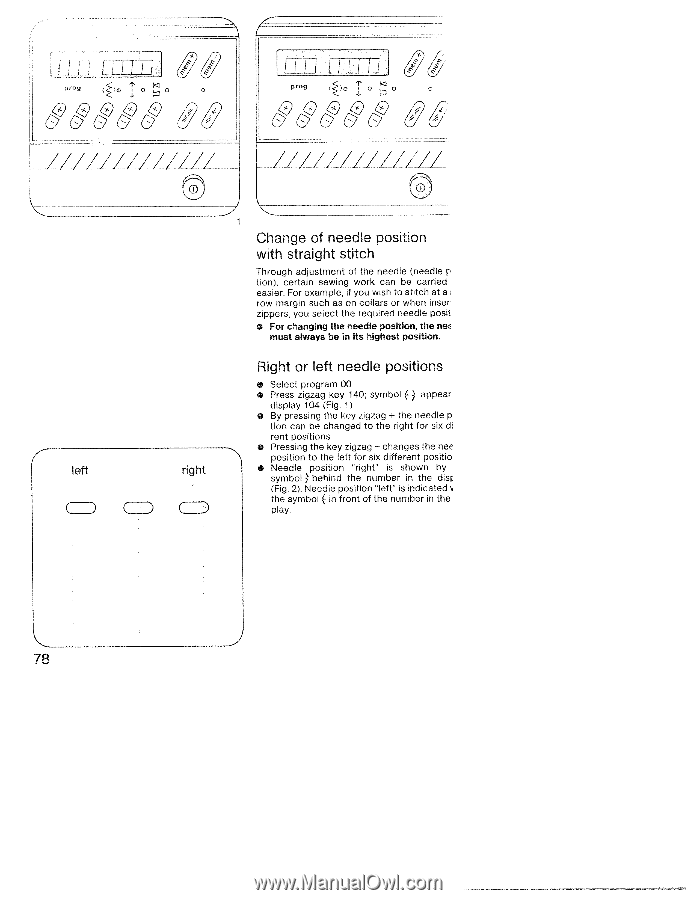
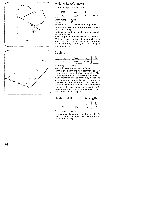
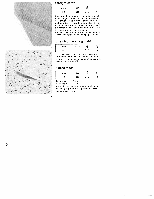
____ _ 1. prog LLL Wiii prOg 1o o ///////////II left right EZD ZD EED Change of needle position with straight stitch Through adjustment of the needle (needle tion), certain sewing work can be carried easier. For example, if you wish to stitch at a row margin such as on collars or when inser zippers, you select the required needle posit • For changing the needle position, the nec must always be in its highest position, Right or left needle positions • Select program 00 • Press zigzag key 140; symbol appear display 104 (Fig. 1) • By pressing the key zigzag + the needle p tion can be changed to the right for six di rent positions • Pressing the key zigzag - changes the nec position to the left for six different positio • Needle position right' is shown by symbol behind the number in the disr (Fig. 2). Needle position "left" is indicated sYmbol E in front of the number in the 78
-
 1
1 -
2
-
3
-
4
-
5
-
6
-
7
-
8
-
9
-
10
-
11
-
12
-
13
-
14
-
15
-
16
-
17
-
18
-
19
-
20
-
21
-
22
-
23
-
24
-
25
-
26
-
27
-
28
-
29
-
30
-
31
-
32
-
33
-
34
-
35
-
36
-
37
-
38
-
39
-
40
-
41
-
42
-
43
-
44
-
45
-
46
-
47
-
48
-
49
-
50
-
51
-
52
-
53
-
54
-
55
-
56
-
57
-
58
-
59
-
60
-
61
-
62
-
63
-
64
-
65
-
66
-
67
-
68
-
69
-
70
-
71
-
72
-
73
-
74
-
75
-
76
-
77
-
78
-
79
-
80
-
81
-
 82
82 -
 83
83 -
 84
84 -
 85
85 -
 86
86 -
 87
87 -
 88
88 -
 89
89 -
 90
90 -
 91
91 -
 92
92 -
93
-
94
-
95
-
96
-
97
-
98
-
99
-
100
-
101
-
102
-
103
-
104
-
105
-
106
-
107
-
108
-
109
-
110
-
111
-
112
-
113
-
114
-
115
-
116
-
117
-
118
-
119
-
120
-
121
-
122
-
123
-
124
-
125
-
126
-
127
-
128
-
129
-
130
-
131
-
132
-
133
-
134
-
135
-
136
-
137
-
138
-
139
-
140
-
141
-
142
-
143
-
144
-
145
-
146
-
147
-
148
-
149
-
150
-
151
-
152
-
153
-
154
-
155
-
156
-
157
-
158
-
159
-
160
-
161
-
162
-
163
-
164
-
165
-
166
-
167
-
168
-
169
-
170
-
171
-
172
-
173
-
174
-
175
-
176
-
177
-
178
-
179
-
180
-
181
-
182
-
183
-
184
-
185
-
186
-
187
-
188
-
189
-
190
-
191
-
192
 |
 |