Pfaff creative 1467 Owner's Manual - Page 185
Cutting, buttonholes open, Sewing, buttons
 |
View all Pfaff creative 1467 manuals
Add to My Manuals
Save this manual to your list of manuals |
Page 185 highlights
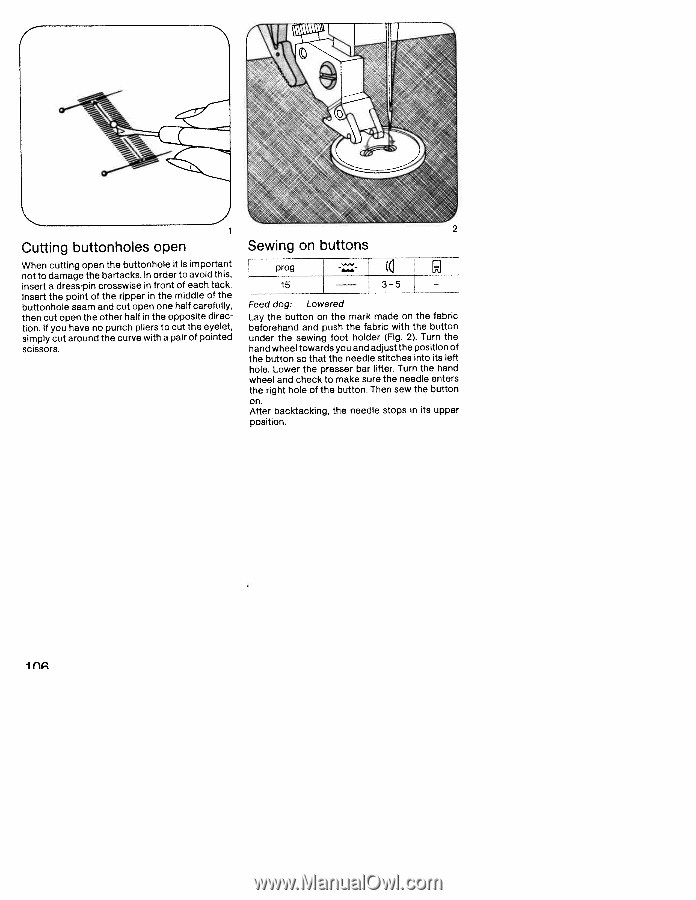
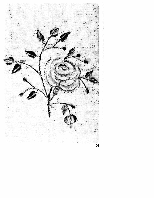
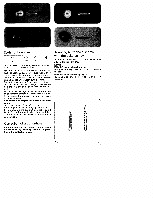
Cutting buttonholes open When cutting open the buttonhole it is important not to damage the bartacks. In order to avoid this, insert a dresspin crosswise in front of each tack. Insert the point of the ripper in the middle of the buttonhole seam and cut open one half carefully, then cut open the other half in the opposite direc tion. If you have no punch pliers to cut the eyelet, simply cut around the curve with a pair of pointed scissors. Sewing on buttons prog ccl -- [] 15 3-5 - Feed dog: Lowered Lay the button on the mark made on the fabric beforehand and push the fabric with the button under the sewing foot holder (Fig. 2). Turn the hand wheel towards you and adjust the position of the button so that the needle stitches into its left hole. Lower the presser bar lifter. Turn the hand wheel and check to make sure the needle enters the right hole of the button. Then sew the button on. After backtacking, the needle stops in its upper position. I
-
 1
1 -
2
-
3
-
4
-
5
-
6
-
7
-
8
-
9
-
10
-
11
-
12
-
13
-
14
-
15
-
16
-
17
-
18
-
19
-
20
-
21
-
22
-
23
-
24
-
25
-
26
-
27
-
28
-
29
-
30
-
31
-
32
-
33
-
34
-
35
-
36
-
37
-
38
-
39
-
40
-
41
-
42
-
43
-
44
-
45
-
46
-
47
-
48
-
49
-
50
-
51
-
52
-
53
-
54
-
55
-
56
-
57
-
58
-
59
-
60
-
61
-
62
-
63
-
64
-
65
-
66
-
67
-
68
-
69
-
70
-
71
-
72
-
73
-
74
-
75
-
76
-
77
-
78
-
79
-
80
-
81
-
82
-
83
-
84
-
85
-
86
-
87
-
88
-
89
-
90
-
91
-
92
-
93
-
94
-
95
-
96
-
97
-
98
-
99
-
100
-
101
-
102
-
103
-
104
-
105
-
106
-
107
-
108
-
109
-
110
-
111
-
112
-
113
-
114
-
115
-
116
-
117
-
118
-
119
-
120
-
121
-
122
-
123
-
124
-
125
-
126
-
127
-
128
-
129
-
130
-
131
-
132
-
133
-
134
-
135
-
136
-
137
-
138
-
139
-
140
-
141
-
142
-
143
-
144
-
145
-
146
-
147
-
148
-
149
-
150
-
151
-
152
-
153
-
154
-
155
-
156
-
157
-
158
-
159
-
160
-
161
-
162
-
163
-
164
-
165
-
166
-
167
-
168
-
169
-
170
-
171
-
172
-
173
-
174
-
175
-
176
-
177
-
178
-
179
-
 180
180 -
 181
181 -
 182
182 -
 183
183 -
 184
184 -
 185
185 -
 186
186 -
 187
187 -
 188
188 -
 189
189 -
 190
190 -
191
-
192
 |
 |