Pfaff creative 1467 Owner's Manual - Page 184
Correction, buttonhole, Eyelet, buttonholes, Adapting, seams, balance
 |
View all Pfaff creative 1467 manuals
Add to My Manuals
Save this manual to your list of manuals |
Page 184 highlights
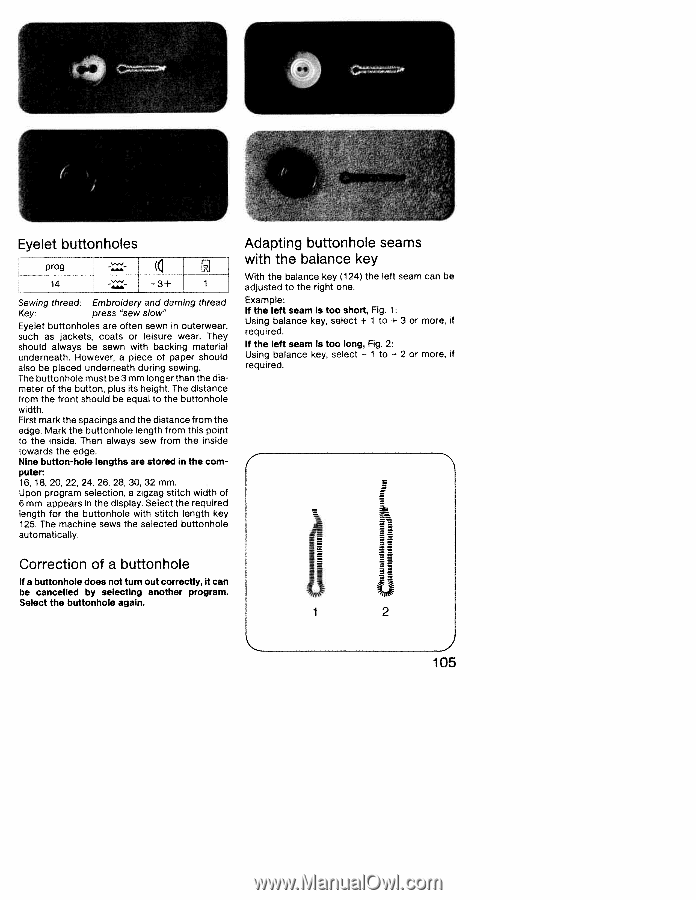
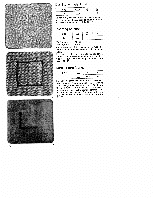
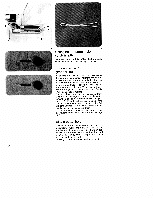
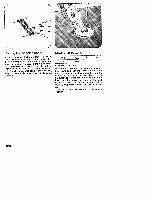
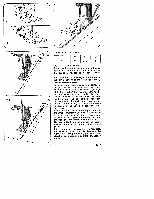
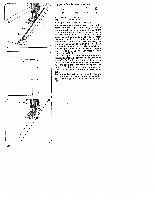
Eyelet buttonholes prog -- 14 -- -3+ Sewing thread: Embroidery and darning thread Key: press "sew slow" Eyelet buttonholes are often sewn in outerwear, such as jackets, coats or leisure wear. They should always be sewn with backing material underneath. However, a piece of paper should also be placed underneath during sewing. The buttonhole must be 3mm longer than the dia meter of the button, plus its height. The distance from the front should be equal to the buttonhole width. First mark the spacings and the distance from the edge. Mark the buttonhole length from this point to the inside. Then always sew from the inside towards the edge. Nine button-hole lengths are stored in the com puter: 16, 18, 20, 22, 24, 26, 28, 30, 32 mm. Upon program selection, a zigzag stitch width of 6mm appears in the display. Select the required length for the buttonhole with stitch length key 125. The machine sews the selected buttonhole automatically. Adapting buttonhole seams with the balance key With the balance key (124) the left seam can be adjusted to the right one. Example: If the left seam is too short, Fig. 1: Using balance key, select + 1 to + 3 or more, t required. If the left seam Is too long, Fig. 2: Using balance key, select - 1 to - 2 or more, f required. = A Correction of a buttonhole If a buttonhole does not turn out correctly, It can be cancelled by selecting another program. Select the buttonhole again. 1 2 105
-
 1
1 -
2
-
3
-
4
-
5
-
6
-
7
-
8
-
9
-
10
-
11
-
12
-
13
-
14
-
15
-
16
-
17
-
18
-
19
-
20
-
21
-
22
-
23
-
24
-
25
-
26
-
27
-
28
-
29
-
30
-
31
-
32
-
33
-
34
-
35
-
36
-
37
-
38
-
39
-
40
-
41
-
42
-
43
-
44
-
45
-
46
-
47
-
48
-
49
-
50
-
51
-
52
-
53
-
54
-
55
-
56
-
57
-
58
-
59
-
60
-
61
-
62
-
63
-
64
-
65
-
66
-
67
-
68
-
69
-
70
-
71
-
72
-
73
-
74
-
75
-
76
-
77
-
78
-
79
-
80
-
81
-
82
-
83
-
84
-
85
-
86
-
87
-
88
-
89
-
90
-
91
-
92
-
93
-
94
-
95
-
96
-
97
-
98
-
99
-
100
-
101
-
102
-
103
-
104
-
105
-
106
-
107
-
108
-
109
-
110
-
111
-
112
-
113
-
114
-
115
-
116
-
117
-
118
-
119
-
120
-
121
-
122
-
123
-
124
-
125
-
126
-
127
-
128
-
129
-
130
-
131
-
132
-
133
-
134
-
135
-
136
-
137
-
138
-
139
-
140
-
141
-
142
-
143
-
144
-
145
-
146
-
147
-
148
-
149
-
150
-
151
-
152
-
153
-
154
-
155
-
156
-
157
-
158
-
159
-
160
-
161
-
162
-
163
-
164
-
165
-
166
-
167
-
168
-
169
-
170
-
171
-
172
-
173
-
174
-
175
-
176
-
177
-
178
-
 179
179 -
 180
180 -
 181
181 -
 182
182 -
 183
183 -
 184
184 -
 185
185 -
 186
186 -
 187
187 -
 188
188 -
 189
189 -
190
-
191
-
192
 |
 |