Pfaff creative 1467 Owner's Manual - Page 63
Attaching
 |
View all Pfaff creative 1467 manuals
Add to My Manuals
Save this manual to your list of manuals |
Page 63 highlights
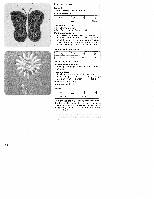
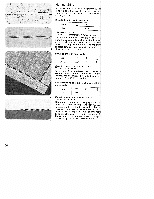
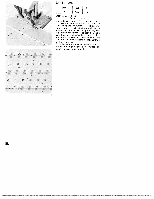
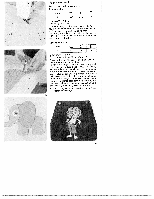
Inserting lace For this work, two worksteps are required First workstep prog I -- ( 00 --3+L0 J The lace insert is first secured to the face side of the material and is sewn on at a narrow margin with straight stitch. The material underneath the lace is cut open at the middle and ironed to the sides. Second workstep prog 10 3+ 0 SSttiittcchh width: length: as required as required Sew over the lace edge on both sides with small, dense zigzagstitches from the face side. Cut off the remaining material on the reverse side (Fig. 1). Attaching lace For this work, two worksteps are required First workstep T cr EZhL Stitch width: 5.0 mm Stitch length: 1.5 mm Serge the raw edge with zigzag stitches (Fig. 2). .4 Second workstep '- n 2 Stitch length: 3.0 mm Baste and sew the lace onto the face side of the material (Fig. 3). Secure the corners with stitches. 3 55
-
 1
1 -
2
-
3
-
4
-
5
-
6
-
7
-
8
-
9
-
10
-
11
-
12
-
13
-
14
-
15
-
16
-
17
-
18
-
19
-
20
-
21
-
22
-
23
-
24
-
25
-
26
-
27
-
28
-
29
-
30
-
31
-
32
-
33
-
34
-
35
-
36
-
37
-
38
-
39
-
40
-
41
-
42
-
43
-
44
-
45
-
46
-
47
-
48
-
49
-
50
-
51
-
52
-
53
-
54
-
55
-
56
-
57
-
 58
58 -
 59
59 -
 60
60 -
 61
61 -
 62
62 -
 63
63 -
 64
64 -
 65
65 -
 66
66 -
 67
67 -
 68
68 -
69
-
70
-
71
-
72
-
73
-
74
-
75
-
76
-
77
-
78
-
79
-
80
-
81
-
82
-
83
-
84
-
85
-
86
-
87
-
88
-
89
-
90
-
91
-
92
-
93
-
94
-
95
-
96
-
97
-
98
-
99
-
100
-
101
-
102
-
103
-
104
-
105
-
106
-
107
-
108
-
109
-
110
-
111
-
112
-
113
-
114
-
115
-
116
-
117
-
118
-
119
-
120
-
121
-
122
-
123
-
124
-
125
-
126
-
127
-
128
-
129
-
130
-
131
-
132
-
133
-
134
-
135
-
136
-
137
-
138
-
139
-
140
-
141
-
142
-
143
-
144
-
145
-
146
-
147
-
148
-
149
-
150
-
151
-
152
-
153
-
154
-
155
-
156
-
157
-
158
-
159
-
160
-
161
-
162
-
163
-
164
-
165
-
166
-
167
-
168
-
169
-
170
-
171
-
172
-
173
-
174
-
175
-
176
-
177
-
178
-
179
-
180
-
181
-
182
-
183
-
184
-
185
-
186
-
187
-
188
-
189
-
190
-
191
-
192
 |
 |
