Ricoh 5510L Operating Instructions - Page 43
Clear, Start
 |
View all Ricoh 5510L manuals
Add to My Manuals
Save this manual to your list of manuals |
Page 43 highlights
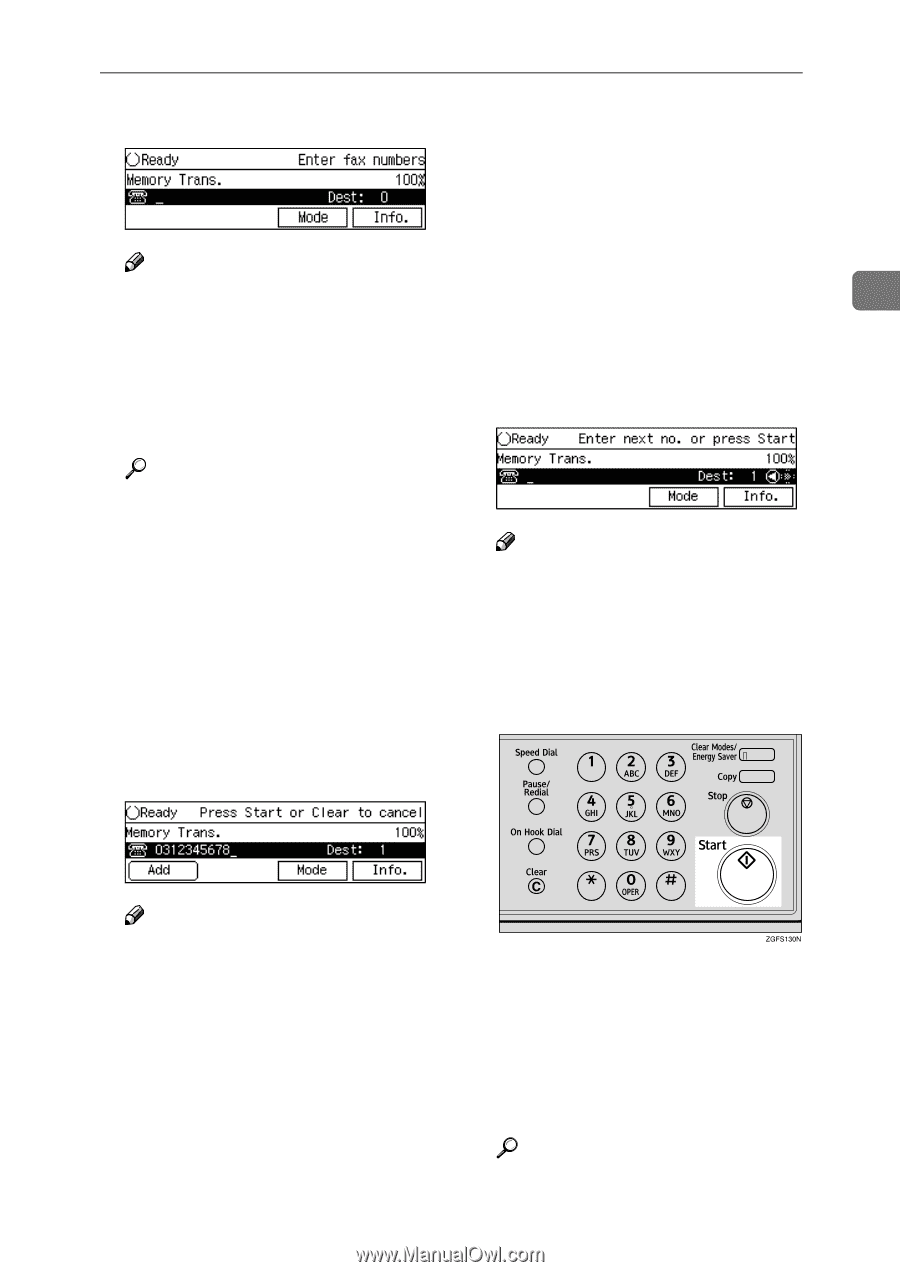
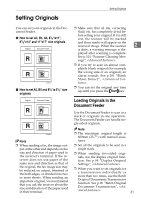
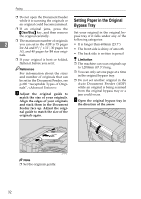
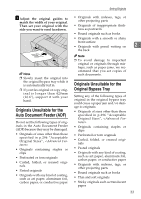
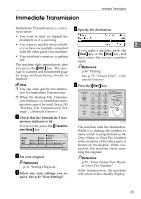
Memory Transmission D Specify the destination. ❒ When destinations are specified using Quick Dial or Group Dial with Quick Dial keys succes- sively, those destinations can be added without pressing [Add]. You can set whether to require Note ❒ If you make a mistake, press the {Clear} or {Stop} key, and then enter the correct number again. to press [Add] when specifying destinations using Quick Dials successively with the User Pa- 2 rameters (sw 09, bit 6). See p.178 "User Parameters", . F when you specify the destina- tion with the number keys or Specify another destination. the chain dial. Reference p.46 "Dialing" p.49 "Using Quick Dials" p.49 "Using Speed Dials" p.50 "Using Groups" p.75 "Chain Dial", p.77 "Redial", E If you want to send the same mes- sage to more than one destination, press [Add]. Note ❒ You can check the destinations already specified by pressing 0 or 1 . ❒ To specify another destination, repeat step E and F. G Press the {Start} key. Note ❒ When you want to send the message to only one destina- tion, go to step G. The machine starts scanning the original. The machine calls the destination. The name or fax number which is programmed as the Own Name or Own Fax Number at the other end is shown on the top of the display. Reference p.55 "Own Name/Fax Header/Own Fax Number" 35
-
 1
1 -
2
-
3
-
4
-
5
-
6
-
7
-
8
-
9
-
10
-
11
-
12
-
13
-
14
-
15
-
16
-
17
-
18
-
19
-
20
-
21
-
22
-
23
-
24
-
25
-
26
-
27
-
28
-
29
-
30
-
31
-
32
-
33
-
34
-
35
-
36
-
37
-
 38
38 -
 39
39 -
 40
40 -
 41
41 -
 42
42 -
 43
43 -
 44
44 -
 45
45 -
 46
46 -
 47
47 -
 48
48 -
49
-
50
-
51
-
52
-
53
-
54
-
55
-
56
-
57
-
58
-
59
-
60
-
61
-
62
-
63
-
64
-
65
-
66
-
67
-
68
-
69
-
70
-
71
-
72
-
73
-
74
-
75
-
76
-
77
-
78
-
79
-
80
-
81
-
82
-
83
-
84
-
85
-
86
-
87
-
88
-
89
-
90
-
91
-
92
-
93
-
94
-
95
-
96
-
97
-
98
-
99
-
100
-
101
-
102
-
103
-
104
-
105
-
106
-
107
-
108
-
109
-
110
-
111
-
112
-
113
-
114
-
115
-
116
-
117
-
118
-
119
-
120
-
121
-
122
-
123
-
124
-
125
-
126
-
127
-
128
 |
 |