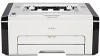
Ricoh SP 213Nw User Guide
Ricoh SP 213Nw Manual
 |
View all Ricoh SP 213Nw manuals
Add to My Manuals
Save this manual to your list of manuals |
Ricoh SP 213Nw manual content summary:
- Ricoh SP 213Nw | User Guide - Page 1
User Guide Guide to the Machine Loading Paper Printing Documents Configuring the Machine Using Utilities Maintaining the Machine Troubleshooting Appendix For safe and correct use, be sure to read Safety Information before using the machine. - Ricoh SP 213Nw | User Guide - Page 2
- Ricoh SP 213Nw | User Guide - Page 3
Symbol (For EU countries only 8 Important Safety Instructions ...9 Notes to Users in the State of California...9 1. Guide to the Machine Guide to Components...11 Exterior...11 Interior...13 About Operation Tools...14 Installing the Driver and Software...15 Network Quick Install...15 - Ricoh SP 213Nw | User Guide - Page 4
IPsec Settings...52 IPsec Global Settings Tab...52 IPsec Policy List Tab...52 Printing Lists/Reports...56 Configuring the Administrator Settings...57 Administrator Tab...57 Reset Settings Tab...57 Backup Setting Tab...57 2 - Ricoh SP 213Nw | User Guide - Page 5
Cleaning...67 Cleaning the Inside of the Machine...68 6. Troubleshooting Common Problems...69 Paper Feed Problems...70 Removing Printing Jams...71 Print Quality Problems...77 Checking the Condition of the Machine...77 Printer Problems...78 Print Positions Do Not Match Display Positions 79 Error - Ricoh SP 213Nw | User Guide - Page 6
stock certificates, bank drafts, checks, passports, driver's licenses. The preceding list is meant as a guide only and is not inclusive. We assume use genuine toner from the manufacturer. Two kinds of size notation are employed in this manual. Some illustrations or explanations in this guide may - Ricoh SP 213Nw | User Guide - Page 7
PCL driver GDI driver Ethernet Port (Network) Wireless LAN Web Image Monitor SP 211 (mainly Europe and Asia) Type 1 Not available Available Not available Not available Not available SP 213w (mainly Europe and Asia) Type 2 Available Not available Not available Available Available SP 213Nw Type - Ricoh SP 213Nw | User Guide - Page 8
-27, -29 • 220-240V (mainly North America) If the label contains the following, your machine is a region B model: • CODE XXXX -17 • 120V • Dimensions in this manual are given in two units of measure: metric and inch. If your machine is a Region A model, refer to the metric units. If your machine is - Ricoh SP 213Nw | User Guide - Page 9
appropriate return and collection systems available. By following these instructions you ensure that this product is treated correctly and help service representatives. Environmental Advice for Users Users in the EU, Switzerland and Norway Consumables yield Please refer to either the User's Manual - Ricoh SP 213Nw | User Guide - Page 10
ink cartridge return program Toner and ink cartridge for recycling will be accepted free of charge from users in accordance with local regulations. For details about the return program, please refer to the Web page below or consult your service person. https://www.ricoh-return.com/ Energy efficiency - Ricoh SP 213Nw | User Guide - Page 11
Important Safety Instructions Notes to Users in the State of California Perchlorate Material - special handling may apply. See: www.dtsc.ca.gov/hazardouswaste/ perchlorate 9 - Ricoh SP 213Nw | User Guide - Page 12
10 - Ricoh SP 213Nw | User Guide - Page 13
the Machine Guide to Components This section introduces the names of the various parts Type 1 models do not have the [Wi-Fi] key. • Only Type 2 and 3 models can print the test page using the [Job Reset] key. 1 11 2 3 12 4 5 6 7 8 9 10 13 14 15 16 DCT831 1. [Wi-Fi] key To switch to - Ricoh SP 213Nw | User Guide - Page 14
1. Guide to the Machine 3. [Stop/Start] key You can use this key to continuously if another error occurs. 6. Toner/Paper End Indicator This indicator flashes red when the toner is nearly empty, and it lights up when the machine runs out of paper or toner and when the toner is not set correctly. 7. - Ricoh SP 213Nw | User Guide - Page 15
Interior Guide to Components 1 DCT064 1. Print Cartridge A replacement consumable that is required to make prints on paper. For details about replacing the cartridge, see page 65 "Replacing the Print Cartridge". 13 - Ricoh SP 213Nw | User Guide - Page 16
1. Guide to the Machine About Operation Tools This section explains the operation tools of this machine. • Depending on the model, Web Image Monitor may not be - Ricoh SP 213Nw | User Guide - Page 17
Installing the Driver and Software Network printers by specified IP Address]. To select a port or specify a new port, select [Select a port or specify a new port]. If a dialog box for selecting the port type appears, it is recommended to select the standard TCP/IP port. 8. Follow the instructions - Ricoh SP 213Nw | User Guide - Page 18
network (DHCP), or manually. • For details about configuring the IPv4 address, see the Setup Guide. • For details about [Smart Organizing Monitor for SP xxx Series]. 3. Click [Smart Organizing Monitor Status]. If the machine you are using is not selected, click [Connect Printer], and then select the - Ricoh SP 213Nw | User Guide - Page 19
Organizing Monitor for SP xxx Series]. 3. Click [Smart Organizing Monitor Status]. If the machine you are using is not selected, click [Connect Printer], and then LAN settings manually using Smart Organizing Monitor. For easy setup using WPS (Wi-Fi Protected Setup), see Wi-Fi Settings Guide. • If - Ricoh SP 213Nw | User Guide - Page 20
1. Guide to the Machine 2. Click [Smart Organizing Monitor for SP xxx Series]. 3. Click [Smart Organizing Monitor Status]. If the machine you are using is not selected, click [Connect Printer], and then select the machine's model. 4. Click the [User Tools] tab. 5. Click [Printer Configuration]. 6. - Ricoh SP 213Nw | User Guide - Page 21
Mode WPA2/WPA authentication methods are not supported. 1. On the [Start] menu, click [All Programs]. 2. Click [Smart Organizing Monitor for SP xxx Series]. 3. Click [Smart Organizing Monitor Status]. If the machine you are using is not selected, click [Connect Printer], and then select the machine - Ricoh SP 213Nw | User Guide - Page 22
1. Guide to the Machine Connection has failed: The alert indicators start flashing, then, after 30 seconds, the alert indicator goes out and the power indicator lights continuously. • For details about how to use Smart Organizing Monitor, see page 60 "Using Smart Organizing Monitor". 20 - Ricoh SP 213Nw | User Guide - Page 23
A5 • A6 • B6 JIS • 16K (197 × 273 mm) • 16K (195 × 270 mm) • 16K (184 × 260 mm) • Custom Size The following paper sizes are supported as custom paper sizes: • Horiz Tray1: Approximately 100-216 mm (3.9-8.5 inches) Bypass Tray: Approximately 90-216 mm (3.6-8.5 inches) • Vert Approximately 148-356 mm - Ricoh SP 213Nw | User Guide - Page 24
2. Loading Paper • Bypass Tray 1 sheet (70 g/m2, 19 lb.) 22 - Ricoh SP 213Nw | User Guide - Page 25
onto, except a preprinted letterhead paper. Malfunctions are especially likely when using paper printed on by other than a laser printer (e.g. monochrome and color copiers, ink-jet printers, etc.) • Special paper, such as thermal paper and carbon paper • Paper weighing heavier or lighter than the - Ricoh SP 213Nw | User Guide - Page 26
Loading Paper Print Area The diagram below shows the area of the paper that the machine can print on. From the printer driver 4 4 3 1 3 2 CHZ904 1. Print area 2. Feed direction 3. Approx. 4.2 mm (0.2 inches) 4. Approx. 4.2 mm (0.2 inches) • The print area may vary depending on the paper size - Ricoh SP 213Nw | User Guide - Page 27
in the printer driver so that the settings configured when paper is loaded can be used for printing. Loading Paper into Tray 1 1. Pull Tray 1 out slowly, and then remove it using both hands. DCT063 Place the tray on a flat surface. 2. Pinch the clips on the side paper guides - Ricoh SP 213Nw | User Guide - Page 28
slide it inward to match the standard size. DCT031 When loading A4 or letter size paper, align the paper guide to the following position: DCT871 4. Fan the paper before loading it in the tray. 5. Load the new paper stack print side down. Make sure paper - Ricoh SP 213Nw | User Guide - Page 29
Loading Paper 6. Check there are no gaps between the paper and the paper guides (both side and end paper guides). DCT049 7. Carefully push Tray 1 straight into the machine. DCT011 To avoid paper jams, make sure the tray is securely inserted. To deliver the sheets face - Ricoh SP 213Nw | User Guide - Page 30
2. Loading Paper 2. Release the extender locks on both sides of the tray, and then pull out the extender. DCT034 Make sure the extender's inner surface and the scale are aligned. You can adjust the length of the extender in three steps. When using A4 or letter size paper, adjust the length to the - Ricoh SP 213Nw | User Guide - Page 31
5. Attach the tray cover. Loading Paper DCT038 • Legal paper or custom-size paper longer than A4 must be loaded without attaching the tray cover. ( only) Loading Paper into Bypass Tray • Do not load paper in the bypass tray unless the message "Ready" appears in Smart Organizing Monitor. 1. - Ricoh SP 213Nw | User Guide - Page 32
outward, load paper with the print side up, and then push in until it stops against the machine. DCT013 3. Adjust the side guides to the paper width. DCT014 To deliver the sheets face up, open the rear cover. DCT037 Specifying Paper Type and Paper Size Using Smart Organizing - Ricoh SP 213Nw | User Guide - Page 33
paper size 1. On the [Start] menu, click [All Programs]. 2. Click [Smart Organizing Monitor for SP xxx Series]. 3. Click [Smart Organizing Monitor Status]. If the machine you are using is not selected, click [Connect Printer], and then select the machine's model. 4. On the [User Tools] tab, click - Ricoh SP 213Nw | User Guide - Page 34
2. Loading Paper 32 - Ricoh SP 213Nw | User Guide - Page 35
3. Printing Documents Basic Operation Use the printer driver to print a document from your computer. 1. After creating a document, open the [Printing Preferences] dialog box in the document's native application. 2. Change any print settings if - Ricoh SP 213Nw | User Guide - Page 36
3. Printing Documents 4. Start printing. The machine prints only the one side of pages first, and then displays on Smart Organizing Monitor screen a message to reload the outputs turned over. 5. Take out all of the prints from the output tray and place them in Tray 1. To print on the reverse side of - Ricoh SP 213Nw | User Guide - Page 37
Basic Operation Canceling a print job before printing has started 1. Double-click the printer icon on the task tray of your computer. 2. Select the print job you want to cancel, click may take a while to cancel a large print job. Canceling a print job while printing 1. Press the [Job Reset] key. 35 - Ricoh SP 213Nw | User Guide - Page 38
3. Printing Documents 36 - Ricoh SP 213Nw | User Guide - Page 39
Configuring the machine's settings • Configuring the network settings • Configuring the IPsec settings • Printing reports • Setting the administrator password • Resetting the machine's configuration to the factory default • Creating backup files of the machine's configuration • Restoring the machine - Ricoh SP 213Nw | User Guide - Page 40
4. Configuring the Machine Using Utilities Displaying Top Page When you access the machine using Web Image Monitor, the top page appears in your browser's window. 1. Launch the Web browser. 2. In the Web browser's address bar, enter "http://(machine's IP address)/" to access the machine. If a DNS - Ricoh SP 213Nw | User Guide - Page 41
's [Refresh] button to refresh the entire browser screen. • If you use an older version of a supported Web browser or the Web browser has JavaScript and cookies disabled, display and operation problems may occur. • If you are using a proxy server, configure the Web browser settings as necessary. For - Ricoh SP 213Nw | User Guide - Page 42
. Shows the host name specified in [Host Name] on the [DNS] page. Shows the current messages on the machine's display. Description Displays the remaining toner level. Description Shows the current state and paper size/type setting of Tray 1. Shows the current state and paper size/type setting of the - Ricoh SP 213Nw | User Guide - Page 43
Checking the System Information Machine Information Tab Machine Information Item Firmware Version Engine FW Version Machine ID Total Memory Description Shows the version of firmware installed on the machine. Shows the version of firmware for the machine engine. Shows the identification number of - Ricoh SP 213Nw | User Guide - Page 44
4. Configuring the Machine Using Utilities Configuring the System Settings Click [System Settings] to display the page for configuring the system settings. This page contains the following tabs: [Tray Paper Settings] and [Interface]. Tray Paper Settings Tab Tray 1 Item Paper Size Paper Type - Ricoh SP 213Nw | User Guide - Page 45
with any machine other than the one originally used for installation, if the machine is of the same model. If disabled, you must install the printer driver separately for individual machines, because the machine other than the original will be recognized as a new device upon USB connection. 43 - Ricoh SP 213Nw | User Guide - Page 46
might not appear. Network Status Tab General Status Item Description Ethernet Speed Shows the type and speed of the network connection. IPP Printer Name Shows the name used to identify the machine on the network. Network Version Shows the version of the machine's network module (a part - Ricoh SP 213Nw | User Guide - Page 47
. You cannot disable IPv6 using Web Image Monitor if the machine is currently in use in an IPv6 environment. When disabled, [DHCP], [Manual Configuration Address], [Prefix Length], and [Gateway Address] below cannot be configured. IPv6 Address Item DHCP IP Address (DHCP) Stateless Address Gateway - Ricoh SP 213Nw | User Guide - Page 48
FTP RAW Port No. LPR mDNS Setting Item mDNS Printer Name Description Select to enable network printing using an embedded up to 32 characters. IPv6 DNS Method Select whether to specify the domain server manually or have the machine obtain its DNS information automatically. When set to [Auto-Obtain - Ricoh SP 213Nw | User Guide - Page 49
low. Soon Replace Print Cartridge Select to send an alert e-mail to the specified address if toner runs out. Out of Paper Select to send an alert e-mail to the specified address if paper runs out. Call Service Select to send an alert e-mail to the specified address if the machine requires - Ricoh SP 213Nw | User Guide - Page 50
4. Configuring the Machine Using Utilities SNMP Tab SNMP Item SNMP Description Select whether to enable the machine to use SNMP services. Trap Item Target Trap SNMP Management Host 1 SNMP Management Host 2 Description Select whether to enable the machine to send traps to the management host ( - Ricoh SP 213Nw | User Guide - Page 51
). Authentication Method Select an authentication method from the following: [Anonymous]: The user name and password are not necessary. [SMTP]: The machine supports NTLM and LOGIN authentication. [POP before SMTP]: The POP3 server is used for authentication. When sending e-mails to an SMTP server - Ricoh SP 213Nw | User Guide - Page 52
4. Configuring the Machine Using Utilities Item User Password Authentication Description Enter the password for logging in to the POP3 server. Can contain up to 32 characters. Select an authentication method from the following: [None]: Password will not be encrypted. [APOP Authentication]: - Ricoh SP 213Nw | User Guide - Page 53
length: 26 characters (0-9, A-F, a-f) • WEP key length: [128bit], Format: [ASCII] WEP key max length: 13 characters (0x20-0x7e) • If you are configuring the connection settings manually, check the SSID, authentication method, or encryption key of the access point or wireless router in advance. 51 - Ricoh SP 213Nw | User Guide - Page 54
Bypass All ICMP Bypass Description Select whether to enable or disable IPsec. Select whether to allow for the default IPsec policy. Select the services that you do not want to apply IPsec from the following: [DHCPv4], [DHCPv6], [SNMP], [mDNS], [NetBIOS], [UDP Port 53550] Select whether to apply - Ricoh SP 213Nw | User Guide - Page 55
Type Select IPv4 or IPv6 as the type of IP address to be used in IPsec communication. Local Address Displays the IP address of this printer. Remote Address Enter the IPv4 or IPv6 address of the device with which to communicate. Can contain up to 39 characters. Prefix Length Enter the - Ricoh SP 213Nw | User Guide - Page 56
(such as VPN devices). Select the security protocol from the following: • [AH]: Establishes secure communication that supports authentication only. • [ESP]: Establishes secure communication that supports both authentication and data encryption. • [ESP&AH]: Establishes secure communication that - Ricoh SP 213Nw | User Guide - Page 57
Configuring the IPsec Settings Item Key Perfect Forward Secrecy Description Select whether to enable or disable PFS (Perfect Forward Secrecy). IKE Settings Item IKE Version Encryption Algorithm Authentication Algorithm IKE Life Time IKE Diffie-Hellman Group Pre-Shared Key Key Perfect Forward - Ricoh SP 213Nw | User Guide - Page 58
about the machine and its current configuration. Test Page Prints a test page for checking the printing condition. PCL Font List Prints the current configuration and installed PCL font list. Maintenance Page Prints the maintenance page. • Reports cannot be printed via Web Image Monitor if - Ricoh SP 213Nw | User Guide - Page 59
the new administrator password. Can contain up to 16 characters. Confirm New Password Enter the same password again, to confirm. Reset Settings Tab Reset Settings Item Description Reset Network Settings Select to restore settings configured under the [Network Settings] and [Administrator Tools - Ricoh SP 213Nw | User Guide - Page 60
4. Configuring the Machine Using Utilities Backup Setting Item Description Back up Network Settings Backs up settings configured under the [Network Settings] and [Administrator Tools]. Back up Menu Settings Backs up settings that are not related to the network. Back up IPsec Settings Backs up - Ricoh SP 213Nw | User Guide - Page 61
Configuring the Administrator Settings • If the settings are not restored successfully, an error message appears. Try again to restore the file completely. Help Source File Setting Tab Help Source File Setting Item Description Help Source File Enter the address (URL) of the Help button. Up to - Ricoh SP 213Nw | User Guide - Page 62
Information 1 3 4 5 2 DCT881 1. Image area Displays the status of this machine with an icon. 2. Status area • Printer Name • Print Cartridge Displays the following messages to indicate remaining toner levels: Remaining Level 1 to 5, "Almost Empty" and "Empty" • Input Tray You can check the following - Ricoh SP 213Nw | User Guide - Page 63
to select a printer driver. 5. [Refresh:] Specify the automatic update of the display. Configuring the Machine Settings Smart Organizing Monitor is used to modify the machine's settings. 1. On the [Start] menu, click [All Programs]. 2. Click [Smart Organizing Monitor for SP xxx Series]. 3. Click - Ricoh SP 213Nw | User Guide - Page 64
required to use the printer. The printer can be used on factory • The changed condition holds even if the printer is turned off. • The access code can printer name, active protocol, and other printer manually • Connecting with one touch using WPS Printer tab • You can set configurations about PCL - Ricoh SP 213Nw | User Guide - Page 65
Status]. If the machine you are using is not selected, click [Connect Printer], and then select the machine's model. 4. On the [User Tools] problems or add a number of new functions. For details about updating the firmware, see the Firmware Update Guide. The Firmware Update Guide can be downloaded - Ricoh SP 213Nw | User Guide - Page 66
4. Configuring the Machine Using Utilities 64 - Ricoh SP 213Nw | User Guide - Page 67
a time, paper type and size, and environmental conditions such as temperature and humidity. Toner quality degrades over time. • For good print quality, the manufacturer recommends that you use genuine toner from the manufacturer. • The manufacturer shall not be responsible for any damage or expense - Ricoh SP 213Nw | User Guide - Page 68
5. Maintaining the Machine 5. Slide the print cartridge in horizontally, and then slowly push it in all the way. Finally, push the cartridge down until it clicks into place. DCT026 6. Carefully push up the front cover until it closes. 66 - Ricoh SP 213Nw | User Guide - Page 69
Cautions When Cleaning Cautions When Cleaning Clean the machine periodically to maintain high print quality. Dry wipe the exterior with a soft cloth. If dry wiping is not sufficient, wipe with a soft, damp cloth that has been wrung out thoroughly. If you still cannot remove the stain or grime, use a - Ricoh SP 213Nw | User Guide - Page 70
5. Maintaining the Machine Cleaning the Inside of the Machine 1. Open the front cover, and then carefully lower it. 2. Carefully pull out the print cartridge horizontally, holding its center. DCT024 3. Use a cloth to wipe the inside of the machine toward and away from yourself. DCT040 Wipe carefully - Ricoh SP 213Nw | User Guide - Page 71
This section describes how to troubleshoot common problems that may occur while operating the machine. Problem The machine does not turn on. Pages are not installed. properly installed. • If any of these problems persist, turn off the power, pull out the power cord, and contact your sales or - Ricoh SP 213Nw | User Guide - Page 72
when printing images that contain large areas of solid color, which consume a lot of toner. • Use supported types of paper. See page 21 "Supported Paper". • Load paper only as high as the upper limit markings on the paper guide. • Fan the paper well before loading. Also make sure that the edges are - Ricoh SP 213Nw | User Guide - Page 73
Paper Feed Problems Problem Solution Paper gets wrinkles. • Paper is damp. Use paper that has been stored properly. • Paper is too thin. See page 21 "Supported Paper". • If there are gaps between the paper and the paper guides, adjust the paper guides to remove the gaps. The printed paper is - Ricoh SP 213Nw | User Guide - Page 74
6. Troubleshooting Removing Jammed Paper from Tray 1 1. Pull Tray 1 halfway out, and check for jammed paper . DCT024 • Do not shake the removed print cartridge. Doing so can cause remaining toner to leak. • Place the print cartridge on paper or similar material to avoid dirtying your workspace. 72 - Ricoh SP 213Nw | User Guide - Page 75
5. Lifting the guide plate, remove the jammed paper carefully. Paper Feed Problems DCT025 6. Slide the print cartridge in horizontally, and then slowly push it in all the way. Finally, push the cartridge down until it clicks into - Ricoh SP 213Nw | User Guide - Page 76
6. Troubleshooting Removing Jammed Paper from the Bypass Tray • Since the temperature around the guide is high, wait for it to cool before Rear Cover to Remove Jammed Paper • Since the temperature around the guide is high, wait for it to cool before checking for jammed paper. 1. Open the rear - Ricoh SP 213Nw | User Guide - Page 77
2. Open the fusing cover. Paper Feed Problems DCT035 3. Push the levers on the sides down with your thumbs. DCT036 4. Remove the jammed paper carefully. DCT068 5. Push the levers on the sides up with your thumbs. 6. Close the fusing cover. 75 - Ricoh SP 213Nw | User Guide - Page 78
6. Troubleshooting 7. Close the rear cover. DCT023 76 - Ricoh SP 213Nw | User Guide - Page 79
check the condition of the machine. Possible Cause Solution There is a problem with the machine's location. Make sure that the machine is on sure that the paper type setting of the printer driver matches the type of paper loaded. See page 21 "Supported Paper". A non-genuine print cartridge is - Ricoh SP 213Nw | User Guide - Page 80
6. Troubleshooting Printer Problems Problem Solution An error occurs. If an error occurs when printing, change the computer or printer driver settings. • Check the printer icon name does not exceed 32 alphanumeric characters. If it does, shorten it. • Check whether other applications are - Ricoh SP 213Nw | User Guide - Page 81
Printer Problems Print Positions Do Not Match Display Positions If the position of items on the printed page differs from the position displayed on the computer screen, - Ricoh SP 213Nw | User Guide - Page 82
Troubleshooting Error and Status Indicate on the Control Panel The LED on the operation panel indicates the machine status, including any errors. LED Toner and then remove the jammed paper. See page 70 "Paper Feed Problems". Confirm that all the covers are closed completely. Use Web Image - Ricoh SP 213Nw | User Guide - Page 83
turned ON. • The USB cable is not connected. • Check the printer power cord. • Check the printer power switch is on. • Check the USB cable is properly connected Feed Problems". Print Cartridge is near empty. The print cartridge is almost empty. Prepare a new print cartridge. No Toner Toner has - Ricoh SP 213Nw | User Guide - Page 84
6. Troubleshooting Message Printing has been interrupted because of the memory overflow. Waste Toner full No printing is [Resolution:] to reduce the size of data. For details, see the printer driver Help. The waste toner bottle is full. Replace the print cartridge. The print cartridge has not - Ricoh SP 213Nw | User Guide - Page 85
7. Appendix Notes About the Toner • Proper operation cannot be guaranteed if any third-party toner is used. • Depending on printing conditions, there are cases where the printer cannot print the number of sheets indicated in the specifications. 83 - Ricoh SP 213Nw | User Guide - Page 86
tip or tilt the machine during transit. • Toner might spill inside the machine if the machine service representative for information about correct disposal of this machine. Where to Inquire Contact your sales or service representative for further information about the topics included in this manual - Ricoh SP 213Nw | User Guide - Page 87
for Standardization. • Unless a print cartridge is replaced before toner runs out, printing will become impossible. To facilitate cartridge • Print cartridges are not covered by warranty. However, if there is a problem, contact the store where you purchased them. • The supplied print cartridge can - Ricoh SP 213Nw | User Guide - Page 88
. General Function Specifications Configuration Desktop Print process Laser electrostatic transfer Maximum paper size for printing 216 16K (184 × 260 mm), Custom Paper Size • The following paper sizes are supported as custom paper sizes: • Width Tray1: Approximately 100-216 mm (3.9-8.5 inches) Bypass - Ricoh SP 213Nw | User Guide - Page 89
(Width × Depth × Height) 402 × 360 × 165 mm (15.8 × 14.2 × 6.5 inches) Weight (machine body with consumables) Approximately 7.2 kg (16 lb.) or less Printer Function Specifications Printing speed (mainly Europe and Asia) 22 pages per minute (A4) (mainly North America) 23 pages per minute (Letter - Ricoh SP 213Nw | User Guide - Page 90
7. Appendix Resolution 600 × 600 dpi (maximum: 1200 × 600 dpi) First print speed 10 seconds (From the completion of data processing to the completion of paper delivery) Interface • Ethernet (10BASE-T, 100BASE-TX) • USB 2.0 • Wi-Fi Printer language GDI, PCL 88 - Ricoh SP 213Nw | User Guide - Page 91
Trademarks Trademarks Firefox is a registered trademark of the Mozilla Foundation. Microsoft, Windows, Windows Server, Windows Vista, and Internet Explorer are either registered trademarks or trademarks of Microsoft Corporation in the United States and/or other countries. Other product names used - Ricoh SP 213Nw | User Guide - Page 92
7. Appendix • The product names of Windows 8.1 are as follows: Microsoft® Windows® 8.1 Microsoft® Windows® 8.1 Pro Microsoft® Windows® 8.1 Enterprise • The product names of Windows Server 2003 are as follows: Microsoft® Windows Server® 2003 Standard Edition Microsoft® Windows Server® 2003 Enterprise - Ricoh SP 213Nw | User Guide - Page 93
Safety Instructions 7, 9 Installing the driver and software Machine settings 61 Manual IP address 17 Models problems 70 Paper jam 71, 74 POP3 settings 49 Print area 24 Print cartridge 65, 85 Print quality problems 77 Printer function 87 Printer problems 78 R Replace 65 Reports 56 Reset - Ricoh SP 213Nw | User Guide - Page 94
paper size 31 Status indicate 80 Status information 40, 60 Status messages 81 Supported paper 21 System information 40, 60 System settings 42 T Toner 40, 83 Top page 38 Trademarks 89 Tray 1 25 Tray paper settings 42 Troubleshooting 69, 70, 77, 78, 79 W Web Image Monitor 37 Wireless LAN - Ricoh SP 213Nw | User Guide - Page 95
© 2014 - Ricoh SP 213Nw | User Guide - Page 96
EN GB EN US EN AU M213-8620
-
 1
1 -
 2
2 -
 3
3 -
 4
4 -
 5
5 -
 6
6 -
 7
7 -
8
-
9
-
10
-
11
-
12
-
13
-
14
-
15
-
16
-
17
-
18
-
19
-
20
-
21
-
22
-
23
-
24
-
25
-
26
-
27
-
28
-
29
-
30
-
31
-
32
-
33
-
34
-
35
-
36
-
37
-
38
-
39
-
40
-
41
-
42
-
43
-
44
-
45
-
46
-
47
-
48
-
49
-
50
-
51
-
52
-
53
-
54
-
55
-
56
-
57
-
58
-
59
-
60
-
61
-
62
-
63
-
64
-
65
-
66
-
67
-
68
-
69
-
70
-
71
-
72
-
73
-
74
-
75
-
76
-
77
-
78
-
79
-
80
-
81
-
82
-
83
-
84
-
85
-
86
-
87
-
88
-
89
-
90
-
91
-
92
-
93
-
94
-
95
-
96
 |
 |
For safe and correct use, be sure to read Safety Information before
using the machine.
Appendix
Troubleshooting
Maintaining the Machine
Configuring the Machine Using Utilities
Printing Documents
Loading Paper
Guide to the Machine
User Guide