Ricoh SP 213Nw User Guide - Page 64
Tab Settings, Printing the Configuration
 |
View all Ricoh SP 213Nw manuals
Add to My Manuals
Save this manual to your list of manuals |
Page 64 highlights
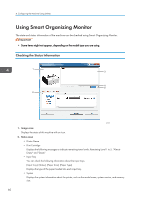
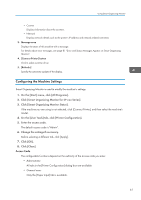
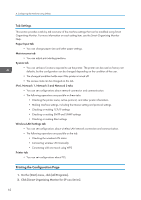
4. Configuring the Machine Using Utilities Tab Settings This section provides a tab-by-tab overview of the machine settings that can be modified using Smart Organizing Monitor. For more information on each setting item, see the Smart Organizing Monitor Help. Paper Input tab • You can change paper size and other paper settings. Maintenance tab • You can adjust print starting positions. System tab • You can set basic functions required to use the printer. The printer can be used on factory-set defaults, but the configuration can be changed depending on the condition of the user. • The changed condition holds even if the printer is turned off. • The access code can be changed on this tab. IPv6, Network 1, Network 2 and Network 3 tabs • You can set configurations about network connection and communication. • The following operations are possible on these tabs: • Checking the printer name, active protocol, and other printer information • Making interface settings, including the timeout setting and protocol settings • Checking or making TCP/IP settings • Checking or making SMTP and SNMP settings • Checking or making Alert settings Wireless LAN Settings tab • You can set configurations about wireless LAN network connection and communication. • The following operations are possible on the tab: • Checking the wireless LAN status • Connecting wireless LAN manually • Connecting with one touch using WPS Printer tab • You can set configurations about PCL. Printing the Configuration Page 1. On the [Start] menu, click [All Programs]. 2. Click [Smart Organizing Monitor for SP xxx Series]. 62
-
 1
1 -
2
-
3
-
4
-
5
-
6
-
7
-
8
-
9
-
10
-
11
-
12
-
13
-
14
-
15
-
16
-
17
-
18
-
19
-
20
-
21
-
22
-
23
-
24
-
25
-
26
-
27
-
28
-
29
-
30
-
31
-
32
-
33
-
34
-
35
-
36
-
37
-
38
-
39
-
40
-
41
-
42
-
43
-
44
-
45
-
46
-
47
-
48
-
49
-
50
-
51
-
52
-
53
-
54
-
55
-
56
-
57
-
58
-
 59
59 -
 60
60 -
 61
61 -
 62
62 -
 63
63 -
 64
64 -
 65
65 -
 66
66 -
 67
67 -
 68
68 -
 69
69 -
70
-
71
-
72
-
73
-
74
-
75
-
76
-
77
-
78
-
79
-
80
-
81
-
82
-
83
-
84
-
85
-
86
-
87
-
88
-
89
-
90
-
91
-
92
-
93
-
94
-
95
-
96
 |
 |