Samsung SCH-R760X User Manual - Page 47
Adding a Facebook account, Adding a Twitter account, Sync Tasks
 |
View all Samsung SCH-R760X manuals
Add to My Manuals
Save this manual to your list of manuals |
Page 47 highlights
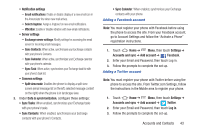
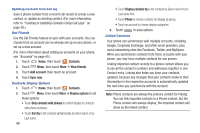
• Notification settings - Email notifications: Enable or disable display of a new email icon in the Annunciator line when new mail arrives. - Select ringtone: Assign a ringtone for new email notifications. - Vibration: Enable or disable vibration with new email notifications. • Server settings - Exchange server settings: Modify settings for accessing the email server for incoming email messages. - Sync Contacts: When active, synchronizes your Exchange contacts with your phone's Contacts. - Sync Calendar: When active, synchronizes your Exchange calendar with your phone's calendar. - Sync Task: When active, synchronizes your Exchange task list with your phone's task list. • Common settings - Split view mode: Enables the phone to display a split view screen (email message list on the left, selected message content on the right) when the phone is in landscape view. 3. Under Data & synchronization, configure these settings: • Sync Tasks: When enabled, synchronizes your Exchange tasks with your phone's tasks. • Sync Contacts: When enabled, synchronizes your Exchange contacts with your phone's Contacts. • Sync Calendar: When enabled, synchronizes your Exchange contacts with your phone. Adding a Facebook account Note: You must register your phone with Facebook before using the phone to access the site. From your Facebook account, go to Account Settings and follow the "Activate a Phone" registration instructions. 1. Touch Home ➔ Menu, then touch Settings ➔ Accounts and sync ➔ Add account ➔ Facebook. 2. Enter your Email and Password, then touch Log in. 3. Follow the prompts to complete the set-up. Adding a Twitter account Note: You must register your phone with Twitter before using the phone to access the site. From Twitter.com Settings, follow the instructions in the Mobile area to register your phone. 1. Touch Home ➔ Menu, then touch Settings ➔ Accounts and sync ➔ Add account ➔ Twitter. 2. Enter your Email and Password, then touch Log in. 3. Follow the prompts to complete the set-up. Accounts and Contacts 43
-
 1
1 -
2
-
3
-
4
-
5
-
6
-
7
-
8
-
9
-
10
-
11
-
12
-
13
-
14
-
15
-
16
-
17
-
18
-
19
-
20
-
21
-
22
-
23
-
24
-
25
-
26
-
27
-
28
-
29
-
30
-
31
-
32
-
33
-
34
-
35
-
36
-
37
-
38
-
39
-
40
-
41
-
 42
42 -
 43
43 -
 44
44 -
 45
45 -
 46
46 -
 47
47 -
 48
48 -
 49
49 -
 50
50 -
 51
51 -
 52
52 -
53
-
54
-
55
-
56
-
57
-
58
-
59
-
60
-
61
-
62
-
63
-
64
-
65
-
66
-
67
-
68
-
69
-
70
-
71
-
72
-
73
-
74
-
75
-
76
-
77
-
78
-
79
-
80
-
81
-
82
-
83
-
84
-
85
-
86
-
87
-
88
-
89
-
90
-
91
-
92
-
93
-
94
-
95
-
96
-
97
-
98
-
99
-
100
-
101
-
102
-
103
-
104
-
105
-
106
-
107
-
108
-
109
-
110
-
111
-
112
-
113
-
114
-
115
-
116
-
117
-
118
-
119
-
120
-
121
-
122
-
123
-
124
-
125
-
126
-
127
-
128
-
129
-
130
-
131
-
132
-
133
-
134
-
135
-
136
-
137
-
138
-
139
-
140
-
141
-
142
-
143
-
144
-
145
-
146
-
147
-
148
-
149
-
150
-
151
-
152
-
153
-
154
-
155
-
156
-
157
-
158
-
159
-
160
-
161
-
162
-
163
-
164
-
165
-
166
-
167
-
168
-
169
-
170
-
171
-
172
-
173
-
174
-
175
-
176
-
177
-
178
-
179
-
180
-
181
-
182
-
183
-
184
-
185
-
186
-
187
-
188
-
189
-
190
-
191
-
192
-
193
-
194
-
195
-
196
-
197
-
198
-
199
-
200
-
201
-
202
-
203
-
204
 |
 |