Sharp LC-45GD6U LC-45GD6U Operation Manual - Page 34
Picture adjustments
 |
UPC - 074000362437
View all Sharp LC-45GD6U manuals
Add to My Manuals
Save this manual to your list of manuals |
Page 34 highlights
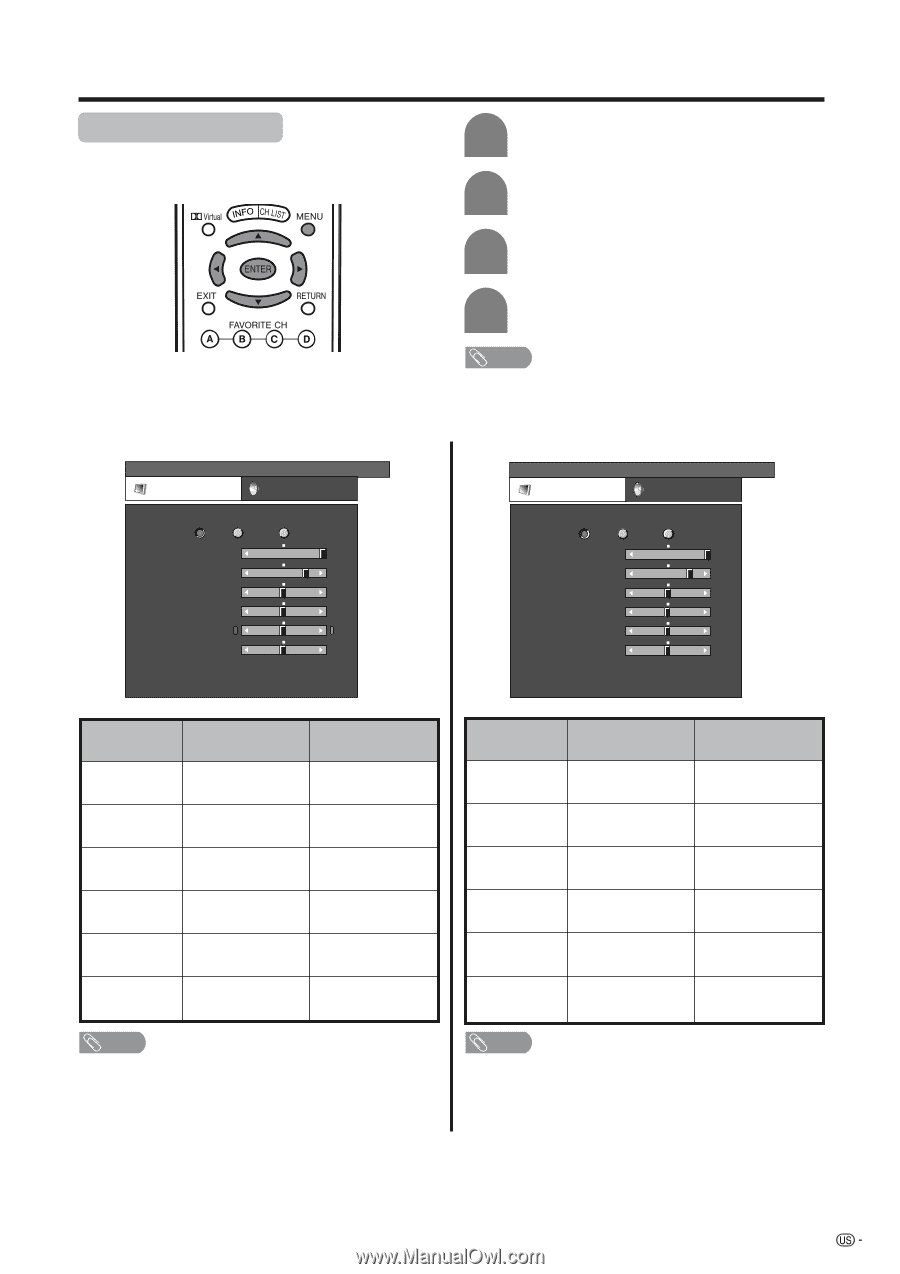
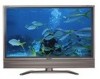
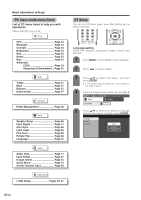
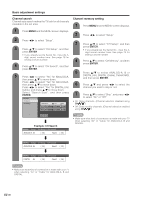
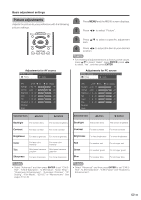
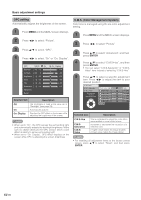
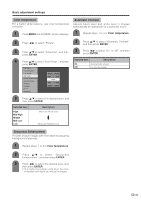
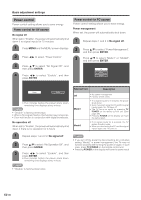
Basic adjustment settings Picture adjustments Adjusts the picture to your preference with the following picture settings. 1 Press MENU and the MENU screen displays. 2 Press c/d to select "Picture". Adjustments for AV source MENU [Picture] Picture Audio OPC Off On Backlight [+16] -16 Contrast [+30] 0 Brightness [ 0] -30 Color [ 0] -30 Tint [ 0] -30 Sharpness [ 0] -10 Advanced Reset On : Display +16 +40 +30 +30 +30 +10 3 Press a/b to select a specific adjustment item. 4 Press c/d to adjust the item to your desired position. NOTE • For resetting all adjustment items to factory preset values, press a/b to select "Reset", press ENTER, press c/d to select "Yes", and then press ENTER. Adjustments for PC source MENU [Picture] Picture Audio OPC Off On Backlight [+16] -16 Contrast [+30] 0 Brightness [ 0] -30 Red [ 0] -30 Green [ 0] -30 Blue [ 0] -30 Advanced Reset On : Display +16 +40 +30 +30 +30 +30 Selected item cbutton dbutton Backlight The screen dims The screen brightens Contrast For less contrast For more contrast Brightness For less brightness For more brightness Color Tint Sharpness For less color intensity For more color intensity Skin tones become Skin tones become purplish greenish For less sharpness For more sharpness Selected item cbutton dbutton Backlight The screen dims The screen brightens Contrast For less contrast For more contrast Brightness For less brightness For more brightness Red For weaker red For stronger red Green Blue For weaker green For stronger green For weaker blue For stronger blue NOTE • Select "Advanced" and then press ENTER to set "C.M.SHue", "C.M.S-Saturation", "C.M.S-Value", "Color Temp.", "Sharpness Enhancement", "Automatic Contrast", "I/P Setting", "Film Mode", "3D-Y/C" or "Monochrome". See pages 34 to 36. NOTE • Select "Advanced" and then press ENTER to set "C.M.SHue", "C.M.S-Saturation", "C.M.S-Value" and "Sharpness Enhancement". 33
-
 1
1 -
2
-
3
-
4
-
5
-
6
-
7
-
8
-
9
-
10
-
11
-
12
-
13
-
14
-
15
-
16
-
17
-
18
-
19
-
20
-
21
-
22
-
23
-
24
-
25
-
26
-
27
-
28
-
 29
29 -
 30
30 -
 31
31 -
 32
32 -
 33
33 -
 34
34 -
 35
35 -
 36
36 -
 37
37 -
 38
38 -
 39
39 -
40
-
41
-
42
-
43
-
44
-
45
-
46
-
47
-
48
-
49
-
50
-
51
-
52
-
53
-
54
-
55
-
56
-
57
-
58
-
59
-
60
-
61
-
62
-
63
-
64
-
65
-
66
-
67
-
68
-
69
-
70
-
71
-
72
-
73
-
74
-
75
-
76
-
77
-
78
-
79
-
80
-
81
-
82
-
83
-
84
-
85
-
86
-
87
-
88
-
89
-
90
-
91
-
92
-
93
-
94
-
95
-
96
-
97
-
98
-
99
-
100
-
101
-
102
-
103
 |
 |