Sharp LC-45GD6U LC-45GD6U Operation Manual - Page 72
Input signal for PC input mode, 3D Noise Reduction, Audio Only
 |
UPC - 074000362437
View all Sharp LC-45GD6U manuals
Add to My Manuals
Save this manual to your list of manuals |
Page 72 highlights
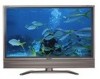
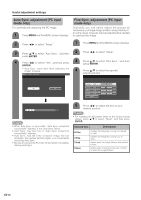
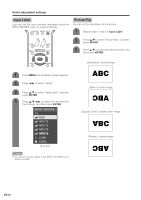
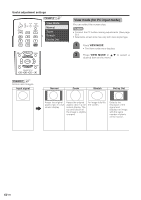
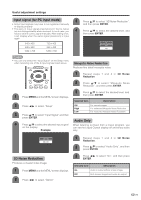
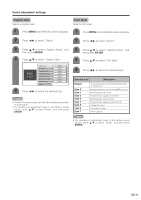
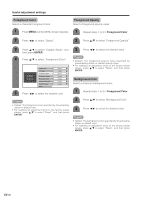
Useful adjustment settings Input signal (for PC input mode) • Some input signals may have to be registered manually to display properly. • The pairs of input signals (resolutions) in the list below are not distinguishable when received. In such case, you have to set the correct signal manually. After setting once, it will display when the same signal (resolution) is input again. 640g400 640g480 1024g768 720g400 848g480 1280g768 3 Press a/b to select "3D Noise Reduction", and then press ENTER. 4 Press a/b to select the desired level, and then press ENTER. Off High Low NOTE • You can only select the "Input Signal" on the Setup menu when receiving one of the 6 input signals listed above. Mosquito Noise Reduction Reduces fine detail mosquito noise. 1 Repeat steps 1 and 2 in 3D Noise Reduction. 2 Press a/b to select "Mosquito Noise Reduction", and then press ENTER. 1 Press MENU and the MENU screen displays. 3 Press a/b to select the desired level, and then press ENTER. Selected item Description 2 Press c/d to select "Setup". Off High For normal images For enhanced Mosquito Noise Reduction Low 3 Press a/b to select "Input Signal" and then press ENTER. For moderate Mosquito Noise Reduction Audio Only 4 Press a/b to select the desired input signal When listening to music from a music program, you on the display. can set the Liquid Crystal display off and enjoy audio Example only. 640 x 480 848 x 480 3D Noise Reduction Produces a clearer video image. 1 Press MENU and the MENU screen displays. 2 Press c/d to select "Option". 1 Repeat steps 1 and 2 in 3D Noise Reduction. 2 Press a/b to select "Audio Only", and then press ENTER. 3 Press c/d to select "On", and then press ENTER. Selected item Description On Audio is output without screen image. Off Both screen images and audio are output. 71
-
 1
1 -
2
-
3
-
4
-
5
-
6
-
7
-
8
-
9
-
10
-
11
-
12
-
13
-
14
-
15
-
16
-
17
-
18
-
19
-
20
-
21
-
22
-
23
-
24
-
25
-
26
-
27
-
28
-
29
-
30
-
31
-
32
-
33
-
34
-
35
-
36
-
37
-
38
-
39
-
40
-
41
-
42
-
43
-
44
-
45
-
46
-
47
-
48
-
49
-
50
-
51
-
52
-
53
-
54
-
55
-
56
-
57
-
58
-
59
-
60
-
61
-
62
-
63
-
64
-
65
-
66
-
 67
67 -
 68
68 -
 69
69 -
 70
70 -
 71
71 -
 72
72 -
 73
73 -
 74
74 -
 75
75 -
 76
76 -
 77
77 -
78
-
79
-
80
-
81
-
82
-
83
-
84
-
85
-
86
-
87
-
88
-
89
-
90
-
91
-
92
-
93
-
94
-
95
-
96
-
97
-
98
-
99
-
100
-
101
-
102
-
103
 |
 |