Sony Ericsson Xperia XZ Premium User Guide - Page 113
Geotagging status icons, Grid lines, Previewing photos, Previewing settings
 |
View all Sony Ericsson Xperia XZ Premium manuals
Add to My Manuals
Save this manual to your list of manuals |
Page 113 highlights
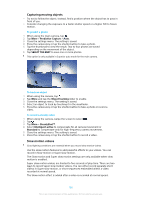
To turn on geotagging 1 When using the camera, tap . 2 Tap More and tap the Save location slider to enable. The setting is saved. Geotagging status icons When geotagging is activated, two different icons show the status and possibility to geotag: The geographical position is saved. The geographical position has not been found. Grid lines With Grid lines, you can apply the "Rule of Thirds" and place important objects along the grid lines or their intersections. By not always having the object in the middle of the frame, you can make your photos and videos more interesting. To activate or deactivate the grid lines 1 When using the camera, tap . 2 Tap More and tap the Grid lines slider to enable or disable. The setting is saved. Previewing photos You can choose to preview photos as soon as you take them. To activate or deactivate previewing 1 When using the camera, tap . 2 Tap More > Auto photo preview and select an option. The setting is saved. Previewing settings On After you take a photo, a preview appears in the lower right corner of the screen for three seconds before it is saved. Only front camera After you take a photo with the front camera, a preview appears in the lower right corner of the screen for three seconds before it is saved. Off No preview appears. The photo is saved directly. Different ways to use the volume key You can change the way you use the volume key. To change how the volume key is used 1 When using the camera, tap . 2 Tap More > Use Volume key as and select an option. The setting is saved. Volume key settings Zoom Use the volume key to zoom in or out. Volume 113 This is an internet version of this publication. © Print only for private use.
-
 1
1 -
2
-
3
-
4
-
5
-
6
-
7
-
8
-
9
-
10
-
11
-
12
-
13
-
14
-
15
-
16
-
17
-
18
-
19
-
20
-
21
-
22
-
23
-
24
-
25
-
26
-
27
-
28
-
29
-
30
-
31
-
32
-
33
-
34
-
35
-
36
-
37
-
38
-
39
-
40
-
41
-
42
-
43
-
44
-
45
-
46
-
47
-
48
-
49
-
50
-
51
-
52
-
53
-
54
-
55
-
56
-
57
-
58
-
59
-
60
-
61
-
62
-
63
-
64
-
65
-
66
-
67
-
68
-
69
-
70
-
71
-
72
-
73
-
74
-
75
-
76
-
77
-
78
-
79
-
80
-
81
-
82
-
83
-
84
-
85
-
86
-
87
-
88
-
89
-
90
-
91
-
92
-
93
-
94
-
95
-
96
-
97
-
98
-
99
-
100
-
101
-
102
-
103
-
104
-
105
-
106
-
107
-
 108
108 -
 109
109 -
 110
110 -
 111
111 -
 112
112 -
 113
113 -
 114
114 -
 115
115 -
 116
116 -
 117
117 -
 118
118 -
119
-
120
-
121
-
122
-
123
-
124
-
125
-
126
-
127
-
128
-
129
-
130
-
131
-
132
-
133
-
134
-
135
-
136
-
137
-
138
-
139
-
140
-
141
-
142
-
143
-
144
-
145
 |
 |
