Sony DAV IS50 Operating Instructions - Page 87
Level Front] Or [level, Test Tone]
 |
UPC - 027242730953
View all Sony DAV IS50 manuals
Add to My Manuals
Save this manual to your list of manuals |
Page 87 highlights
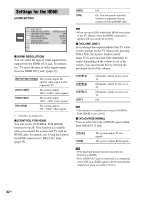
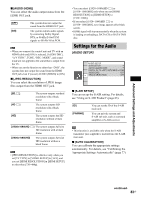
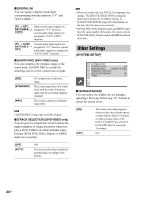
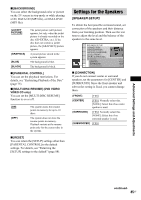
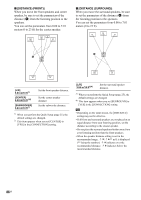
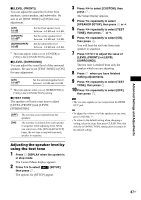
Advanced Settings and Adjustments x [LEVEL (FRONT)] You can adjust the sound level of the front speakers, center speaker, and subwoofer. Be sure to set [TEST TONE] to [ON] for easy adjustment. [L/R] 0.0 dB [CENTER] 0.0 dB5) [SUBWOOFER] 0.0 dB Set the front speaker level between -6.0 dB and +6.0 dB. Set the center speaker level between -6.0 dB and +6.0 dB. Set the subwoofer level between -6.0 dB and +6.0 dB. 5) This item appears when you set [CENTER] to [YES] in the [CONNECTION] setting. x [LEVEL (SURROUND)] You can adjust the sound level of the surround speakers. Be sure to set [TEST TONE] to [ON] for easy adjustment. [L/R] 0.0 dB6) Set the surround speaker level between -6.0 dB and +6.0 dB. 6) This item appears when you set [SURROUND] to [YES] in the [CONNECTION] setting. x [TEST TONE] The speakers will emit a test tone to adjust [LEVEL (FRONT)] and [LEVEL (SURROUND)]. [OFF] [ON] The test tone is not emitted from the speakers. The test tone is emitted from each speaker in sequence while adjusting level. When you select one of the [SPEAKER SETUP] items, the test tone is emitted from each speaker in sequence. 3 Press X/x to select [CUSTOM], then press . The Setup Display appears. 4 Press X/x repeatedly to select [SPEAKER SETUP], then press or c. 5 Press X/x repeatedly to select [TEST TONE], then press or c. 6 Press X/x repeatedly to select [ON], then press . You will hear the test tone from each speaker in sequence. 7 Press C/X/x/c to adjust the value of [LEVEL (FRONT)] or [LEVEL (SURROUND)]. The test tone is emitted from only the speaker which you are adjusting. 8 Press when you have finished making adjustments. 9 Press X/x repeatedly to select [TEST TONE], then press . 10 Press X/x repeatedly to select [OFF], then press . Note • The test tone signals are not output from the HDMI OUT jack. Tip • To adjust the volume of all the speakers at one time, press VOLUME +/-. • To return to the default setting when changing a setting, select the item, then press CLEAR. Note that only the [CONNECTION] setting does not return to the default setting. Adjusting the speaker level by using the test tone 1 Press DISPLAY when the system is in stop mode. The Control Menu display appears. 2 Press X/x to select [SETUP], then press . The options for [SETUP] appear. 87US
-
 1
1 -
2
-
3
-
4
-
5
-
6
-
7
-
8
-
9
-
10
-
11
-
12
-
13
-
14
-
15
-
16
-
17
-
18
-
19
-
20
-
21
-
22
-
23
-
24
-
25
-
26
-
27
-
28
-
29
-
30
-
31
-
32
-
33
-
34
-
35
-
36
-
37
-
38
-
39
-
40
-
41
-
42
-
43
-
44
-
45
-
46
-
47
-
48
-
49
-
50
-
51
-
52
-
53
-
54
-
55
-
56
-
57
-
58
-
59
-
60
-
61
-
62
-
63
-
64
-
65
-
66
-
67
-
68
-
69
-
70
-
71
-
72
-
73
-
74
-
75
-
76
-
77
-
78
-
79
-
80
-
81
-
 82
82 -
 83
83 -
 84
84 -
 85
85 -
 86
86 -
 87
87 -
 88
88 -
 89
89 -
 90
90 -
 91
91 -
 92
92 -
93
-
94
-
95
-
96
-
97
-
98
-
99
-
100
-
101
-
102
-
103
-
104
-
105
-
106
-
107
-
108
-
109
-
110
-
111
-
112
-
113
-
114
-
115
 |
 |
