Sony DCR-IP5 Operating Instructions - Page 14
Getting started, Using this manual - micromv
 |
UPC - 027242597945
View all Sony DCR-IP5 manuals
Add to My Manuals
Save this manual to your list of manuals |
Page 14 highlights
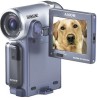
- Getting started - Using this manual The instructions in this manual are for the two models listed in the table below. Before you start reading this manual and operating your camcorder, check the model number by looking at the bottom of your camcorder (The DCR-IP7BT is marked as "DCR-IP7" on the bottom of the unit). The DCR-IP7BT is the model used for illustration purposes. Otherwise, the model name is indicated in the illustrations. Any differences in operation are clearly indicated in the text, for example, "DCR-IP7BT only." As you read through this manual, buttons and settings on your camcorder are shown in capital letters. e.g. Set the POWER switch to CAMERA. When you carry out an operation, you can hear a beep or melody sound to indicate that the operation is being carried out. Type of difference DCRMEMORY/NETWORK mark1) (on the POWER switch) IP5 IP7BT - z z Provided - Not provided 1) The models with MEMORY/NETWORK marked on the POWER switch is provided with memory and network functions. See page 162 for details. Note on the MICROMV format Your camcorder is based on the MICROMV format. You can only use MICROMV cassettes with your camcorder. •Records and plays back for about 60 minutes with equal quality when compared to DV (digital video). •The Micro Cassette Memory feature is provided with all MICROMV cassettes. The camcorder can access any scene easily using the memory (Multi-picture search function). •Adopts the MPEG2 format as a data compression method. This format is the same as the one for DVD (digital video disc). Note on TV color systems TV color systems differ from country to country. To view your recordings on a TV, you need an NTSC system-based TV. Copyright precautions Television programs, films, video tapes, and other materials may be copyrighted. Unauthorized recording of such materials may be contrary to the provision of the copyright laws. 14
-
 1
1 -
2
-
3
-
4
-
5
-
6
-
7
-
8
-
 9
9 -
 10
10 -
 11
11 -
 12
12 -
 13
13 -
 14
14 -
 15
15 -
 16
16 -
 17
17 -
 18
18 -
 19
19 -
20
-
21
-
22
-
23
-
24
-
25
-
26
-
27
-
28
-
29
-
30
-
31
-
32
-
33
-
34
-
35
-
36
-
37
-
38
-
39
-
40
-
41
-
42
-
43
-
44
-
45
-
46
-
47
-
48
-
49
-
50
-
51
-
52
-
53
-
54
-
55
-
56
-
57
-
58
-
59
-
60
-
61
-
62
-
63
-
64
-
65
-
66
-
67
-
68
-
69
-
70
-
71
-
72
-
73
-
74
-
75
-
76
-
77
-
78
-
79
-
80
-
81
-
82
-
83
-
84
-
85
-
86
-
87
-
88
-
89
-
90
-
91
-
92
-
93
-
94
-
95
-
96
-
97
-
98
-
99
-
100
-
101
-
102
-
103
-
104
-
105
-
106
-
107
-
108
-
109
-
110
-
111
-
112
-
113
-
114
-
115
-
116
-
117
-
118
-
119
-
120
-
121
-
122
-
123
-
124
-
125
-
126
-
127
-
128
-
129
-
130
-
131
-
132
-
133
-
134
-
135
-
136
-
137
-
138
-
139
-
140
-
141
-
142
-
143
-
144
-
145
-
146
-
147
-
148
-
149
-
150
-
151
-
152
-
153
-
154
-
155
-
156
-
157
-
158
-
159
-
160
-
161
-
162
-
163
-
164
-
165
-
166
-
167
-
168
-
169
-
170
-
171
-
172
-
173
-
174
-
175
-
176
-
177
-
178
-
179
-
180
-
181
-
182
-
183
-
184
-
185
-
186
-
187
-
188
-
189
-
190
-
191
-
192
-
193
-
194
-
195
-
196
 |
 |