Sony DCR-TRV70 Operating Instructions
Sony DCR-TRV70 - Digital Handycam Camcorder Manual
 |
View all Sony DCR-TRV70 manuals
Add to My Manuals
Save this manual to your list of manuals |
Sony DCR-TRV70 manual content summary:
- Sony DCR-TRV70 | Operating Instructions - Page 1
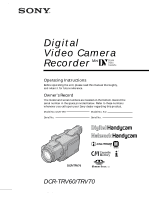
081-414-11(1) Digital Video Camera Recorder Operating Instructions Before operating the unit, please read this manual thoroughly, and your Sony dealer regarding this product. Model No. DCR-TRV Model No. AC- Serial No. Serial No. TM SERIES DCR-TRV70 DCR-TRV60/TRV70 ©2003 Sony Corporation - Sony DCR-TRV70 | Operating Instructions - Page 2
) instructions in the literature accompanying the appliance. CAUTION The use of optical instruments with this product will increase eye hazard. As the laser beam used in this Handycam is harmful to eyes, do not attempt to disassemble the cabinet. Refer servicing to qualified personnel only. For - Sony DCR-TRV70 | Operating Instructions - Page 3
Name: SONY Model No.: DCR-TRV70 Responsible Party: Sony Electronics not expressly approved in this manual could void your authority to comply with the limits for a Class B digital device, pursuant to Part 15 of the used in accordance with the instructions, may cause harmful interference - Sony DCR-TRV70 | Operating Instructions - Page 4
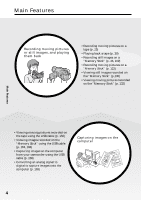
moving pictures recorded on the tape using the USB cable (p. 156) •Viewing images recorded on the "Memory Stick" using the USB cable (p. 163, 168) •Capturing images on the computer from your camcorder using the USB cable (p. 158) •Converting an analog signal to digital to capture images onto the - Sony DCR-TRV70 | Operating Instructions - Page 5
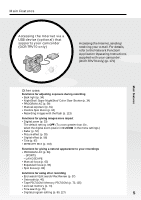
Accessing the Internet via a USB device (optional) that supports your camcorder (DCR-TRV70 only) Accessing the Internet, sending/ receiving your e-mail. For details, refer to the Network Function/ Application Operating Instructions supplied with your camcorder. (DCR-TRV70 only) (p. 171) Main - Sony DCR-TRV70 | Operating Instructions - Page 6
manual 12 Using the viewfinder 69 Checking supplied accessories 14 Step 1 Preparing the power source ..... 15 Advanced Playback Installing or removing the battery Operations pack 15 Charging the battery only desired scenes - Digital program editing (on a tape 80 Recording video or TV - Sony DCR-TRV70 | Operating Instructions - Page 7
Network function (DCR-TRV70 only) Accessing the network 171 For details, refer to the Network Function/Application Operating Instructions supplied with your camcorder. Customizing Your Camcorder Changing the menu settings 172 Troubleshooting Types of trouble and how to correct trouble 183 Self - Sony DCR-TRV70 | Operating Instructions - Page 8
Quick Start Guide - Recording on a tape Connecting the power cord Use the battery pack when using your camcorder outdoors (p. 15). 2 Open the DC IN jack the cassette. Insert the cassette into the cassette compartment with the window facing up. 3 Close the cassette compartment by pressing on - Sony DCR-TRV70 | Operating Instructions - Page 9
the supplied stylus (DCRTRV70 only) supporting the LCD panel from the back side of it. Do not press the LCD screen with sharp-pointed objects other than the supplied stylus (DCR-TRV70 only). Do not pick up your camcorder by holding parts as illustrated. Viewfinder LCD panel Battery pack Flash 9 - Sony DCR-TRV70 | Operating Instructions - Page 10
Quick Start Guide - Recording on a "Memory Stick" Connecting the power cord Use the battery pack when using your camcorder outdoors (p. 15). Open the DC IN jack cover. 2 3 AC Adaptor 1 (supplied) Connect the plug with its v mark facing up. Inserting a "Memory Stick" (p. 104) Insert a "Memory - Sony DCR-TRV70 | Operating Instructions - Page 11
Guide Recording still images on a "Memory Stick" (p. 109) 1 Remove the lens the "Memory Stick." 1600 FINE 12 1600 FINE PHOTO PHOTO When you purchase your camcorder, the date and time are not set for the camcorder by holding parts as illustrated. Viewfinder LCD panel Battery pack Flash 11 - Sony DCR-TRV70 | Operating Instructions - Page 12
- Getting Started - Using this manual The instructions in this manual are for the two models listed in the table below. Before you start reading this manual and operating your camcorder, check the model number by looking at the bottom of your camcorder. The DCR-TRV70 is the model used for - Sony DCR-TRV70 | Operating Instructions - Page 13
Started Using this manual Precautions on connecting with other equipment When connecting your camcorder to another equipment such as the VCR or the computer with the USB cable or i.LINK cable, be sure to confirm the insert direction of the connector plug before connecting your camcorder to another - Sony DCR-TRV70 | Operating Instructions - Page 14
5 Size AA (R6) battery for Remote Commander (2) (p. 216) 6 Shoulder strap (1) 7 Lens cap (1) (p. 25) 8 Lens hood (1) (p. 32) 9 "Memory Stick" (1) (p. 102) 0 USB cable (1) (p. 143) qa CD-ROM (SPVD-010 USB Driver) (1) (p. 148) qs Cleaning cloth (1) (p. 203) qd Stylus (1) (DCR-TRV70 only) (p. 171) qf - Sony DCR-TRV70 | Operating Instructions - Page 15
Lift up the viewfinder. (2) Slide the battery pack out in the direction of the arrow while pressing BATT down. 1 2 BATT release button 2 If you use the large capacity battery pack If you install the NP-FM70/QM71/QM71D/FM91/QM91/QM91D battery pack on your camcorder, extend and lift up the viewfinder - Sony DCR-TRV70 | Operating Instructions - Page 16
CHARGE lamp turns off (full charge). 5 POWER VCR OFF(CHG) CAMERA MEMORY/ NETWORK CHARGE lamp 3 2 After charging the battery pack Disconnect the AC Adaptor from the DC IN jack on your camcorder. Note Prevent metallic objects from coming into contact with the metal parts of the DC plug of the AC - Sony DCR-TRV70 | Operating Instructions - Page 17
NP-FM91/QM91/QM91D 785 Playing time on the LCD screen 160 335 390 585 Approximate minutes when you use a fully charged battery pack Note Approximate recording time and continuous playing time at 25°C (77°F). The battery life will be shorter if you use your camcorder in a cold environment. 17 - Sony DCR-TRV70 | Operating Instructions - Page 18
viewfinder are displayed for about seven seconds. If you keep pressing DISPLAY/BATT INFO, the indicator is displayed for about 20 seconds. 3 DISPLAY/ BATT INFO BATTERY INFO BATTERY CHARGE LEVEL 0% 50% 100% REC TIME AVAILABLE LCD SCREEN : 80 min VIEWFINDER : 100 min During charging - Sony DCR-TRV70 | Operating Instructions - Page 19
has been turned off. Notes •The AC Adaptor can supply power from a wall outlet even if the battery pack is attached to your camcorder. •The DC IN jack has "source priority." This means that the battery pack cannot supply any power if the power cord is connected to the DC IN jack, even - Sony DCR-TRV70 | Operating Instructions - Page 20
tape or the "Memory Stick" as the data code. If you do not use your camcorder battery installed in your camcorder will have been discharged (p. 204). In this case, charge the built-in rechargeable battery 3 FN 5 SETUP MENU EXIT CLOCK SET --:--:-- USB STREAM LANGUAGE DEMO MODE r R EXEC RET. - Sony DCR-TRV70 | Operating Instructions - Page 21
Getting Started Step 2 Setting the date and time To return to FN (Function) Press EXIT. When using your camcorder abroad Set the clock to the local time (p. 22). If you use your camcorder in an area where daylight saving time is used Set DST SET in to ON in the menu settings. Note - Sony DCR-TRV70 | Operating Instructions - Page 22
Step 2 Setting the date and time Simple setting of clock by time difference You can easily set the clock to the local time by setting a time difference. Select AREA SET and DST SET* in in the menu settings. See page 181 for details. * Instead of DST, SUMMERTIME is displayed on the screen for some - Sony DCR-TRV70 | Operating Instructions - Page 23
touch panel Your camcorder has operation buttons on the LCD screen. Touch the LCD screen directly with your finger or the supplied stylus (DCR-TRV70 only) to operate . (5) Press a desired operation item. See relevant pages of this manual for each function. 3 When the POWER switch is set to CAMERA - Sony DCR-TRV70 | Operating Instructions - Page 24
supplied stylus (DCR-TRV70 only) supporting the LCD DCR-TRV70 only) •Do not press the LCD screen too hard. •Do not touch the LCD screen with wet hands. •If FN is not on the LCD screen, touch the LCD screen lightly to make it appear. You can control the display with DISPLAY/BATT INFO on your camcorder - Sony DCR-TRV70 | Operating Instructions - Page 25
"Step 1" and "Step 2" (p. 15 to 22) beforehand. (1) Remove the lens cap and pull the lens cap string to fix it. (2) Prepare the power source (p. 15 to 19) you record with the self-timer, your camcorder automatically starts recording on a tape after counting down for about 10 seconds. See page 48 - Sony DCR-TRV70 | Operating Instructions - Page 26
• Be careful not to touch the microphone. If you leave your camcorder in standby for five minutes while the cassette is inserted Your camcorder automatically turns off. This is to save battery power and to prevent the battery pack and tape from wearing. To return to standby, set the POWER switch to - Sony DCR-TRV70 | Operating Instructions - Page 27
Recording - Basics Recording a picture Indicators displayed during recording Indicators are not recorded on the tape. Remaining battery time Cassette Memory This appears when using a cassette with Cassette Memory. Recording mode STBY/REC 50min REC 0:00:01 45min JUL 4 2003 12:05:56PM - Sony DCR-TRV70 | Operating Instructions - Page 28
LCD screen except in the mirror mode, the viewfinder automatically turns off. •When you turn the LCD panel over and move it back to your camcorder body with the LCD screen facing out during recording or recording standby, the brightness of the LCD screen is fix to BRT NORMAL. When monitoring - Sony DCR-TRV70 | Operating Instructions - Page 29
Recording - Basics Recording a picture Shooting with the mirror mode This feature allows the camera subject to view him-or herself on the LCD screen. The subject uses this feature to check his or her own image on the LCD screen while you look at the subject in the viewfinder. Picture in the mirror - Sony DCR-TRV70 | Operating Instructions - Page 30
indicator To return to FN Press EXIT. LCD screen backlight You can change the brightness of the backlight. Select LCD B.L. in settings when using the battery pack (p. 175). Even if you adjust LCD BRT or LCD B.L. The recorded picture will not be affected. in the menu 30 - Sony DCR-TRV70 | Operating Instructions - Page 31
into sharp focus. Lift up the viewfinder and move the viewfinder lens adjustment lever. The viewfinder lens adjustment lever Viewfinder backlight You can change the brightness of the backlight. Select VF B.L. in settings when using the battery pack (p. 175). in the menu Even if you adjust VF - Sony DCR-TRV70 | Operating Instructions - Page 32
fine pictures under strong light, we recommend attaching the lens hood. Also the lens cap can be attached even with the lens hood on. Note You cannot attach filters or other objects onto the lens hood. If you forcibly attach these objects onto the lens hood, you will no longer be able to remove - Sony DCR-TRV70 | Operating Instructions - Page 33
the focus is sharp. You can shoot a subject that is at least about 80 cm (about 2 5/8 feet) away from the lens surface in the telephoto position, or about 1 cm (about 1/2 inch) away in the wide-angle position. When the POWER switch is set to MEMORY You cannot use the digital zoom. 33 - Sony DCR-TRV70 | Operating Instructions - Page 34
on the screen. BACK LIGHT To cancel the back light function Press BACK LIGHT again. When shooting backlit subjects If you set EXPOSURE to MANUAL (p. 61) or select SPOT METER (p. 62), the back light function will be canceled. Shooting in the dark - NightShot/Super NightShot/Color Slow Shutter Using - Sony DCR-TRV70 | Operating Instructions - Page 35
. •While recording using the NightShot Light, attaching the lens hood may block the NightShot Light. Remove the lens hood when you use the NightShot Light. •If focusing is difficult while recording using NightShot, focus manually. •While recording using the NightShot Light, do not obstruct - Sony DCR-TRV70 | Operating Instructions - Page 36
Light is about 3 m (10 feet). •Attaching the lens hood (supplied) or a conversion lens (optional) may obstruct the infrared rays. While using Color Slow Shutter, you cannot use the following functions: - Fader - Digital effect - PROGRAM AE - Manual exposure - Flexible Spot Meter - Recording with the - Sony DCR-TRV70 | Operating Instructions - Page 37
search/Edit search/Rec Review You can use these SCH. The last five seconds of the recorded section is played back and your camcorder returns to standby. To return to FN Press EXIT. To cancel end search after you have recorded on the tape. If you use a cassette with Cassette Memory, End search works even - Sony DCR-TRV70 | Operating Instructions - Page 38
Checking recordings - End search/Edit search/Rec Review Edit search You can search for the next recording begins from the point you released EDITSEARCH. 7 - :To go backwards + :To go forwards Rec Review You can check the last recorded section. (1) Set the POWER switch to CAMERA. (2) Press the 7 - Sony DCR-TRV70 | Operating Instructions - Page 39
can also control playback using the Remote Commander supplied with your camcorder. (1) Set the POWER switch to VCR while pressing the small green button. (2) Press OPEN to open the LCD panel. (3) Press to rewind the tape. (4) Press to start playback. (5) Adjust the volume following the steps below - Sony DCR-TRV70 | Operating Instructions - Page 40
INFO or DISPLAY on the Remote Commander again. DISPLAY DATA CODE DISPLAY/ BATT INFO About date/time and various settings Your camcorder automatically records not only images on the tape but also the recording data (date/time or various settings when recorded) (Data code). Follow the steps below to - Sony DCR-TRV70 | Operating Instructions - Page 41
, the various settings are not displayed. When you use data code, bars (-- -- --) appear if: - A blank portion of the tape is being played back. - The tape is unreadable due to tape damage or noise. - The tape was recorded by a camcorder without the date and time set. Data code When you connect your - Sony DCR-TRV70 | Operating Instructions - Page 42
while fastforwarding or rewinding the tape (skip scan) Keep pressing while fastforwarding or while rewinding the tape. To resume fastforwarding or rewinding recorded section is played back, then your camcorder stops. * Press ** Press to pause playback. Press to resume normal playback. to - Sony DCR-TRV70 | Operating Instructions - Page 43
are different from those on the Remote Commander supplied with your camcorder. On your camcorder: To play back or pause the tape To stop the tape To rewind the tape To fastforward the tape To play back the tape slowly To forward one frame at a time To rewind one frame at a time To play back - Sony DCR-TRV70 | Operating Instructions - Page 44
When viewing the playback picture on the TV screen, we recommend that you power your camcorder from a wall outlet using the AC Adaptor. Refer to the operating instructions of your TV. Open the jack cover. Connect your camcorder to the TV with the A/V connecting cable. Then set the TV/VCR selector on - Sony DCR-TRV70 | Operating Instructions - Page 45
not need to connect the yellow (video) plug of the A/V connecting cable. Connect the S video cable (optional) to the S video jacks on both your camcorder and the equipment to be connected. This connection produces higher quality DV format pictures. •The sound is not output on the other equipment if - Sony DCR-TRV70 | Operating Instructions - Page 46
Recording still images on a "Memory Stick" during tape recording standby or tape recording Insert a "Memory Stick" into your camcorder beforehand. During tape recording standby The POWER switch should be set to . (1) Keep pressing PHOTO lightly until a still image appears. The CAPTURE indicator - Sony DCR-TRV70 | Operating Instructions - Page 47
recording (p. 109). While and after recording still images on the "Memory Stick" Your camcorder continues recording on the tape. When you press PHOTO on the Remote Commander Your camcorder immediately records the image that is on the screen when you press the button. To record still images on - Sony DCR-TRV70 | Operating Instructions - Page 48
still images or moving pictures using the self-timer. You can also use the Remote Commander for this operation. START/STOP PHOTO PHOTO START/STOP Recording on a tape The POWER switch should be set to . Operate by touching the panel. (1) During standby, press FN and select PAGE2. (2) Press - Sony DCR-TRV70 | Operating Instructions - Page 49
PAGE1. (2) Press MENU. (3) Select WHT BAL in , then press EXEC. MANUAL SET PROGRAM AE P EFFECT RED EYE R FLASH LVL WHT BAL SHARPNESS AUTO SHTR get better adjustment when: - You remove the battery pack for replacement. - You bring your camcorder outdoors from the interior of a house holding the - Sony DCR-TRV70 | Operating Instructions - Page 50
You can enjoy recording with wider angles compared to the normal tape recording while the power zoom lever is moved to the "W" normal TV appears the same as the picture played back in the wide mode on your camcorder [a]. [a] [b] [d] 16:9WIDE [c] The POWER switch should be set to . Operate by - Sony DCR-TRV70 | Operating Instructions - Page 51
Recording Mode •Pictures recorded in the wide mode on the tape cannot be changed to normal size. Connection for a TV Pictures recorded in the 16:9WIDE mode automatically appear on the TV screen at full size when: - You connect your camcorder to a TV compatible with the video ID (ID-1/ID-2) system - Sony DCR-TRV70 | Operating Instructions - Page 52
Using the fader function You can fade in or out to give your recording a professional appearance. [a] STBY NORM. FADER (normal) REC MOSC. FADER (mosaic) BOUNCE1) 2) OVERLAP2) WIPE2) DOT2) [b] STBY REC MONOTONE When fading in, the picture gradually changes from black-and-white to color. - Sony DCR-TRV70 | Operating Instructions - Page 53
PAGE1. (5) Press EXIT to return to FN. The fader indicator you selected flashes. (6) Press START/STOP. After the fade in/out is carried out, your camcorder automatically returns to the normal mode. 2 FADER FADER OFF OK NORM. MOSC. BOUN- FADER FADER CE MONO- OVER- W I PE DOT TONE LAP START/STOP - Sony DCR-TRV70 | Operating Instructions - Page 54
using following functions: - Super NightShot - Color Slow Shutter - Digital effect - Recording with the flash - Interval Recording - Frame recording When you select OVERLAP, WIPE or DOT Your camcorder automatically stores the image recorded on the tape. As the image is being stored, the image on the - Sony DCR-TRV70 | Operating Instructions - Page 55
POWER switch should be set to . Operate by touching the panel. (1) Press FN to display PAGE1. (2) Press MENU. (3) Select P EFFECT in , then press EXEC. MANUAL SET PROGRAM AE P EFFECT RED EYE R FLASH LVL WHT BAL SHARPNESS AUTO SHTR EXIT OFF NEG. ART SEPIA B&W SOLARIZE PASTEL MOSAIC EXEC RET - Sony DCR-TRV70 | Operating Instructions - Page 56
Using special effects - Digital effect SLOW SHTR (slow shutter) You can slow down the on a moving picture. OLD MOVIE You can add an old movie type atmosphere to pictures. Your camcorder automatically sets the 16:9WIDE mode to ON, picture effect to SEPIA, and sets the appropriate shutter speed - Sony DCR-TRV70 | Operating Instructions - Page 57
The POWER switch should be set to . Operate by touching the panel. (1) Press FN and select PAGE2. (2) Press DIG EFFT. The screen to select a digital effect is displayed. (3) Press a desired mode. When you select STILL or LUMI., the still image when you have selected the mode is stored in memory - Sony DCR-TRV70 | Operating Instructions - Page 58
SLOW SHTR 2 SLOW SHTR 3 SLOW SHTR 4 Shutter speed 1/30 1/15 1/8 1/4 Notes • While using digital effect, you cannot use the following functions: - Super NightShot - Color Slow Shutter - Fader • PROGRAM AE in the SLOW SHTR mode Autofocus may not be effective. Focus manually using a tripod. 58 - Sony DCR-TRV70 | Operating Instructions - Page 59
** This mode is for when you are recording distant subjects such as mountains. Also it prevents your camcorder from focusing on glass or metal mesh in windows when you are recording a subject behind glass or a screen. * Your camcorder focuses only on subjects in the middle to far distance. ** Your - Sony DCR-TRV70 | Operating Instructions - Page 60
be set to or . Operate by touching the panel. (1) Press FN to display PAGE1. (2) Press MENU. (3) Select PROGRAM AE in , then press EXEC. MANUAL SET PROGRAM AE P EFFECT RED EYE R FLASH LVL WHT BAL SHARPNESS AUTO SHTR EXIT AUTO SPOTLIGHT PORTRAIT SPORTS BEACH&SKI SUNSETMOON LANDSCAPE EXEC RET - Sony DCR-TRV70 | Operating Instructions - Page 61
to or . Operate by touching the panel. (1) Press FN to display PAGE1. (2) Press EXPOSURE. The screen to adjust the exposure appears. (3) Press MANUAL. (4) Adjust the exposure using - (to dim) /+ (to brighten). (5) Press OK to return to PAGE1. 2 4 EXPO- AUTO OK AUTO OK SURE MANU- MANU - Sony DCR-TRV70 | Operating Instructions - Page 62
Using the spot light-metering function - Flexible Spot Meter You can take a picture with the appropriate exposure automatically adjusted for just the point you want to focus on and with its exposure fixed. Use Flexible Spot Meter in the following cases: - The subject is backlit. - When there is - Sony DCR-TRV70 | Operating Instructions - Page 63
focus is automatically adjusted. When the POWER switch is set to MEMORY, you can adjust the focus manually with the image enlarged to twice the size (Expanded focus). Adjust the focus manually in the following cases: •The autofocus mode is not effective when shooting: - Subjects through glass coated - Sony DCR-TRV70 | Operating Instructions - Page 64
Focusing manually To focus precisely It is easier to focus on the subject if you adjust on the screen in the following cases: - When switching the focus adjustment mode from autofocus to manual. - When turning the focus ring. Focal distance information You cannot get correct information if you have - Sony DCR-TRV70 | Operating Instructions - Page 65
Advanced Recording Operations Using the spot focus function - Spot Focus You can take a picture with the appropriate focus automatically adjusted for just the point you want to focus on and with its focus fixed. The POWER switch should be set to or . Operate by touching the panel. (1) Press - Sony DCR-TRV70 | Operating Instructions - Page 66
Recording You can make a time-lapse recording by setting your camcorder to automatically record and switch to standby sequentially. You can achieve . (11) Press EXIT to return to FN. The INTERVAL TAPE indicator flashes on the screen. (12) Press START/STOP to start Interval Recording. The INTERVAL - Sony DCR-TRV70 | Operating Instructions - Page 67
display PAGE1. (2) Press MENU. (3) Select FRAME REC in , then press EXEC. TAPE SET EXIT REC MODE AUD I O MODE REMAIN FRAME REC OFF I NT. REC lights up. (6) Press START/STOP to start frame recording. Your camcorder makes a recording for about six frames, and returns to recording standby - Sony DCR-TRV70 | Operating Instructions - Page 68
To import moving pictures to your computer to view still images, we tape in normal mode, and thus are more suitable for analyzing high-speed action such as sports scenes. (Since your camcorder Mode, you cannot use the following functions: - Digital Zoom - Wide mode - BOUNCE - Slow Shutter - - Sony DCR-TRV70 | Operating Instructions - Page 69
Turn the LCD panel over and move it back to your camcorder body with the LCD screen facing out. You can operate . Operate by touching the panel. (1) Turn the LCD panel over and move it back to your camcorder body with the LCD screen facing out. (2) Press OFF. The PANEL OFF indicator appears on the - Sony DCR-TRV70 | Operating Instructions - Page 70
Using the viewfinder Note When the POWER switch is set to VCR or during memory playback, you cannot operate with the touch panel using the viewfinder. To operate the items that do not appear Set the LCD panel back to the normal position. Operate the items using the LCD screen. Available recording - Sony DCR-TRV70 | Operating Instructions - Page 71
Press EXIT. To cancel picture effect Set P EFFECT to OFF. Notes •You cannot process externally input scenes using picture effect. •You cannot record images processed with picture effect on the tape on your camcorder. Record the processed images on the "Memory Stick" (p. 116, 125), or on a VCR using - Sony DCR-TRV70 | Operating Instructions - Page 72
TRAIL To return to FN Press EXIT. To cancel digital effect Press OFF to return to PAGE2. Notes • You cannot process externally input scenes using digital effect. • You cannot record images processed with digital effect on the tape on your camcorder. Record the processed images on the "Memory Stick - Sony DCR-TRV70 | Operating Instructions - Page 73
PB ZOOM END Advanced Playback Operations To cancel tape PB ZOOM Press END. Notes •You cannot process externally input scenes using tape PB ZOOM with your camcorder. •You cannot record images processed with tape PB ZOOM on the tape on your camcorder. Record the processed images on a "Memory Stick - Sony DCR-TRV70 | Operating Instructions - Page 74
a scene - Zero set memory Your camcorder automatically searches for a desired scene having the tape counter value of "0:00:00". Use SET MEMORY on the Remote Commander at the point you want to locate later. The tape counter shows "0:00:00", then starts counting. If the indicators do not appear, press - Sony DCR-TRV70 | Operating Instructions - Page 75
or > on the Remote Commander to select the title for playback. Your camcorder automatically starts playback of the scene having the title that you selected. 1 for [b] Present point on the tape To cancel searching Press x on the Remote Commander. If the tape has a blank portion between recorded - Sony DCR-TRV70 | Operating Instructions - Page 76
for the date without using Cassette Memory, cue the tape to changing point of recording date. Use the Remote (2) Press . or > on the Remote Commander to select the date for playback. Your camcorder automatically starts playback at the beginning of the selected date. 1 SEARCH MODE 2 DATE SEARCH 1 - Sony DCR-TRV70 | Operating Instructions - Page 77
. To cancel searching Press x on the Remote Commander or on your camcorder. Note If one day's recording is less than two minutes, your camcorder may not accurately find the point where the recording date changes. If the tape has a blank portion between recorded portions Date search may not work - Sony DCR-TRV70 | Operating Instructions - Page 78
Dubbing a tape You can dub or edit on the VCR connected to your camcorder using your camcorder as a player. You can connect either the A/V connecting cable (supplied) or i.LINK cable (optional). If you connect with the i.LINK cable (optional), video and audio signals are transmitted in digital form - Sony DCR-TRV70 | Operating Instructions - Page 79
Pictures processed with picture effect, digital effect or PB ZOOM These instructions of the VCR. (3) Play back the recorded tape on your camcorder. (4) Start recording on the VCR. Refer to the operating instructions of your VCR. When you have finished dubbing the tape Press x on both your camcorder - Sony DCR-TRV70 | Operating Instructions - Page 80
selected by frame. You can set up to 20 programs. Your camcorder can dub on a "Memory Stick." See page 127 for details. Unwanted scene Unwanted scene Switch the order Before operating Digital program editing having the tape recorded on other equipment Step 1 Connecting to the VCR. Step 2 Setting - Sony DCR-TRV70 | Operating Instructions - Page 81
Editing Dubbing only desired scenes - Digital program editing (on a tape) Step 2: Setting the VCR for operation When connecting with the A/V connecting cable, your camcorder sends the control signal by infrared rays to the remote sensor on the VCR. The POWER switch should be set to . Operate by - Sony DCR-TRV70 | Operating Instructions - Page 82
Digital program editing (on a tape) (11) Select PAUSEMODE, then press EXEC. (12) Select the mode to cancel recording pause on the VCR, then press EXEC. The correct button depends on your VCR. Refer to the operating instructions the infrared rays emitter of your camcorder and face it towards the - Sony DCR-TRV70 | Operating Instructions - Page 83
desired scenes - Digital program editing (on a tape) When the VCR does not operate correctly •After checking the code in "About the IR SETUP code," set the IR SETUP or the PAUSEMODE again. •Place your camcorder at least 30 cm (12 in.) away from the VCR. •Refer to the operating instructions of your - Sony DCR-TRV70 | Operating Instructions - Page 84
Dubbing only desired scenes - Digital program editing (on a tape) Step 3: Adjusting the synchronization of the VCR You can adjust the synchronization of your camcorder and the VCR. Prepare a pen and paper for notes. Before operation, eject the cassette from your camcorder (if inserted). The POWER - Sony DCR-TRV70 | Operating Instructions - Page 85
Editing Dubbing only desired scenes - Digital program editing (on a tape) 2 V I DEO ED I T ED I T SET CONTROL ADJ TEST "CUT - I N" "CUT -OUT" I R SETUP PAUSEMODE I R TEST END RETURN EXECUTE ENGAGE REC PAUSE EXEC RET. 6 V I DEO ED I T ED I T SET - Sony DCR-TRV70 | Operating Instructions - Page 86
Dubbing only desired scenes - Digital program editing (on a tape) Operation 1: Making a Program The POWER switch should be set to . Operate by touching the panel. (1) Insert the cassette for playback into your camcorder, and insert a cassette for recording into the VCR. (2) Press FN to display - Sony DCR-TRV70 | Operating Instructions - Page 87
Editing Dubbing only desired scenes - Digital program editing (on a tape) Note You cannot operate recording during Digital program editing. On a blank portion of the tape You cannot set IN or OUT. If there is a blank portion between the IN point and the OUT point on the tape The total time may not - Sony DCR-TRV70 | Operating Instructions - Page 88
) Operation 2: Performing the program (Dubbing on the tape) The POWER switch should be set to . Operate by touching the panel. (1) When you use a digital video camera recorder, set its power switch to VCR/ VTR. (2) Make sure your camcorder and the VCR are connected, and that the VCR is set to - Sony DCR-TRV70 | Operating Instructions - Page 89
tape from another VCR or a TV program from a TV that has video/ audio outputs. Use your camcorder as a recorder. You can connect either the A/V connecting cable (supplied) or i.LINK cable (optional). If you connect with the i.LINK cable (optional), video and audio signals are transmitted in digital - Sony DCR-TRV70 | Operating Instructions - Page 90
want to start recording from. When you have finished dubbing the tape Press on your camcorder, and then press the stop button on the VCR. Using the used to distinguish your camcorder from other Sony VCRs to avoid erroneous remote control operation. If you use another Sony VCR in the commander - Sony DCR-TRV70 | Operating Instructions - Page 91
SET MEMORY indicator flashes and the end point of the insert is stored in memory. The tape counter shows "0:00:00". (4) On your camcorder, locate the insert start point [b] and set your camcorder to recording pause. 1 Press FN and select PAGE3. 2 Press REC CTRL. 3 Press REC PAUSE. (5) First press - Sony DCR-TRV70 | Operating Instructions - Page 92
insert a scene without setting the insert end point Skip Step 2 and 3. Press x on the Remote Commander or when you want to stop inserting. on your camcorder 92 - Sony DCR-TRV70 | Operating Instructions - Page 93
: •The tape recorded in the 16-bit mode •The tape recorded in the LP mode •Connecting with the DV Interface •The blank portions of the tape •When the recorded takes precedence over others in the following order: •MIC jack •Intelligent accessory shoe •AUDIO/VIDEO jack •Built-in microphone Dubbing with - Sony DCR-TRV70 | Operating Instructions - Page 94
shoe Slide the shoe cover to remove it. Then, connect the external microphone (optional) to the intelligent accessory shoe. Microphone (optional) Intelligent Shoe cover accessory shoe Connecting the A/V connecting cable to the AUDIO/VIDEO jack Audio equipment LINE OUT AUDIO L L R AUDIO - Sony DCR-TRV70 | Operating Instructions - Page 95
. Using the touch panel The POWER switch should be set to . Operate by touching the panel. (1) Insert the recorded tape into your camcorder. (2) Locate the recording start point. Press to start playing back. To pause playing back, press at the recording start point. You can fine adjust the - Sony DCR-TRV70 | Operating Instructions - Page 96
on the tape recorded with your camcorder If you add new sound on the tape recorded with another camcorder (including another DCR-TRV60/TRV70), the sound minutes after you disconnect the power source or remove the battery pack, the setting of AUDIO MIX returns to the original sound (ST1) only. - Sony DCR-TRV70 | Operating Instructions - Page 97
Superimposing a title on a cassette with Cassette Memory Editing VACATION One cassette can have up to about 20 titles, with each title comprising five characters. However, if Cassette Memory is full with date and cassette label data, one cassette can have only up to about 11 titles each - Sony DCR-TRV70 | Operating Instructions - Page 98
Superimposing a title on a cassette with Cassette Memory The titles superimposed with your camcorder • They are displayed only by the DV format video equipment with the index titler function. • The point you superimposed the title may be detected as - Sony DCR-TRV70 | Operating Instructions - Page 99
, then press EXEC and enter a new title as desired. If you take five minutes or longer to enter characters during tape recording standby with the cassette inserted in your camcorder The power automatically goes off. The characters you have entered remain stored in memory. Set the POWER switch to OFF - Sony DCR-TRV70 | Operating Instructions - Page 100
by touching the panel. or . (1) Insert a cassette with Cassette Memory you want to label. (2) Press FN to display PAGE1. (3) Press MENU. (4) Select TAPE TITLE in , then press EXEC. (5) Select a desired character. Repeat pressing a key to select a desired character on the key. (6) Press c to move - Sony DCR-TRV70 | Operating Instructions - Page 101
. When erasing is complete, the COMPLETE indicator appears. 3 CM SET TITLE TITLEERASE TITLE DSPL CM SEARCH TAPE TITLE ERASE ALL EXIT RETURN OK EXEC RET. 4 CM SET TITLE TITLEERASE TITLE DSPL CM SEARCH TAPE TITLE ERASE ALL EXIT RETURN EXECUTE EXEC RET. To return to FN Press EXIT. To cancel - Sony DCR-TRV70 | Operating Instructions - Page 102
external recording camcorder. However, because your camcorder does not support the MagicGate standards, data recorded with your camcorder camcorder. DSC00001.JPG: This file name appears on the display of a computer. Moving picture MOV00001: This file name appears on the screen of your camcorder - Sony DCR-TRV70 | Operating Instructions - Page 103
power off on your camcorder or remove the battery pack for replacement while your camcorder is reading or writing image camcorder. The "Memory Stick" formatted by a computer The "Memory Stick" formatted by Windows OS or Macintosh computers do not have a guaranteed compatibility with your camcorder - Sony DCR-TRV70 | Operating Instructions - Page 104
because your camcorder is reading the data from the "Memory Stick" or writing the data on the "Memory Stick." Do not turn the power off, eject the "Memory Stick" or remove the battery pack. Otherwise, image data may become damaged. If " MEMORY STICK ERROR" appears Reinsert the "Memory Stick - Sony DCR-TRV70 | Operating Instructions - Page 105
Selecting the quality and size of image data Selecting the still image quality The default setting is FINE. The POWER switch should be set to Operate by touching the panel. or . (1) Press FN to display PAGE1. (2) Press MENU. (3) Select STILL SET in , then press EXEC. (4) Select QUALITY, then - Sony DCR-TRV70 | Operating Instructions - Page 106
Selecting the quality and size of image data Selecting the still image size You can select image size 1600 × 1200 or 640 × 480. (When the POWER switch is set to CAMERA or VCR, the image size is automatically set to 640 × 480.) The default setting is 1600 × 1200. The POWER switch should be set to - Sony DCR-TRV70 | Operating Instructions - Page 107
Selecting the quality and size of image data Selecting the moving picture size You can select picture size 320 × 240 or 160 × 112. The default setting is 320 × 240. The POWER switch should be set to Operate by touching the panel. or . (1) Press FN to display PAGE1. (2) Press MENU. (3) Select - Sony DCR-TRV70 | Operating Instructions - Page 108
h 22 min 40 s The table shows approximate number of still images and time of moving pictures you can record on a "Memory Stick" formatted with your camcorder. 108 - Sony DCR-TRV70 | Operating Instructions - Page 109
of the image and the focus are adjusted, being targeted for the middle of the image, and are fixed. Recording does not start yet. (2) Press PHOTO deeply. Recording is complete when the bar scroll indicator disappears. The image displayed on the screen when you press - Sony DCR-TRV70 | Operating Instructions - Page 110
Wide mode - Fader - Picture effect - Digital effect - SPORTS of PROGRAM AE (The indicator flashes.) - Title - SteadyShot While saving a still image data You cannot turn off the power or press PHOTO. When you press PHOTO on the Remote Commander Your camcorder immediately records the image that is on - Sony DCR-TRV70 | Operating Instructions - Page 111
Recording still images on a "Memory Stick" - Memory Photo recording Recording images continuously You can record still images continuously. Before recording, select one of the three modes described below in the menu settings. NORMAL [a] ( ) Your camcorder shoots up to four still images in 1600 × - Sony DCR-TRV70 | Operating Instructions - Page 112
When shooting with the self-timer or the Remote Commander Your camcorder automatically records up to the maximum number of still images. When the computer to check the effect. When NORMAL or HIGH SPEED is selected Recording continues up to the maximum number of still images while pressing PHOTO - Sony DCR-TRV70 | Operating Instructions - Page 113
recording Recording images with the flash The POWER switch should be set to or . If you press PHOTO, the flash automatically pops up to strobe. The default setting is auto (no indicator). To change the flash mode, press (flash) repeatedly until the flash - Sony DCR-TRV70 | Operating Instructions - Page 114
. This is because your camcorder starts to charge power for manually. •When the flash pops up, it may be up against the accessory attached to the intelligent accessory shoe depending on the accessory used together. In this case, set the built-in flash to (No flash). When you are using the external - Sony DCR-TRV70 | Operating Instructions - Page 115
thus maintains higher safety for human eyes. No safety problems will be caused by directly looking into the HOLOGRAM directly or even through a lens for 30,000 seconds. Notes •Attaching a conversion lens (optional) may obstruct the - Manual focus - Spot Focus - Continuous photo recording 115 - Sony DCR-TRV70 | Operating Instructions - Page 116
× 480. Before operation Insert a "Memory Stick" and the recorded tape into your camcorder. The POWER switch should be set to . Operate by touching the panel. (1) Press . The picture recorded on the tape is played back. (2) Keep pressing PHOTO lightly and check the image. The picture from the - Sony DCR-TRV70 | Operating Instructions - Page 117
, set DISPLAY in to LCD in the menu settings. (The default setting is LCD.) The POWER switch should be set to . (1) Play back the recorded tape on the VCR, or turn the TV on to see a desired program. The image from the other equipment is displayed on the screen. (2) At the - Sony DCR-TRV70 | Operating Instructions - Page 118
a still image on the tape on which you have already finished recording. You can record the superimposed images on a tape or a "Memory Stick." OVERLAP (Memory Overlap) You can make a moving picture you are recording with your camcorder fade in on top of a still image recorded on the "Memory Stick." - Sony DCR-TRV70 | Operating Instructions - Page 119
screen appears normally without being mirror-reversed. Image data modified with your computer You may not be able to play back the images modified with your computer on your camcorder. The "Memory Stick" supplied with your camcorder stores 20 images: - For M. CHROM: 18 images (such as a frame) 101 - Sony DCR-TRV70 | Operating Instructions - Page 120
. To record still images as-is to the tape Press -/+ on the left lower corner of the the "Memory Stick" containing still images into your camcorder. Image size of still images is automatically set to 1 to 6 on pages 119, 120. (2) Press PHOTO deeply to start recording. Recording is complete when the - Sony DCR-TRV70 | Operating Instructions - Page 121
You can make a time-lapse recording by setting the camcorder to automatically record still images. [a] [a] [a] [b] [b] [a] Memory Photo recording [b] INTERVAL The POWER switch should be set to . Operate by touching the panel. (1) Press FN to display PAGE1. (2) Press MENU. (3) Select - Sony DCR-TRV70 | Operating Instructions - Page 122
sound on a "Memory Stick" (MPEG MOVIE EX). The POWER switch should be set to . Press START/STOP. Your camcorder starts recording. The camera recording lamp located on the front of your camcorder lights up. The picture and sound are recorded up to the remaining capacity of the "Memory Stick." For - Sony DCR-TRV70 | Operating Instructions - Page 123
zoom - Super NightShot - Color Slow Shutter - Wide mode - Fader - Picture effect - Digital effect - SPORTS of PROGRAM AE (The indicator flashes.) - Title - SteadyShot When using an external flash (optional) Turn the power of the external flash off when recording moving pictures on the "Memory Stick - Sony DCR-TRV70 | Operating Instructions - Page 124
. You can also use the Remote Commander for this operation. START/STOP PHOTO PHOTO START/STOP Recording a still image The POWER switch should be set to press START/STOP again. To cancel the self-timer With your camcorder in standby, press SELFTIMER and the (self-timer) indicator disappears - Sony DCR-TRV70 | Operating Instructions - Page 125
appears Sound that cannot be recorded by your camcorder has been recorded. Connect the A/V connecting cable to input images from the external equipment used to play back the image (p. 89). Data Codes recorded on the tape Data Codes recorded on the tape cannot be recorded on the "Memory Stick." The - Sony DCR-TRV70 | Operating Instructions - Page 126
, set DISPLAY in menu settings. (The default setting is LCD.) to LCD in the The POWER switch should be set to . (1) Play back the recorded tape on the VCR, or turn the TV on to see a desired program. The image from the other equipment is displayed on the LCD screen or - Sony DCR-TRV70 | Operating Instructions - Page 127
Operate by touching the panel. (1) Insert the tape for playback, and a "Memory Stick" for recording into your camcorder. (2) Press FN to display PAGE1. (3) . •You cannot operate recording during Digital program editing on the "Memory Stick." On a blank portion of the tape You cannot set IN or OUT. - Sony DCR-TRV70 | Operating Instructions - Page 128
Your camcorder stops when dubbing ends. Then the display returns to VIDEO EDIT in the menu settings. Press END to end Digital program editing function. Note Recording may abort unexpectedly or distorted images may be recorded in the following cases: - When there is a blank portion on the tape - Sony DCR-TRV70 | Operating Instructions - Page 129
can be recorded in each folder. When a folder is full, a new folder is automatically created. •Once a folder is created, it cannot be deleted with your camcorder. •The more folders you have created, the less the remaining capacity of the "Memory Stick" becomes. 129 - Sony DCR-TRV70 | Operating Instructions - Page 130
. The last recorded image is displayed. (2) Press - (to see the previous image)/+ (to see the next image) on your camcorder to select a desired still image. To cancel Memory Photo playback Press CAM. When no file is in the folder The "NO FILE AVAILABLE" indicator appears. Screen indicators during - Sony DCR-TRV70 | Operating Instructions - Page 131
Viewing a still image - Memory Photo playback Playing back six recorded images at a time (index screen) This function is especially useful when searching for a particular image. Press INDEX to display the - Sony DCR-TRV70 | Operating Instructions - Page 132
Viewing a moving picture - MPEG MOVIE playback You can view moving pictures recorded on the "Memory Stick." The POWER switch should be set to . Operate by touching the panel. (1) Press PLAY. The last recorded image appears. (2) Press - (to see the previous picture)/+ (to see the next picture) - Sony DCR-TRV70 | Operating Instructions - Page 133
Viewing a moving picture - MPEG MOVIE playback Playing back a moving picture from a desired part The moving picture recorded on the "Memory Stick" is divided into multiple parts. You can select one of them and start playing back the picture from the scene you want to see. The moving picture is - Sony DCR-TRV70 | Operating Instructions - Page 134
To select the next folder (4) Press EXIT. The images in the playback folder are played back. Note Your camcorder does not recognize folder names created or changed on the computer. Current playback folder The current playback folder is valid until the next recording is made. Once you record an image - Sony DCR-TRV70 | Operating Instructions - Page 135
pictures recorded on the "Memory Stick" Memory PB ZOOM does not work. To record images processed with memory PB ZOOM on the "Memory Stick" Press PHOTO to record images during display. The image size is 640 × 480. 135 - Sony DCR-TRV70 | Operating Instructions - Page 136
*: To play back all the images in the folder selected with PB FOLDER * The folder number is displayed in the sss. (5) Press START. Your camcorder plays back the images recorded on the "Memory Stick" in sequence. When all the images have been played back, slide show automatically stops and the - Sony DCR-TRV70 | Operating Instructions - Page 137
"Memory Stick" Operations Preventing accidental erasure - Image protection To prevent accidental erasure of important images, you can protect selected images. The POWER switch should be set to . Operate by touching the panel. (1) Press INDEX. (2) Press - MARK. The screen to protect the image - Sony DCR-TRV70 | Operating Instructions - Page 138
Deleting images - DELETE You can delete all the images or selected images. Deleting selected images The POWER switch should be set to . Operate by touching the panel. (1) Play back the image you want to delete. (2) Press FN to display PAGE1. (3) Press DEL. The DELETE? indicator appears on the - Sony DCR-TRV70 | Operating Instructions - Page 139
"Memory Stick" Operations Deleting images - DELETE Deleting selected images on the index screen The POWER switch should be set to . Operate by touching the panel. (1) Press INDEX. (2) Press DEL. Then press the image you want to delete. The number of the selected image is highlighted. You can - Sony DCR-TRV70 | Operating Instructions - Page 140
Deleting images - DELETE Deleting all the images You can delete all the unprotected images in the "Memory Stick." The POWER switch should be set to . Operate by touching the panel. (1) Press FN to display PAGE1. (2) Press MENU. (3) Select DELETE ALL in , then press EXEC. MEM SET 2 EXIT SL I - Sony DCR-TRV70 | Operating Instructions - Page 141
"Memory Stick" Operations Changing the image size - Resize You can change the size of recorded still images to 640 × 480 or 320 × 240. Use this function when you reduce the size of the image file to attach it to an e-mail. The original image is retained even after resizing. The POWER switch - Sony DCR-TRV70 | Operating Instructions - Page 142
- Print mark This function is useful for printing out still images later. (You cannot specify the number for printouts.) Your camcorder conforms with the DPOF (Digital Print Order Format) standard for specifying still images to print out. The POWER switch should be set to . Operate by touching - Sony DCR-TRV70 | Operating Instructions - Page 143
insert it into your computer's "Memory Stick" slot. Camcorder connection jack Connection cable Computer environment requirements Reference pages For Windows Users For Macintosh Users Tape image/live USB jack USB cable (supplied) USB port, 146 - 148 editing software 150 - 151 - from your - Sony DCR-TRV70 | Operating Instructions - Page 144
have a DV port and editing software installed that can process video signals. DV Interface : Signal flow i.LINK cable (optional) i.LINK Viewing images recorded on the "Memory Stick" When connecting to a computer with the USB port See page 147 when using Windows and page 166 when using Macintosh - Sony DCR-TRV70 | Operating Instructions - Page 145
if the "Memory Stick" in your camcorder was formatted from your computer when the USB cable was connected. •Do not compress the data on the "Memory Stick." Compressed files cannot be played back on your camcorder. Software •Depending on your application software, the file size may increase when you - Sony DCR-TRV70 | Operating Instructions - Page 146
cable, you can view pictures live from your camcorder and pictures recorded on the tape on a computer (USB Streaming function). Furthermore, if you download pictures from your camcorder to a computer, you can process or edit them in image processing software and attach them to e-mail. You can view - Sony DCR-TRV70 | Operating Instructions - Page 147
your computer Connecting your camcorder to a computer using the USB cable (For Windows users) Recommended computer usage environment when connecting with USB cable and viewing the "Memory Stick" images on a computer Recommended Windows environment OS: Microsoft Windows 98, Windows 98SE, Windows Me - Sony DCR-TRV70 | Operating Instructions - Page 148
Connecting your camcorder to a computer using the USB cable (For Windows users) Installing the USB driver Start the following operation without connecting the USB cable to the computer. Connect the USB cable according to "Making the computer recognize your camcorder". If you are using Windows 2000, - Sony DCR-TRV70 | Operating Instructions - Page 149
Viewing images with your computer Connecting your camcorder to a computer using the USB cable (For Windows users) Installing Image Transfer Make sure USB driver installation is complete. This function enables image data recorded on the "Memory Stick" to be automatically transferred (copied) to your - Sony DCR-TRV70 | Operating Instructions - Page 150
Connecting your camcorder to a computer using the USB cable (For Windows users) Installing ImageMixer Make sure USB driver installation is complete. "ImageMixer Ver.1.5 for Sony" is an application that can capture or edit images, or create video CDs. To install and use this software in Windows 2000, - Sony DCR-TRV70 | Operating Instructions - Page 151
camcorder to the USB port on the computer using the supplied USB cable. The computer recognizes your camcorder, and the Windows Add Hardware Wizard starts. (USB) jack USB port USB cable (supplied) (7) Follow the on-screen messages so that the Add Hardware Wizard recognizes that the USB drivers - Sony DCR-TRV70 | Operating Instructions - Page 152
on the LCD screen of your camcorder. The computer recognizes your camcorder, and the Add Hardware Wizard starts. (USB) jack USB port USB cable (supplied) (4) Follow the on-screen messages so that the Add Hardware Wizard recognizes that the USB drivers have been installed. The Add Hardware - Sony DCR-TRV70 | Operating Instructions - Page 153
Windows users) If you cannot install the USB driver The USB driver has been registered incorrectly as a computer was connected to your camcorder before installation of the USB driver was completed. Follow the procedure below to correctly install the USB driver. Viewing pictures recorded on the tape - Sony DCR-TRV70 | Operating Instructions - Page 154
Connecting your camcorder to a computer using the USB cable (For Windows users) Windows 2000 Windows XP 6 Set the POWER switch to OFF (CHG) on your camcorder, then disconnect the USB cable. 7 Restart the computer. Step 2: Install the USB driver on the supplied CD-ROM Follow the entire procedure - Sony DCR-TRV70 | Operating Instructions - Page 155
the USB port on the computer to the (USB) jack on your camcorder using the supplied USB cable. 5 Open the computer's "Device Manager." Windows XP: Sony Handycam 7 Set the POWER switch to OFF (CHG) on your camcorder, then disconnect the USB cable. 8 Restart the computer. Step2: Install the USB driver - Sony DCR-TRV70 | Operating Instructions - Page 156
for Sony" You need to install the USB driver and ImageMixer to view images recorded on the tape on a computer (p. 148, 150). Viewing pictures recorded on the tape (1) Turn on the computer and allow Windows to load. (2) Connect the AC Adaptor, then insert the cassette into your camcorder. (3) Set - Sony DCR-TRV70 | Operating Instructions - Page 157
Viewing images with your computer Viewing pictures recorded on the tape on a computer - USB Streaming (For Windows users) (11) Connect the (USB) jack on your camcorder to the USB port on the computer using the supplied USB cable. (USB) jack USB port USB cable (supplied) (12) Click N to start - Sony DCR-TRV70 | Operating Instructions - Page 158
Viewing pictures recorded on the tape on a computer - USB Streaming (For Windows users) Capturing still images Monitor window Thumbnail list window (1) Click . (2) Looking at the monitor window, move the cursor to point you want to capture. The still image on the screen is captured. Captured - Sony DCR-TRV70 | Operating Instructions - Page 159
data cannot be transferred by the USB connection The USB driver has been registered incorrectly as the computer was connected to your camcorder before installation of the USB driver was complete. Reinstall the USB driver following the procedure on page 153. If any trouble occurs Close all running - Sony DCR-TRV70 | Operating Instructions - Page 160
recorded on the tape on a computer - USB Streaming (For Windows users) Making Video CDs - Easy Video CD This function makes it simple to create a video CD by capturing images recorded on the tape or images live from your camcorder. Capturing images recorded on the tape onto a CD-R (1) Follow - Sony DCR-TRV70 | Operating Instructions - Page 161
Viewing pictures recorded on the tape on a computer - USB Streaming (For Windows users) Capturing images live from your camcorder onto a CD-R Eject the cassette beforehand if inserted. If the cassette is inserted, your camcorder automatically turns off when it has been in recording standby for more - Sony DCR-TRV70 | Operating Instructions - Page 162
recorded on the tape on a computer - USB Streaming (For Windows users) Seeing the on-line help (operating instructions) of ImageMixer A "ImageMixer Ver.1.5 for Sony" on-line help site is available where you can find the detailed operating method of "ImageMixer Ver.1.5 for Sony." (1) Click located in - Sony DCR-TRV70 | Operating Instructions - Page 163
. You need to install the USB driver and Image Transfer to view the "Memory Stick" images on a computer (p. 148, 149). (1) Turn on the computer and allow Windows to load. (2) Insert the "Memory Stick" into your camcorder, then connect the AC Adaptor to you camcorder. (3) Set the POWER switch to - Sony DCR-TRV70 | Operating Instructions - Page 164
images recorded on the "Memory Stick" on a computer (For Windows users) Viewing images without Image Transfer Before operation • You need to install the USB driver to view the "Memory Stick" images on a computer (p. 148). • An application such as Windows Media Player must be installed to play back - Sony DCR-TRV70 | Operating Instructions - Page 165
Stick" on a computer (For Windows users) Image file storage destinations and image files Image files recorded with your camcorder are grouped in folders file Disconnect the USB cable and eject the "Memory Stick" or set the POWER switch to OFF (CHG) For Windows 2000, Windows Me, Windows XP users (1) - Sony DCR-TRV70 | Operating Instructions - Page 166
computer with the USB cable You must install a USB driver onto a computer in order to connect your camcorder to the computer's USB port. The USB driver can be found on the CD-ROM supplied, along with the application software Mac OS 8.6 standard installation The USB port must be provided as standard. - Sony DCR-TRV70 | Operating Instructions - Page 167
software screen appears. (3) Select "Handycam" on the screen. The title screen appears. (4) Click "USB Driver" to open the folder containing the six files related to "Driver." Click (5) Select the following two files, and drag and drop them into the System Folder. •Sony Camcorder USB Driver •Sony - Sony DCR-TRV70 | Operating Instructions - Page 168
•You need to install the USB driver to view the "Memory Stick" images on a computer (p. 167). •QuickTime 3.0 or newer must be installed to play back moving pictures. (1) Turn on the computer and allow Mac OS to load. (2) Insert the "Memory Stick" into your camcorder, then connect the AC Adaptor - Sony DCR-TRV70 | Operating Instructions - Page 169
video unit connected to a computer which has the DV port via your camcorder. Before operation Set DISPLAY computer. The operation procedures depend on the computer and the software you are using. For details of how to capture images, refer to the operating instructions of the computer and software - Sony DCR-TRV70 | Operating Instructions - Page 170
•You need the software and computer that support the exchange of digital video signals. •Depending on the condition of the analog video signals, the computer may not be able to output the images correctly when you convert video signals to digital video signals via your camcorder. Depending on the - Sony DCR-TRV70 | Operating Instructions - Page 171
network - DCR-TRV70 only You can access the Internet using a USB device that complies with your camcorder. Once Operating Instructions supplied with your camcorder. Note •Make sure that your camcorder is manual. How to hold your camcorder when operating network functions Hold your camcorder with - Sony DCR-TRV70 | Operating Instructions - Page 172
- Customizing Your Camcorder - Changing the menu settings To change the mode settings in For details, see "Selecting the mode setting of each item" (p. 173). RET. to return to 2 MENU MANUAL SET EXIT PROGRAM AE P EFFECT RED EYE R FLASH LVL WHT BAL SHARPNESS AUTO SHTR r R EXEC RET. 3 - Sony DCR-TRV70 | Operating Instructions - Page 173
as the following icons: MANUAL SET CAMERA SET VCR SET LCD/VF SET MEM SET 1 MEM SET 2 CM SET TAPE SET SETUP MENU OTHERS sharpness of the image outline with R/r Customizing Your Camcorder AUTO SHTR z ON OFF To soften To sharpen external flash (optional) is not compatible. (continued on the following - Sony DCR-TRV70 | Operating Instructions - Page 174
to 10× zoom is performed. To activate the digital zoom. More than 10× to 20× zoom is performed digitally (p. 33). To activate the digital zoom. More than 10× to 120× zoom is performed digitally. To deactivate the expanded focus While focusing manually, the center of the screen is displayed at twice - Sony DCR-TRV70 | Operating Instructions - Page 175
tape with the right sound or a dual sound track tape with sub sound To adjust the balance between stereo 1 and stereo 2 (p. 96) ST1 ST2 A/V t DV OUT z OFF To output digital images and sound in analog format using your camcorder select BRIGHT, battery life is reduced by about 10 percent during - Sony DCR-TRV70 | Operating Instructions - Page 176
Changing the menu settings Icon/item MEM SET 1 STILL SET BURST QUALITY IMAGESIZE MOVIE SET IMAGESIZE REMAIN NEW FOLDER REC FOLDER FILE NO. Mode Meaning POWER switch z OFF To not record continuously NORMAL To record from 4 to 25 images continuously (p. 111) HIGH SPEED To record up to 32 - Sony DCR-TRV70 | Operating Instructions - Page 177
activate Interval Photo Recording (p. 121) z OFF To deactivate Interval Photo Recording SET To set INTERVAL for Interval Photo Recording The "Memory Stick" supplied with your camcorder has been formatted at factory. Formatting the "Memory Stick" with your camcorder is not required. •You cannot - Sony DCR-TRV70 | Operating Instructions - Page 178
Changing the menu settings Icon/item CM SET TITLE TITLEERASE TITLE DSPL CM SEARCH TAPE TITLE ERASE ALL Mode -- -- z ON OFF z ON OFF -- z RETURN OK Meaning POWER switch To superimpose a title or make your own title (p. 97, 99) To erase - Sony DCR-TRV70 | Operating Instructions - Page 179
in the LP mode on your camcorder, we recommend playing back the tape on your camcorder. When you play back the tape on other camcorders or VCRs, mosaic noise may occur in pictures or sound. •When you record in the LP mode, we recommend using a Sony Excellence/Master mini DV cassette so that you can - Sony DCR-TRV70 | Operating Instructions - Page 180
20) POWER switch USB STREAM LANGUAGE DEMO MODE z OFF To deactivate the USB Streaming function ON To activate the USB Streaming function z ENGLISH DEMO MODE when a cassette or a "Memory Stick" is inserted in your camcorder. •When NIGHTSHOT switch is set to ON, the "NIGHTSHOT" indicator appears - Sony DCR-TRV70 | Operating Instructions - Page 181
time ON During daylight saving time BEEP z MELODY To output the melody when you start/stop recording or when an unusual condition occurs on your camcorder NORMAL To output the beep instead of the melody OFF To cancel melody, the beep sound and shutter sound COMMANDER z ON To activate the - Sony DCR-TRV70 | Operating Instructions - Page 182
camera recording lamp at the front of your camcorder during recording To turn the camera recording lamp off so that the person is not aware of the recording To cancel Digital program editing To make programs and perform Digital program editing on the tape on the other VCR (p. 80) To make programs - Sony DCR-TRV70 | Operating Instructions - Page 183
and how to correct trouble If you run into any problem using your camcorder, use the following table to troubleshoot the problem. If the problem persists, remove the power source and contact your Sony dealer. If "C:ss:ss" appears on the screen, the self-diagnosis display function has activated - Sony DCR-TRV70 | Operating Instructions - Page 184
trouble Symptom without a cassette or a "Memory Stick" inserted, your camcorder automatically starts the demonstration. c Insert a cassette or a computer screen. c Set STEADYSHOT in (p. 174). to OFF in the menu settings An external flash (optional) does not work. • The power of the external - Sony DCR-TRV70 | Operating Instructions - Page 185
trouble During playback Symptom Cause and/or Corrective Actions The playback button does not work. • The cassette has run out of the tape. c Rewind the tape . • The tape was recorded in a TV color system other than that of your camcorder. Troubleshooting (continued on the following page) 185 - Sony DCR-TRV70 | Operating Instructions - Page 186
work correctly. • The tape has a blank portion in the beginning or middle (p. 37). The battery pack is quickly discharged. camcorder for at least one hour to acclimatize (p. 202). The indicator does not appear when using a cassette with Cassette Memory. • The gold-plated connector of the tape - Sony DCR-TRV70 | Operating Instructions - Page 187
how to correct trouble When operating using "Memory Stick" formatted incorrectly is inserted. c Format the "Memory Stick" using your camcorder or use another "Memory Stick" (p. 104, 177). • The write-protect tab on protect the image (p. 137). Troubleshooting (continued on the following page) 187 - Sony DCR-TRV70 | Operating Instructions - Page 188
to correct trouble Symptom Cause . You cannot play back image data. • Your camcorder may not be able to playback the following image files: - Image name modified with the computer - Image files with their names modified with the computer - Image files processed with the computer • If you - Sony DCR-TRV70 | Operating Instructions - Page 189
(p. 195). Digital program editing on the tape does not function. • The input selector on the VCR is not set correctly. c Set the selector correctly, then check the connection between the VCR and your camcorder (p. 81). • Your camcorder is connected to the DV equipment of other than Sony using the - Sony DCR-TRV70 | Operating Instructions - Page 190
on your camcorder or DISPLAY on the Remote Commander (p. 40). The buttons on the LCD screen do not work. c Adjust the screen (CALIBRATION) (p. 204). Image data cannot be transferred to your computer via the USB connection. • The USB cable was connected before installation of the USB driver was - Sony DCR-TRV70 | Operating Instructions - Page 191
c Contact your Sony dealer or local authorized Sony service facility and inform them of the 5-digit code. (e.g. E:61:10) If you are unable to rectify the problem even if you try corrective actions a few times, contact your Sony dealer or local authorized Sony service facility. Troubleshooting 191 - Sony DCR-TRV70 | Operating Instructions - Page 192
battery pack is dead or nearly dead Slow flashing: • The battery pack is nearly dead. Depending on the operating conditions, environmental or battery Moisture condensation has occurred (p. 202). • The tape has run out. • The self-diagnosis display -in flash or the external flash (optional). Warning - Sony DCR-TRV70 | Operating Instructions - Page 193
performing the USB Streaming function. • NOW CHARGING Charging the built-in flash or an external flash (optional) does not work correctly. * * You hear the melody or beep sound. DCR-TRV70 only Refer to the Network Function/Application Operating Instructions supplied with your camcorder about - Sony DCR-TRV70 | Operating Instructions - Page 194
video camera recorder that doesn't support Cassette Memory on the tape already recorded on the Cassette Memory-compatible digital video camera recorder. mark on the cassette The memory capacity of the cassette marked with is 4K bits. Your camcorder can accommodate cassettes having a memory - Sony DCR-TRV70 | Operating Instructions - Page 195
Be sure to affix a label only on the locations as illustrated below [a] so as not to cause malfunction of your camcorder. Do not affix a label along this border. [a] After using the cassette Rewind the tape to the beginning, put the cassette in its case, and store it in an upright position. 195 - Sony DCR-TRV70 | Operating Instructions - Page 196
cassettes may be dirty or dusty. Cleaning the gold-plated connector If the gold-plated connector on the cassette is dirty or dusty, the remaining tape indicator sometimes does not appear correctly, and you may not be able to operate functions using Cassette Memory. Clean up the gold-plated connector - Sony DCR-TRV70 | Operating Instructions - Page 197
POWER switch to OFF (CHG) when not taking shots or playing back on your camcorder. The battery pack is also consumed when your camcorder is during tape recording standby or playback pause. •Have spare battery packs handy for two or three times the expected recording time, and make trial recordings - Sony DCR-TRV70 | Operating Instructions - Page 198
the proper function. 1. Fully charge the battery pack. 2. Use the battery pack up on your camcorder. 3. Remove the battery pack from your camcorder and store it in a dry, cool place. •To use the battery pack up on your camcorder, leave your camcorder in tape recording standby until the power goes - Sony DCR-TRV70 | Operating Instructions - Page 199
i.LINK is a digital serial interface for handling digital video, digital audio and other IEEE 1394 data transport bus proposed by Sony, and is a trademark approved by many baud rate is listed under "Specifications" in the operating instructions of each equipment. It is also indicated near the i.LINK - Sony DCR-TRV70 | Operating Instructions - Page 200
made by Sony (e.g. VAIO series personal computer) other than video equipment. Before connecting this unit to your computer, make sure that application software supported by this unit is already installed on your computer. Beware that some of the video equipment such as the Digital Televisions, the - Sony DCR-TRV70 | Operating Instructions - Page 201
instructions supplied with the USB device (optional) (DCR-TRV70 only). You can use your camcorder in any country or area with the AC Adaptor supplied with your camcorder Your camcorder is an NTSC system-based camcorder. If you want to view the playback picture on a TV, it must be an NTSC system- - Sony DCR-TRV70 | Operating Instructions - Page 202
warm place, moisture may condense inside your camcorder, on the surface of the tape, or on the lens. In this state, the tape may stick to the head drum and be damaged or your camcorder may not operate correctly. If there is moisture inside your camcorder, the beep sounds and the % indicator flashes - Sony DCR-TRV70 | Operating Instructions - Page 203
recording. If the above problem, [a], [b] or [c] occurs, clean the video heads for 10 seconds with the Sony DVM-12CLD cleaning cassette (optional because the video head is worn. Please contact your Sony dealer or local authorized Sony service facility to have the video head replaced. Cleaning the - Sony DCR-TRV70 | Operating Instructions - Page 204
hours. •Or install the fully charged rechargeable battery pack on your camcorder, and leave your camcorder with the POWER switch set to OFF (CHG camcorder, then keep pressing DISPLAY/BATT INFO for about five seconds. (4) Touch displayed on the screen with your finger or the supplied stylus (DCR-TRV70 - Sony DCR-TRV70 | Operating Instructions - Page 205
camcorder on 7.2 V (battery pack) or 8.4 V (AC Adaptor). •For DC or AC operation, use the accessories recommended in these operating instructions. •If any solid object or liquid get inside the casing, unplug your camcorder and have it checked by a Sony stylus. (DCR-TRV70 only) •If your camcorder is - Sony DCR-TRV70 | Operating Instructions - Page 206
Store the lens in a well-ventilated location subject to little dirt or dust. To prevent mold from occurring, periodically perform the above. We recommend turning on and operating your camcorder about once per month to keep your camcorder in an optimum state for a long time. Rechargeable battery pack - Sony DCR-TRV70 | Operating Instructions - Page 207
carefully before replacing the batteries. •If you touch the liquid, wash it off with water. •If the liquid get into your eyes, wash your eyes with a lot of water and then consult a doctor. If any problem occurs, unplug your camcorder and contact your nearest Sony dealer. 207 Additional Information - Sony DCR-TRV70 | Operating Instructions - Page 208
jack Stereo mini-minijack (ø 2.5 mm) USB jack DCR-TRV60: mini-B DCR-TRV70: mini-AB MIC jack Minijack, 0.388 mV low impedance with 2.5 to 3.0 V DC, output impedance 6.8 kΩ (kilohms) (ø 3.5 mm) Stereo type General Power requirements 7.2 V (battery pack) 8.4 V (AC Adaptor) Average power consumption - Sony DCR-TRV70 | Operating Instructions - Page 209
projecting parts Mass (approx.) 190 g (6.7 oz) excluding power cord Rechargeable battery pack NP-FM50 Maximum output voltage DC 8.4 V Output voltage DC 7.2 V Power consumption Approx. 45 mA during operation mode Approx. 130 µA during tape recording standby Dimensions (approx.) 50 × 2.8 × 21.5 mm (2 × - Sony DCR-TRV70 | Operating Instructions - Page 210
Germany, and Sony Corporation. It adopts the MTF# measurement system for video camera and offers a quality as the Carl Zeiss lens. The lens for your camcorder is also T*-coated to suppress unwanted reflection and faithfully reproduce colors. # MTF stands for Modulation Transfer Function. The value - Sony DCR-TRV70 | Operating Instructions - Page 211
Identifying parts and controls q; qh qa qj qs qd qf qk qg 0 Lens cap (p. 25) qa RESET button If you press RESET, all the settings (DCR-TRV70: except the network settings) including the date and time return to the default. qs LCD/Touch panel screen (p. 23) qd OPEN button (p. 25) qf DISPLAY/ - Sony DCR-TRV70 | Operating Instructions - Page 212
89, 144, 169, 199) The DV Interface is i.LINK compatible. w; (USB) jack (p. 143) wa PHOTO button (p. 46, 109, 116) ws Power zoom lever (p. 33, 73, camcorder is silent. ea Stylus (DCR-TRV70 only) (p. 171) es Stylus holder (DCR-TRV70 only) ed MIC (PLUG IN POWER) jack (red) (p. 93) Connect an external - Sony DCR-TRV70 | Operating Instructions - Page 213
to turn the power supplied by the shoe on and off. Refer to the operating instructions of the accessory for details. •The intelligent accessory shoe has a safety device for fixing the installed accessory securely. To connect an accessory, press down and push it to the end, and then tighten the screw - Sony DCR-TRV70 | Operating Instructions - Page 214
rj rk rh rl rh Battery pack (p. 15, 16) rj Cassette compartment (p. 8) rk OPEN/Z EJECT lever (p. 8) rl Tripod receptacle Make sure that the length of the tripod screw is less than 5.5 mm (7/32 inch). Otherwise, you cannot attach the tripod securely, and the screw may damage your camcorder. 214 - Sony DCR-TRV70 | Operating Instructions - Page 215
The buttons that have the same name on the Remote Commander as on your camcorder function identically to the buttons on your camcorder. 8 1 9 0 2 qa 3 qs 4 qd 5 6 qf 7 1 PHOTO button (p. 46, 110, 116) 2 DISPLAY button (p. 40) 3 Memory control buttons 4 SEARCH MODE button (p. 75 - Sony DCR-TRV70 | Operating Instructions - Page 216
the lens hood (supplied) or a conversion lens (optional) may obstruct the remote sensor, and in this situation, the remote commander may not work correctly. •Your camcorder works in the commander mode VTR 2. Commander modes 1, 2 and 3 are used to distinguish your camcorder from other Sony VCRs - Sony DCR-TRV70 | Operating Instructions - Page 217
Cassette Memory (p. 12, 194) 2 Remaining battery time (p. 27) 3 Zoom (p. 33)/Exposure (p. 61)/ Data file name (p. 102) 4 Digital effect (p. 56, 72)/MEMORY MIX (p. )/Tape counter (p. 27)/Self-diagnosis (p. 191)/Photo recording (p. 109)/Image number (p. 130)/Playback folder (p. 134) w; Remaining tape - Sony DCR-TRV70 | Operating Instructions - Page 218
built-in rechargeable battery 204 CLEANING CASSETTE ...... 203 Clock set 20 Color Slow Shutter 35 Continuous photo recording 111 Data code 40 Date search 76 DEMO MODE 180 Digital effect 56, 72 Digital program editing 80, 127 DISPLAY 40 DOT 52 Dual sound track tape .......... 195 E Edit - Sony DCR-TRV70 | Operating Instructions - Page 219
- Sony DCR-TRV70 | Operating Instructions - Page 220
Printed on 100% recycled paper using VOC (Volatile Organic Compound)-free vegetable oil based ink. Printed in Japan 308141411
-
 1
1 -
 2
2 -
 3
3 -
 4
4 -
 5
5 -
 6
6 -
 7
7 -
8
-
9
-
10
-
11
-
12
-
13
-
14
-
15
-
16
-
17
-
18
-
19
-
20
-
21
-
22
-
23
-
24
-
25
-
26
-
27
-
28
-
29
-
30
-
31
-
32
-
33
-
34
-
35
-
36
-
37
-
38
-
39
-
40
-
41
-
42
-
43
-
44
-
45
-
46
-
47
-
48
-
49
-
50
-
51
-
52
-
53
-
54
-
55
-
56
-
57
-
58
-
59
-
60
-
61
-
62
-
63
-
64
-
65
-
66
-
67
-
68
-
69
-
70
-
71
-
72
-
73
-
74
-
75
-
76
-
77
-
78
-
79
-
80
-
81
-
82
-
83
-
84
-
85
-
86
-
87
-
88
-
89
-
90
-
91
-
92
-
93
-
94
-
95
-
96
-
97
-
98
-
99
-
100
-
101
-
102
-
103
-
104
-
105
-
106
-
107
-
108
-
109
-
110
-
111
-
112
-
113
-
114
-
115
-
116
-
117
-
118
-
119
-
120
-
121
-
122
-
123
-
124
-
125
-
126
-
127
-
128
-
129
-
130
-
131
-
132
-
133
-
134
-
135
-
136
-
137
-
138
-
139
-
140
-
141
-
142
-
143
-
144
-
145
-
146
-
147
-
148
-
149
-
150
-
151
-
152
-
153
-
154
-
155
-
156
-
157
-
158
-
159
-
160
-
161
-
162
-
163
-
164
-
165
-
166
-
167
-
168
-
169
-
170
-
171
-
172
-
173
-
174
-
175
-
176
-
177
-
178
-
179
-
180
-
181
-
182
-
183
-
184
-
185
-
186
-
187
-
188
-
189
-
190
-
191
-
192
-
193
-
194
-
195
-
196
-
197
-
198
-
199
-
200
-
201
-
202
-
203
-
204
-
205
-
206
-
207
-
208
-
209
-
210
-
211
-
212
-
213
-
214
-
215
-
216
-
217
-
218
-
219
-
220
 |
 |
3-081-414-
11
(1)
©2003 Sony Corporation
Operating Instructions
Before operating the unit, please read this manual thoroughly,
and retain it for future reference.
Owner’s Record
The model and serial numbers are located on the bottom. Record the
serial number in the space provided below. Refer to these numbers
whenever you call upon your Sony dealer regarding this product.
DCR-TRV60/TRV70
Digital
Video Camera
Recorder
Model No.
DCR-TRV
Model No.
AC-
Serial No.
Serial No.
SERIES
TM
DCR-TRV70