Sony DCR-TRV70 Operating Instructions - Page 190
Press the LCD screen lightly., Press DISPLAY/BATT INFO on your camcorder or
 |
View all Sony DCR-TRV70 manuals
Add to My Manuals
Save this manual to your list of manuals |
Page 190 highlights
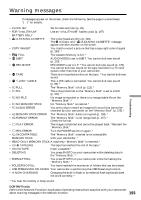
Types of trouble and how to correct trouble Symptom Cause and/or Corrective Actions The melody or beep sounds for five seconds. • Moisture condensation has occurred. c Remove the cassette and leave your camcorder for at least one hour to acclimatize (p. 202). • Some troubles have occurred in your camcorder. c Remove the cassette and insert it again, then operate your camcorder. No function works though the power is on. c Disconnect the AC Adaptor from a wall outlet or remove the battery pack, then reconnect it in about one minute. Turn the power on. If the functions still do not work, press the RESET button using a sharp-pointed object. (If you press the RESET button, all the settings (DCR-TRV70: except the network settings) including the date and time return to the default) (p. 15, 16, 211). When you set the POWER switch to VCR or OFF (CHG), if you move your camcorder, you may hear a clattering sound from inside your camcorder. • This is because some functions use a linear mechanism. This is not a malfunction. While charging the battery pack, the CHARGE (charge) lamp is not lit. • Charging the battery pack is completed. • The battery pack is not properly installed. c Install it properly (p. 15). You cannot charge the battery pack. • The POWER switch is not set to OFF (CHG). c Set it to OFF (CHG) (p. 16). The power runs out quickly, even though the remaining battery time indicator is full. c Charge the battery pack fully again (p. 16). While charging the battery pack, the CHARGE (charge) lamp flashes. • The battery pack is not properly installed. c Install it properly (p. 15). • Something is wrong with the battery pack. c If the symptom persists, disconnect the plug from the wall outlet as soon as possible to cut off the power, and contact your Sony dealer or local authorized Sony service facility. The buttons do not appear on the touch panel. • DISPLAY/BATT INFO is pressed. c Press the LCD screen lightly. c Press DISPLAY/BATT INFO on your camcorder or DISPLAY on the Remote Commander (p. 40). The buttons on the LCD screen do not work. c Adjust the screen (CALIBRATION) (p. 204). Image data cannot be transferred to your computer via the USB connection. • The USB cable was connected before installation of the USB driver was complete. c Uninstall the USB driver and reinstall the USB driver (p. 148, 153). The cassette cannot be ejected even if the cassette lid is open. • USB STREAM in is set to OFF in the menu settings. c Set it to ON (p. 180). • Your camcorder is on the point of falling into moisture condensation (p. 202). The cassette cannot be ejected. c Remove the battery pack, then install it again (p. 15). 190
-
 1
1 -
2
-
3
-
4
-
5
-
6
-
7
-
8
-
9
-
10
-
11
-
12
-
13
-
14
-
15
-
16
-
17
-
18
-
19
-
20
-
21
-
22
-
23
-
24
-
25
-
26
-
27
-
28
-
29
-
30
-
31
-
32
-
33
-
34
-
35
-
36
-
37
-
38
-
39
-
40
-
41
-
42
-
43
-
44
-
45
-
46
-
47
-
48
-
49
-
50
-
51
-
52
-
53
-
54
-
55
-
56
-
57
-
58
-
59
-
60
-
61
-
62
-
63
-
64
-
65
-
66
-
67
-
68
-
69
-
70
-
71
-
72
-
73
-
74
-
75
-
76
-
77
-
78
-
79
-
80
-
81
-
82
-
83
-
84
-
85
-
86
-
87
-
88
-
89
-
90
-
91
-
92
-
93
-
94
-
95
-
96
-
97
-
98
-
99
-
100
-
101
-
102
-
103
-
104
-
105
-
106
-
107
-
108
-
109
-
110
-
111
-
112
-
113
-
114
-
115
-
116
-
117
-
118
-
119
-
120
-
121
-
122
-
123
-
124
-
125
-
126
-
127
-
128
-
129
-
130
-
131
-
132
-
133
-
134
-
135
-
136
-
137
-
138
-
139
-
140
-
141
-
142
-
143
-
144
-
145
-
146
-
147
-
148
-
149
-
150
-
151
-
152
-
153
-
154
-
155
-
156
-
157
-
158
-
159
-
160
-
161
-
162
-
163
-
164
-
165
-
166
-
167
-
168
-
169
-
170
-
171
-
172
-
173
-
174
-
175
-
176
-
177
-
178
-
179
-
180
-
181
-
182
-
183
-
184
-
 185
185 -
 186
186 -
 187
187 -
 188
188 -
 189
189 -
 190
190 -
 191
191 -
 192
192 -
 193
193 -
 194
194 -
 195
195 -
196
-
197
-
198
-
199
-
200
-
201
-
202
-
203
-
204
-
205
-
206
-
207
-
208
-
209
-
210
-
211
-
212
-
213
-
214
-
215
-
216
-
217
-
218
-
219
-
220
 |
 |