Sony DCR-TRV70 Operating Instructions - Page 177
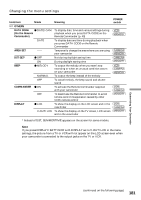
Icon/item, MEM SET 2, SLIDE SHOW, INT. R -STL, DELETE ALL, FORMAT, Meaning, POWER, switch
 |
View all Sony DCR-TRV70 manuals
Add to My Manuals
Save this manual to your list of manuals |
Page 177 highlights
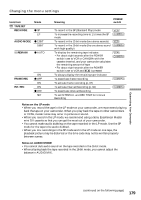
Changing the menu settings Icon/item MEM SET 2 SLIDE SHOW INT. R -STL DELETE ALL FORMAT Mode Meaning RETURN To cancel slide show z ALL FILES To execute slide show by playing back all the images on the "Memory Stick" (p. 136) FOLDER sss* To execute slide show by playing back all the images in the selected playback folder ON To activate Interval Photo Recording (p. 121) z OFF To deactivate Interval Photo Recording SET To set INTERVAL for Interval Photo Recording z RETURN To cancel deleting all the image ALL FILES To delete all the unprotected images (p. 140) FOLDER sss* To delete all the images in the selected playback folder z RETURN To cancel formatting OK To format the inserted "Memory Stick" (p. 103) Formatting erases all information on the "Memory Stick." Check the contents of the "Memory Stick" before formatting. 1. Select FORMAT, then press EXEC. 2. Select OK, then press EXEC. 3. After the EXECUTE indicator appears, press EXEC. The FORMATTING indicator flashes while formatting. The COMPLETE indicator appears when formatting is complete. POWER switch * The folder number is displayed in the sss. Notes on formatting •Do not do any of the following while the FORMATTING indicator is displayed: - Turn the POWER switch to other positions. - Operate buttons. - Eject the "Memory Stick." •The "Memory Stick" supplied with your camcorder has been formatted at factory. Formatting the "Memory Stick" with your camcorder is not required. •You cannot format the "Memory Stick" if the write-protect tab on the "Memory Stick" is set to LOCK. •Format the "Memory Stick" if the " FORMAT ERROR" indicator appears. •Formatting erases sample images on the supplied "Memory Stick." •Formatting erases protected image data on the "Memory Stick." •Formatting erases newly created folders as well. Customizing Your Camcorder (continued on the following page) 177
-
 1
1 -
2
-
3
-
4
-
5
-
6
-
7
-
8
-
9
-
10
-
11
-
12
-
13
-
14
-
15
-
16
-
17
-
18
-
19
-
20
-
21
-
22
-
23
-
24
-
25
-
26
-
27
-
28
-
29
-
30
-
31
-
32
-
33
-
34
-
35
-
36
-
37
-
38
-
39
-
40
-
41
-
42
-
43
-
44
-
45
-
46
-
47
-
48
-
49
-
50
-
51
-
52
-
53
-
54
-
55
-
56
-
57
-
58
-
59
-
60
-
61
-
62
-
63
-
64
-
65
-
66
-
67
-
68
-
69
-
70
-
71
-
72
-
73
-
74
-
75
-
76
-
77
-
78
-
79
-
80
-
81
-
82
-
83
-
84
-
85
-
86
-
87
-
88
-
89
-
90
-
91
-
92
-
93
-
94
-
95
-
96
-
97
-
98
-
99
-
100
-
101
-
102
-
103
-
104
-
105
-
106
-
107
-
108
-
109
-
110
-
111
-
112
-
113
-
114
-
115
-
116
-
117
-
118
-
119
-
120
-
121
-
122
-
123
-
124
-
125
-
126
-
127
-
128
-
129
-
130
-
131
-
132
-
133
-
134
-
135
-
136
-
137
-
138
-
139
-
140
-
141
-
142
-
143
-
144
-
145
-
146
-
147
-
148
-
149
-
150
-
151
-
152
-
153
-
154
-
155
-
156
-
157
-
158
-
159
-
160
-
161
-
162
-
163
-
164
-
165
-
166
-
167
-
168
-
169
-
170
-
171
-
 172
172 -
 173
173 -
 174
174 -
 175
175 -
 176
176 -
 177
177 -
 178
178 -
 179
179 -
 180
180 -
 181
181 -
 182
182 -
183
-
184
-
185
-
186
-
187
-
188
-
189
-
190
-
191
-
192
-
193
-
194
-
195
-
196
-
197
-
198
-
199
-
200
-
201
-
202
-
203
-
204
-
205
-
206
-
207
-
208
-
209
-
210
-
211
-
212
-
213
-
214
-
215
-
216
-
217
-
218
-
219
-
220
 |
 |