Sony DPP-EX7 Operating Instructions
Sony DPP-EX7 Manual
 |
View all Sony DPP-EX7 manuals
Add to My Manuals
Save this manual to your list of manuals |
Sony DPP-EX7 manual content summary:
- Sony DPP-EX7 | Operating Instructions - Page 1
Digital Photo Printer Operating Instructions GB Before operating this printer, please read this manual Manual de instrucciones ES Antes de utilizar esta impresora, lea este manual atentamente y consérvelo para consultarlo en el futuro. Digital Photo Printer DPP-EX7 DPP-EX7 2002 Sony - Sony DPP-EX7 | Operating Instructions - Page 2
of the printer, "Memory Stick" or PC card. Owner's Record The model and serial numbers are located on the bottom. Record the serial number in the space provided below. Refer to this number whenever you call upon your Sony dealer regarding this product. Model No. DPP-EX7 Serial No. WARNING - Sony DPP-EX7 | Operating Instructions - Page 3
Name: SONY Model No.: DPP-EX7 Responsible Party: Sony Electronics Inc 's claim for damages. When using photo images with this printer, pay special attention not to infringe ANY PRODUCT. • Microsoft, MS, MS-DOS and Windows® are registered trademarks of Microsoft Corporation in the United - Sony DPP-EX7 | Operating Instructions - Page 4
the rest of the package, immediately to the dealer where you obtained it. Sony Corporation reserves the right to make any modification to this manual or the information contained herein at any time without notice. The software described herein may also be governed by the terms of a separate user - Sony DPP-EX7 | Operating Instructions - Page 5
from your computer Using your printer with Windows computers 66 System requirements 66 Installing the printer driver 67 Printing from an application software 70 Using your printer with Macintosh computers 76 System requirements 76 Installing the printer driver 77 Printing from an application - Sony DPP-EX7 | Operating Instructions - Page 6
system, the digital photo printer DPP-EX7 can make photo-realistic prints meeting digital still cameras) Print is a global standard for digital photo printing. A digital still camera supporting Exif Print stores the data relevant to the conditions of shooting as each shot is taken. The printer - Sony DPP-EX7 | Operating Instructions - Page 7
paper tray, you can print up to 25 sheets for Post Card (4 x 6 inch) size and 30 sheets for 3.5 x 5 inch size and Small (3.5 x 4 inch) size print paper the DPOF (Digital Print Order Format printer and your computer with the USB cable supplied and installing the supplied DPP-EX7 printer driver software - Sony DPP-EX7 | Operating Instructions - Page 8
Paper tray (1) • Stylus (1) -Sony DPP-EX5/EX7 Printer Driver Software for Windows® 98/98SE/ Me/2000 Professional/XP Home Edition/XP Professional for MAC OS 8.6/9.0/9.1/ 9.2/X (v10.1/v10.2) - Operating Instructions • Cleaning kit (a set of cleaning paper and cartridge) (1) • Operating Instructions - Sony DPP-EX7 | Operating Instructions - Page 9
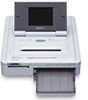
indicated in the parentheses. Printer front panel 1 Operation panel cover 2 POWER button (pages 18, 23, 25, 28) 3 "MEMORY STICK" insertion slot (page 14) 4 PC CARD insertion slot (page 15) 5 PC card eject button (page 15) 6 Paper tray compartment lid (page 21) 7 Cartridge compartment lid (page 18 - Sony DPP-EX7 | Operating Instructions - Page 10
parts Printer rear panel 1 USB connector (page 16) Connects to the USB connector of your computer. 2 AC IN connector (page 15) 3 Ventilation holes Paper tray 1 lid (page 20) 2 Partition (page 20) 3 3.5 x 5 inch paper adaptor (page 20) Use the adaptor only when you feed 3.5 x 5 inch size paper into - Sony DPP-EX7 | Operating Instructions - Page 11
cartridge currently loaded: : Post Card (4 x 6 inch) size : 3.5 x 5 inch size : Small (3.5 x 4 inch) size 7 Scroll bar Indicates the position of the image currently displayed or selected among the total number of images. 8 Protect indication Indicates that the image is protected by a q; digital - Sony DPP-EX7 | Operating Instructions - Page 12
stylus and operation panel Most operations on the DPP-EX7 are carried out by tapping an item or button keep the touchscreen safe and clean, we recommend you close the operation panel after you finish using your printer. • Keep the stylus in the slot on the panel to prevent it from being lost. • If - Sony DPP-EX7 | Operating Instructions - Page 13
screen using the point of the supplied stylus. This action is referred to as "tapping" in this manual. Tapping allows you to execute the button function or select an item or image on the screen. Move write on the screen. •In case you lost the supplied stylus, contact Sony service facilities. 13 GB - Sony DPP-EX7 | Operating Instructions - Page 14
Stick" or a PC card into or out of the slot. If you do, the "Memory Stick" or the PC card or the printer may be damaged. •When the printer is accessing the "Memory Stick" or PC card and the relevant indicator flashes, do not remove the "Memory Stick" or PC card from - Sony DPP-EX7 | Operating Instructions - Page 15
. •For the PC card, see page 89. Connecting the AC power cord Connect the supplied AC power cord to the AC IN connector of the printer and then to an AC outlet. The POWER indicator lights in red. To the wall outlet AC power cord (supplied) Continued 15 GB - Sony DPP-EX7 | Operating Instructions - Page 16
the printer and your computer (Windows PC or Macintosh) with a commercially available USB cable. By installing the supplied driver software on to trouble with the printer. •Refer to the instruction manual of your computer for further information. •You cannot use the printer and the printer driver on - Sony DPP-EX7 | Operating Instructions - Page 17
- Do not rewind the ink ribbon and use the rewound print cartridge for printing. Otherwise, proper printing result will not be obtained, or even a breakdown may occur. - Use the printing pack for this printer only. - Always use the print cartridge designed for the size of the print paper you use. Do - Sony DPP-EX7 | Operating Instructions - Page 18
Pull and open the cartridge compartment lid. 3 Insert the print cartridge into the printer firmly until it clicks into place and close the cartridge compartment lid. The side with the Sony logo To replace the print cartridge When the print cartridge runs out, the cartridge error indicator lights and - Sony DPP-EX7 | Operating Instructions - Page 19
to remove the slack. •If the print cartridge is not loaded when you turn on the printer, the cartridge error indicator lights up. •Do not touch the ink ribbon or place the print cartridge in a dusty location. Fingerprints or dust on the ink ribbon may result in imperfect printing. •Do not change - Sony DPP-EX7 | Operating Instructions - Page 20
print paper 1 Open the paper tray lid and set the 3.5 x 5 inch paper adaptor and the partition according to the print paper size you want to use. x To use Post Card (4 x 6 inch) size print paper Remove the 3.5 x 5 inch paper adaptor and leave the partition laid down. 3.5 x 5 inch paper adaptor - Sony DPP-EX7 | Operating Instructions - Page 21
Do not touch the printing surface. Fingerprints on the printing surface may result in imperfect printing. 3 Close the paper tray lid. Then push and open the printer's paper tray compartment lid and insert the paper tray into the printer. Insert it firmly until it clicks into place. Continued 21 GB - Sony DPP-EX7 | Operating Instructions - Page 22
4 Inserting the print paper Notes • Do not remove or insert the paper tray during printing. • If print paper does not feed automatically, the paper error indicator lights. Pull out the paper tray and check for a paper jam. •To avoid paper jam or malfunction on the printer, note the following: - When - Sony DPP-EX7 | Operating Instructions - Page 23
card with recorded images into the "Memory Stick" or PC card insertion slot (pages 14, 15). 2 Press the POWER button to turn on the printer. The POWER indicator lights in green. Basic printing operations 3 Press the INPUT SELECT button repeatedly until the "MEMORY STICK" or PC CARD indicator turns - Sony DPP-EX7 | Operating Instructions - Page 24
printing, see page 27. PRINT To stop printing Tap [Cancel] on the screen. 6 When printing ends and the print paper automatically emerges from the paper outlet, remove the printed paper from the printer. To display a preview image Move the cursor to an image that you want to view in full screen and - Sony DPP-EX7 | Operating Instructions - Page 25
PC card with recorded images into the "Memory Stick" or PC card insertion slot (pages 14, 15). 2 Press the POWER button to turn on the printer. The POWER indicator lights in green. 3 Press the INPUT SELECT button repeatedly until the "MEMORY STICK" or PC CARD indicator turns on. The list of - Sony DPP-EX7 | Operating Instructions - Page 26
Tap [Cancel] on the screen. Printing will be canceled from the next print. 8 When printing ends and the print paper automatically emerges from the paper outlet, remove the printed paper from the printer. To edit or process an image In the image list or preview image screen, tap [Effect] to zoom in - Sony DPP-EX7 | Operating Instructions - Page 27
printer; the print cartridge or paper may become stuck. If this happens, turn the printer print, see "Troubleshooting" on page 90 the digital still camera type. •The printer cannot printer. •Do not leave more than 20 sheets of the ejected printed paper on the paper tray. •When using your printer - Sony DPP-EX7 | Operating Instructions - Page 28
1 Notes • For how to preset images for printing, see the manual of your digital still camera. • Some types of digital still cameras do not support the DPOF function or the printer does not support part of the functions of the digital still camera. 1 Insert a "Memory Stick" or PC card with recorded - Sony DPP-EX7 | Operating Instructions - Page 29
, remove the printed paper from the printer. For notes during or after printing, see page 27. Tip Even if a smaller number of sheets of print paper than the print quantity are installed in the paper tray, you can proceed with printing. If a message appears, follow the instructions on the screen to - Sony DPP-EX7 | Operating Instructions - Page 30
Advanced printing operations Adding effects to an image (Effect) What you can do with the Effect menu The Effect menu allows you to edit, adjust or add special filters to an image that is positioned with the cursor in the image list or displayed in the preview screen. To display the main Effect menu - Sony DPP-EX7 | Operating Instructions - Page 31
The image is saved in JPEG format without regards to the original image file format. To change the printer settings midway Tap [Menu]. The Menu screen is displayed and you can change the printer settings (page 57). To exit the Effect menu Tap [Exit]. When you have edited an image, the confirmation - Sony DPP-EX7 | Operating Instructions - Page 32
Adding effects to an image (Effect) Changing the image size and position The Edit sub menu allows you to enlarge, reduce, rotate, or flip an image. 1 Move the cursor to the desired image in the image list or tap it again to display its preview. 2 Tap [Effect]. The Effect menu is displayed (page 30 - Sony DPP-EX7 | Operating Instructions - Page 33
Advanced printing operations Note The picture quality of an enlarged image may be deteriorated depending on the size of the image. 5 Tap [Back]. The Effect menu is displayed again. You can select another Effect sub menu, save or print the image, or exit the Effect menu (pages 30-31). Adjusting the - Sony DPP-EX7 | Operating Instructions - Page 34
Adding effects to an image (Effect) 5 Drag the slider upwards or downwards, or tap the upper or lower part or [V]/[v] on the scroll bar repeatedly to adjust the image. Items Brightness Saturation Tint Sharpness Procedures Move the slider upwards to brighten the image or downwards to darken the - Sony DPP-EX7 | Operating Instructions - Page 35
Adding a special filter to an image The Filter sub menu allows you to add a special effect to an image to print in monochrome, paint, or sepia tone. 1 Move the cursor to the desired image in the image list or tap it again to display its preview. 2 Tap [Effect]. The Effect menu is displayed (page 30 - Sony DPP-EX7 | Operating Instructions - Page 36
Making various prints (Creative Print) What you can do with the Creative Print menu The Creative Print menu allows you to make a variety of prints. To display the Creative Print top menu, tap [Creative Print] below the image list or preview screen: Tap the desired item and make a card, calendar, - Sony DPP-EX7 | Operating Instructions - Page 37
]. The image is saved in JPEG format without regards to the original image file format. To change the printer settings midway Tap [Menu]. The Menu screen is displayed and you can change the printer settings (page 57). To exit the Creative Print menu Tap [Exit]. When you have edited an image, the - Sony DPP-EX7 | Operating Instructions - Page 38
top menu (page 36). The print size selection screen is displayed. Select the print paper size you want to use. 2 Tap the desired paper size icon. The screen used for selecting a template of the selected paper size is displayed. When you select "Postcard Size" 3 Tap the desired template. A preview - Sony DPP-EX7 | Operating Instructions - Page 39
Color]. To change the color, tap [Select Color] to display the color selection window. Tap the desired color. 2 Tap the desired message. A preview is displayed. The Insert a "Memory Stick" or PC card into the printer and tap an image area. The image list used for selecting an image is displayed. Continued - Sony DPP-EX7 | Operating Instructions - Page 40
Making various prints (Creative Print) 2 Tap the desired image. The screen used to adjust the image size, position, angle, and brightness is displayed. 3 Tap the desired adjustment button and make your adjustments. Items #/3 $/4/%/5 / Brightness Procedures Each time you tap 3 or #, the image is - Sony DPP-EX7 | Operating Instructions - Page 41
an original calendar. 1 Tap [Calendar] in the Creative Print top menu (page 36). The print size selection screen is displayed (page 38). 2 Tap the desired paper size icon. The screen used for selecting a calendar template for the selected print - Sony DPP-EX7 | Operating Instructions - Page 42
Making various prints (Creative Print) 3 Tap the desired template. A preview of the selected template is displayed. Image area Calendar area 4 Tap each area on the preview to set the calendar and add image(s). You can choose them in any order. x Selecting an image Tap the image area to select and - Sony DPP-EX7 | Operating Instructions - Page 43
. 4-split images 1 Tap [Split Image] in the Creative Print top menu (page 36). The print size selection screen is displayed (page 38). 2 Tap the desired paper size icon. The screen for selecting the split image template for the selected print - Sony DPP-EX7 | Operating Instructions - Page 44
To make a 9-split image sticker, you can use the Small (3.5 x 4 inch) size print paper only. Before making a sticker, make sure to feed the Small (3.5 x 4 inch) size 9-split sticker print paper (SVM-30SW09) into the printer. 1 Tap [Sticker] in the Creative Print top menu (page 36). The screen used - Sony DPP-EX7 | Operating Instructions - Page 45
multiple images, you can select from any image area. The screen used for selecting a frame is displayed. 4 Insert a "Memory Stick" or PC card into the printer and then tap the desired frame. The screen used for selecting an image is displayed. 5 Tap the desired image. The image is displayed with the - Sony DPP-EX7 | Operating Instructions - Page 46
1 Tap [Index Print] in the Creative Print top menu (page 36). The print size selection screen is displayed (page 38). 2 Tap the desired paper size icon. The window for selecting title and print pattern is displayed. When you select "Postcard Size" 3 In the Title line, tap either [On] to add a title - Sony DPP-EX7 | Operating Instructions - Page 47
card, do not tap the image area but skip to step 7. •To print only selected images, tap the image area to display the image selection window. Tap and cancel the selection of the images that you do not want to print. Tap [Back] to return to the preview screen. 7 Check the - Sony DPP-EX7 | Operating Instructions - Page 48
Making various prints (Creative Print) Adding pictures or characters to an image (Tool) For all the Creative Print sub menus except for the Index Print, you can tap [Tool] in a preview screen to display the Tool screen. The Tool screen allows you to add pictures and characters to the desired - Sony DPP-EX7 | Operating Instructions - Page 49
Advanced printing operations Drawing freehand line art ( ) You can use the pencil tool to draw freehand line art on the preview. 1 In the Tool screen (page 48), tap (Pencil tool). The pencil tool screen is displayed. 2 To select the color for the pencil drawings, tap (Color). The color selection - Sony DPP-EX7 | Operating Instructions - Page 50
Making various prints (Creative Print) 6 Tap [Enter]. The drawing you made is fixed and pasted to the preview. The Tool top screen is displayed. You can use another tool, print the created image, or save it (page 48). Typing characters ( ) You can use the type tool to input the maximum of 5 lines - Sony DPP-EX7 | Operating Instructions - Page 51
Advanced printing operations x To change lines Tap # to enter the next line. To return to the previous line, tap [b] in the side of the character input box repeatedly until the previous line is displayed. To move to the next line, tap [B] in the side of the character input box repeatedly until the - Sony DPP-EX7 | Operating Instructions - Page 52
Making various prints (Creative Print) 3 Tap [Exit]. The character input screen is closed and the input characters are pasted onto the preview. 4 Adjust the size, position and angle of the characters. Items #/3 $/4/%/5 / Cancel Procedures Each time you tap 3 or #, the characters are enlarged or - Sony DPP-EX7 | Operating Instructions - Page 53
Advanced printing operations Pasting stamps ( ) You can use the stamp tool to paste a selected stamp to the preview. 1 In the Tool screen (page 48), tap (Stamp tool). The stamp selection screen is displayed. 2 Tap the desired stamp. The tapped stamp is selected and the stamp selection screen is - Sony DPP-EX7 | Operating Instructions - Page 54
cut. 1 In the Tool screen (page 48), tap (Cut out tool). The shape selection screen is displayed. 2 Insert a "Memory Stick" or PC card into the printer and tap the desired shape. The image list used for selecting an image is displayed. 3 Tap the desired image. The image is displayed in the - Sony DPP-EX7 | Operating Instructions - Page 55
color The messages are printed in the color displayed in the [Select Color]. To change the color, tap [Select Color] to display the color selection window. Tap the desired color. Continued 55 GB - Sony DPP-EX7 | Operating Instructions - Page 56
Making various prints (Creative Print) 2 Tap the desired message. The selected message in the selected color is pasted onto the preview. To cancel the operation Tap [Cancel]. The message is erased from the preview. 3 Adjust the size, position and angle of the message. For how to adjust the stamp, - Sony DPP-EX7 | Operating Instructions - Page 57
) What you can do with the Menu The Menu allows you to change the printer settings, set up the screen, perform slide show, or delete images. To display the Menu screen, tap [Menu] below the image list or preview screen: - Sony DPP-EX7 | Operating Instructions - Page 58
printer Print Setting] in the Menu screen (page 57) . The Print Setting window is displayed. 2 Tap the setting items you want to select. The is selected, an image shot by an Exif Print (Exif 2.2)compatible digital still camera is automatically adjusted to its optimum picture quality and printed. - Sony DPP-EX7 | Operating Instructions - Page 59
prints with Small (3.5 x 4 inch) size print paper. • When printing a standard 4:3 picture shot by a digital still camera, the top and bottom edges of the JPEG file format. When the image is saved after edited with the printer, the saved date is printed. Note To record the date precisely, set - Sony DPP-EX7 | Operating Instructions - Page 60
(MENU) Items Color Setting Settings Adjusts the color reproduction of the printer. Drag the adjustment slider of each color or tap [+] or [-] to set the level to a higher value (+1, +2) or a lower value (-1, -2). (*R: 0/G:0/B:0) R: Adjusts the red and blue - Sony DPP-EX7 | Operating Instructions - Page 61
Advanced printing operations Changing the printer preferences (Options) You can change the printer preferences and adjust the LCD screen contrast of the printer. 1 Tap [Options] in the Menu screen (page 57) . The Options window is displayed. 2 Tap the setting items you want to select. The yellow - Sony DPP-EX7 | Operating Instructions - Page 62
Setting up the printer (MENU) Items Display Contrast Settings Drag the adjustment slider or tap [b]/[B] or anywhere on the bar to adjust the LCD display contrast level. The adjusted - Sony DPP-EX7 | Operating Instructions - Page 63
Advanced printing operations Viewing a slide show You can perform a slide show of the images saved in a "Memory Stick" or PC card. 1 Tap [Slide Show] in the Menu screen (page 57). The Slide Show screen is displayed. 2 In the Switch Time line, tap [Fast] to switch images quickly or [Slow] to switch - Sony DPP-EX7 | Operating Instructions - Page 64
Deleting images You can delete selected images in the "Memory Stick" or PC card. You can also format the "Memory Stick." Notes • During deleting or formatting, do not turn off the power or remove the "Memory Stick" or PC card from the insertion slot. The "Memory Stick" or PC card may be damaged. • - Sony DPP-EX7 | Operating Instructions - Page 65
Advanced printing operations 3 Tap the image that you want to delete. The selected image is displayed in yellow background with a trash icon. To delete multiple images at a time, repeat this step. To cancel deletion Tap [Exit]. 4 Tap [Execute] . The confirmation message is displayed. 5 Tap [Yes] to - Sony DPP-EX7 | Operating Instructions - Page 66
Using your printer with Windows computers The supplied DPP-EX7 printer driver enables you to print an image stored on your computer with the Digital Photo Printer DPP-EX7. To print an image from the computer, you need commercially available printing application software. System requirements - Sony DPP-EX7 | Operating Instructions - Page 67
the printer driver Install the printer driver contained on the supplied CD-ROM to your computer. 1 Make sure that the printer is not connected to the computer. 2 Turn on your computer and start Windows. •When installing or uninstalling the software in Windows® 2000 Professional, log on Windows as - Sony DPP-EX7 | Operating Instructions - Page 68
your printer with Windows computers The "Sony DPP-EX5/EX7 Setup" dialog box appears. 4 Click "Next" to start installation. Installation continues. When it is completed, the setup compete dialog box is displayed. 5 Click "Finish". 6 Remove the CD-ROM from your computer. 7 Turn on the printer and - Sony DPP-EX7 | Operating Instructions - Page 69
the installation Open the "Printers and Faxes" (Windows XP Home Edition/XP Professional only) or "Printers" from the "Control Panel". When the "Sony DPP-EX7" is displayed in the "Printers and Faxes" or "Printers" window, the DPP-EX7 has successfully installed. When using the Windows Me The "Add New - Sony DPP-EX7 | Operating Instructions - Page 70
removed from your computer's hard disk. Printing from an application software You can use the "Print "command of an application software to print an image from your computer with the Digital Photo Printer DPP-EX7. When using the Windows XP Home Edition/Professional, you can use My Pictures to print - Sony DPP-EX7 | Operating Instructions - Page 71
. The dialog box differs depending on the application. 1 Click "Printer" . The "Page Setup" dialog box is displayed. 2 Select "Sony DPP-EX7" as the name of the printer. 3 Click "Properties". The document properties window is displayed. 4 In the "Layout" tab, select the Orientation of an image - Sony DPP-EX7 | Operating Instructions - Page 72
Using your printer with Windows computers 5 Click "Paper Type" tab and then set the paper according to the print paper size you would like to use for printing. Paper Type margin Select the paper size either from "Post card", "3.5 x 5 inch" or "Small" according to the print paper size you use. When - Sony DPP-EX7 | Operating Instructions - Page 73
printer starts printing. The DPP-EX7 printer monitor is displayed showing the printing process. To print from My Pictures (when using the Windows "My Pictures" window is displayed. 3 Select the folder that you want to print and then click "Print this picture". The photo printing wizard is displayed - Sony DPP-EX7 | Operating Instructions - Page 74
Select "DPP-EX7" as the printer you use and then click "Printing Preferences". The document properties window in step 4 in page 71 is displayed. Set the layout , paper type and the printer details in the same way as in the steps 4 through 7 on pages 71 and 72. 7 Click "OK". The photo printing wizard - Sony DPP-EX7 | Operating Instructions - Page 75
the data has already transferred to the printer queue 1 Open the "Printers and Faxes" (Windows XP Home Edition/XP Professional only) or "Printers" from the "Control Panel". 2 Double-click the "Sony DPP-EX7" icon. The "Sony DPP-EX7" window is displayed. In the window, the documents in the queue for - Sony DPP-EX7 | Operating Instructions - Page 76
with Macintosh computers The supplied DPP-EX7 printer driver enables you to print an image stored on your computer with the Digital Photo Printer DPP-EX7. To print an image from the computer, you need commercially available printing application software. System requirements To use the supplied - Sony DPP-EX7 | Operating Instructions - Page 77
with Macintosh computers Installing the printer driver When using Mac OS 8.6/9.0/9.1/9.2 1 Make sure that the printer is not connected to the computer. 2 Turn on and start your Macintosh. Note Be sure to close all running programs before installing the software. 3 Insert the supplied CD-ROM into - Sony DPP-EX7 | Operating Instructions - Page 78
. Keep it in good order for possible future use. Uninstalling the printer driver When the software becomes unnecessary, remove the software as follows: In step 6, click "Uninstaller". When using Mac OS X (v10.1/v10.2) 1 Make sure that the printer is not connected to the computer. 2 Turn on and start - Sony DPP-EX7 | Operating Instructions - Page 79
When you are using Mac OS X (v10.2), this dialog box will be not displayed. 7 Enter the name and password of the computer administrator, and then click "OK". For the name and password, refer to the computer administrator. 8 Click "Continue". 9 Click the location you install the driver and then click - Sony DPP-EX7 | Operating Instructions - Page 80
in good order for possible future use. Uninstalling the printer driver When the software becomes unnecessary, remove the software as follows: 1 Disconnect the USB cable from your printer and the computer. 2 Open "Print Center", select "DPP-EX7" from the printer list and then click "Delete". Note The - Sony DPP-EX7 | Operating Instructions - Page 81
Printing from your computer Printing from an application software You can use an application software to print images stored in your computer with the Digital Photo Printer DPP-EX7. Notes • Before printing, make sure to connect the USB connectors of the printer and the computer. If you connect it - Sony DPP-EX7 | Operating Instructions - Page 82
Using your printer with Macintosh computers 4 Choose the print settings. Settings Select "Page Attributes". Format for Select "DPP-EX7" from the drop-down list box. Paper Size Select either of the following paper size from the dropdown list box. • Post card: When you use the Post Card (4 x 6 - Sony DPP-EX7 | Operating Instructions - Page 83
, do not cancel printing. Paper jam may occur. Please wait until the printing is completed. When an error occurs during printing in the Mac OS X (v10.1/v10.2) If an error occurs, follow the procedures. 1 If the right dialog box is displayed, click "Show Printer". The error description is displayed - Sony DPP-EX7 | Operating Instructions - Page 84
roughly. • To reduce the risk of electrical shock, always unplug the printer from the electrical outlet before cleaning and servicing the printer. • Take care not to scratch or damage your printer's LCD screen. Always use the supplied stylus or a plastictipped pointer to tap on the screen. Do - Sony DPP-EX7 | Operating Instructions - Page 85
printer for at least one hour. On transport When you transport the printer, remove the print cartridge, paper tray, the "Memory Stick" or PC card from the printer and put the printer postal stamps is also against the law. • TV program, films, video tapes, others' portraits or other materials may be - Sony DPP-EX7 | Operating Instructions - Page 86
same size as the standard-sized "Memory Stick", and can be used with "Memory Stick" compliant devices. • When using the "Memory Stick Duo" on the printer, make sure to insert the "Memory Stick Duo" into the Memory Stick Duo adaptor and then insert the adaptor containing the "Memory Stick Duo" into - Sony DPP-EX7 | Operating Instructions - Page 87
technology. The "MagicGate"compatible device and the "MagicGate Memory Stick" attest that each other supports the "MagicGate" technology and encode the data they exchange. The printer does not support the "MagicGate" standards and cannot read or write the data subject to the "MagicGate" copyright - Sony DPP-EX7 | Operating Instructions - Page 88
direct sunlight, or a place near a heater. - direct sunlight - high humidity - corrosive substances • When formatting a "Memory Stick", use the format function of the printer or your digital still camera. If you format a "Memory Stick" with your computer, images may not be displayed properly. 88 GB - Sony DPP-EX7 | Operating Instructions - Page 89
adaptor that is compatible with the card. Insert the card into the adaptor and then insert it into the printer. For how to install the card and adaptor, refer to the operating instructions of the PC card adaptor. • Avoid inserting or removing the compact flash card or Smart Media into or out - Sony DPP-EX7 | Operating Instructions - Page 90
Troubleshooting If you run into any problems using the printer, use the following guidelines to solve the problem. If the problem persists, consult your Sony dealer. When you are printing from your computer, also refer to the computer manual. Cannot operate the printer after the power switch is - Sony DPP-EX7 | Operating Instructions - Page 91
remove the print cartridge. m Turn the printer off then on. After the motor sound stops, try to remove the cartridge. If this does not solve the problem, contact Sony service facilities or your Sony dealer. The or indicator is lit or an error message is displayed. m Follow the instructions on the - Sony DPP-EX7 | Operating Instructions - Page 92
paper. Take out the paper tray to remove the jammed paper. Pull out the jammed paper slowly. Note If you cannot remove the jammed paper, contact your Sony dealer. Cleaning the inside of the printer If white lines or dots are printed on the pictures, use the supplied cleaning cartridge and paper - Sony DPP-EX7 | Operating Instructions - Page 93
18). 2 Insert the supplied cleaning cartridge (white) into the printer and close the cartridge compartment lid. 3 Remove the paper tray from the printer. If there is print paper in the tray, remove the print paper from the tray. 4 Remove the 3.5 x 5 inch paper adaptor and stand the partition up - Sony DPP-EX7 | Operating Instructions - Page 94
4:4:4, 4:2:2, 4:2:0 (baseline JPEG) BMP: 24 bits full color, Windows format JFIF (Note that some versions of the file formats may not be handled 9999 files per a "Memory Stick" or PC card media Print cartridge/Print Paper See "Preparing the printing pack" on page 17. LCD display 3.8 inch - Sony DPP-EX7 | Operating Instructions - Page 95
conditions data. *4: The printer functions may be limited for a TIFF file. Additional information Customer support home page The latest support information is available at the following homepage addresses: For the customers in the U.S.A.: http://www.sel.sony.com/SEL/service/conselec/ For the - Sony DPP-EX7 | Operating Instructions - Page 96
Print) Exif (Exchangeable image file format for digital still cameras) Print is a global standard for digital photo printing. A digital still camera supporting Exif Print stores the data relevant to the conditions of shooting as each shot is taken. The printer utilises the Exif Print data stored in - Sony DPP-EX7 | Operating Instructions - Page 97
16, 23 Installing the software Macintosh 77 Windows 67 L LCD display contrast Paper error indicator 22, 92 Paper jams 92 Paper tray 10, 20 PC Card Inserting/removing 15 Note on use 89 Pencil tool 49 Post Card size 17 POWER button 18, 23, 25, 28 Preview image 24 PRINT button 24, 26 Print cartridge - Sony DPP-EX7 | Operating Instructions - Page 98
size 17 Specifications 94 Split Images 43 Stamp tool 53 Sticker 44 Stylus 13 Supplied accessories 8 System requirements Macintosh 76 Windows 66 T Tapping 13 Template 38 Texture 59 Thumbnails 90, 96 Tool 48 Troubleshooting 90 Type tool 50 U Uninstalling the software 70, 78, 80 USB connector 16 98 GB - Sony DPP-EX7 | Operating Instructions - Page 99
Additional information 99 GB - Sony DPP-EX7 | Operating Instructions - Page 100
mettant un rayonnement électromagnétique. ATTENTION Sony ne pourra être tenu responsable de DE TOUT PRODUIT. • Microsoft, MS, MS-DOS et Windows® sont des marques déposées de Microsoft Corporation aux Corporation. •Apple, Macintosh, Power Macintosh, et Mac OS sont des marques déposées de Apple - Sony DPP-EX7 | Operating Instructions - Page 101
Notice destinée aux Enregistrement utilisateur Pour bénéficier du service clientèle, utilisateurs complétez et renvoyez la carte d'enregistrement incluse dans votre emballage. Programme © 2002 Sony Corporation Documentation ©2002 Sony Corporation Il est interdit de modifier ou de dupliquer - Sony DPP-EX7 | Operating Instructions - Page 102
Table des matières Préparatifs Fonctions 6 Déballage de l'imprimante 8 Identification des composants 9 Utilisation du crayon optique et du panneau de commande 12 Ouverture du panneau de commande 12 Utilisation du crayon optique 13 Configuration 1 Raccordement de l'imprimante ....... 14 - Sony DPP-EX7 | Operating Instructions - Page 103
Suppression des images sélectionnées 64 Formatage d'un "Memory Stick" ...... 65 Impression depuis votre ordinateur Utilisation de l'imprimante sous Windows 66 Configuration du système 66 IInstallation du pilote d'imprimante .. 67 Impression à partir d'un logiciel d'application 70 Utilisation de - Sony DPP-EX7 | Operating Instructions - Page 104
Préparatifs Fonctions Impression de qualité photographique Avec son système d'impression par sublimation, l'imprimante photo numérique DPP-EX7 peut faire des impressions de qualité photographique répondant à un grand nombre d'exigences. Fonction Super Coat 2 La fonction Super Coat 2 offre une grande - Sony DPP-EX7 | Operating Instructions - Page 105
pouvez visualiser sur l'écran LCD les images d'un appareil photo numérique enregistrées sur un "Memory Stick" ou contenues ou toutes les images préréglées en DPOF (Digital Print Order Format) peuvent être imprimées en même de l'imprimante DPP-EX7 fourni sur l'ordinateur, vous pouvez imprimer des images à - Sony DPP-EX7 | Operating Instructions - Page 106
de licence d'utilisateur final pour le logiciel Sony (1) • Fiche d'enregistrement client (1) - Pilote d'imprimante Sony DPPEX5/EX7 pour Windows 98/ 98SE/Me/2000 Professional/XP Home Edition/XP Professional - Pilote d'imprimante Sony DPPEX5/EX7 pour Mac OS versions 8.6/9.0/9.1/X (v10.1/v10.2) - Mode - Sony DPP-EX7 | Operating Instructions - Page 107
Identification des composants Préparatifs Pour davantage d'informations, reportez-vous aux pages indiquées entre parenthèses. Panneau avant de l'imprimante 1 Capot du panneau de commande 2 Touche POWER (pages 18, 23, 25, 28) 3 Fente d'insertion du "MEMORY STICK" (page 14) 4 Logement d' - Sony DPP-EX7 | Operating Instructions - Page 108
Identification des composants Panneau arrière de l'imprimante 1 Connecteur USB (page 16) Se raccorde au connecteur USB de votre ordinateur. 2 Connecteur AC IN (page 15) 3 Trous de ventilation 10 FR Magasin à papier 1 Capot (page 20) 2 Séparation (page 20) 3 Adaptateur de papier 3,5 x 5 pouces ( - Sony DPP-EX7 | Operating Instructions - Page 109
la position de l'image affichée ou sélectionnée parmi le nombre total d'images. q; 8 Indicateur de protection Indique que l'image est protégée par un appareil photo numérique. 9 Numéro de l'image 0 Indication de la quantité d'impression qa Touches de commande qs Message de guidage qd Touches de - Sony DPP-EX7 | Operating Instructions - Page 110
Utilisation du crayon optique et du panneau de commande La plupart des opérations du DPP-EX7 sont réalisées en appuyant sur un élément ou une touche de l'écran tactile du panneau de commande. Cette section explique comment utiliser le crayon - Sony DPP-EX7 | Operating Instructions - Page 111
l'écran. N'utilisez jamais de vrai crayon, stylo ou autre objet pointu pour écrire sur l'écran. •Si vous perdez le crayon fourni, vous pouvez utiliser l'accessoire Sony proposé en option. 13 FR - Sony DPP-EX7 | Operating Instructions - Page 112
Configuration 1 Raccordement de l'imprimante Insertion d'un "Memory Stick" ou d'une carte PC Remarques •N'essayez pas d'introduire ou de retirer de force le "Memory Stick" ou la carte PC du logement. Cela risquerait d'endommager le "Memory Stick", la carte PC ou l'imprimante. •Lorsque l'imprimante - Sony DPP-EX7 | Operating Instructions - Page 113
Configuration Insertion d'une carte PC Insérez la carte PC dans le logement PC CARD jusqu'à ce que vous entendiez un déclic. Bouton d'éjection PC CARD Carte PC Pour éjecter la carte PC Appuyez sur le bouton d'éjection PC CARD. Lorsque la carte PC a été éjectée, retirez-la doucement. Remarques •Insé - Sony DPP-EX7 | Operating Instructions - Page 114
option) Raccordez les connecteurs USB de l'imprimante à votre ordinateur (PC Windows ou Macintosh) à l'aide d'un câble USB disponible dans le la section "Impression depuis votre ordinateur" (pages 66-83). Ordinateur Windows/ Macintosh Vers le connecteur USB Vers le connecteur USB (TYPE B) - Sony DPP-EX7 | Operating Instructions - Page 115
Contenu SVM-25LS 25 feuilles de papier photo au format carte postale (10 x 15 impression. Si vous ne respectez pas cette instruction, vous obtiendrez une qualité d'impression mé pas sa précision. - Ne retirez pas le papier support du papier d'impression autocollant avant de procéder à l'impression - Sony DPP-EX7 | Operating Instructions - Page 116
vous entendiez un déclic vous indiquant qu'elle est bien en place, puis fermez le capot du compartiment. Le côté où se trouve le logo Sony doit être orienté vers le haut Pour remplacer la cartouche d'impression Lorsque la cartouche d'impression est vide, l'indicateur d'erreur cartouche s'allume et - Sony DPP-EX7 | Operating Instructions - Page 117
Configuration Remarques •N'introduisez jamais vos doigts dans le compartiment de la cartouche d'encre. La tête d'impression thermique atteint des températures élevées, en particulier après une impression prolongée. •Ne réutilisez pas une cartouche d'encre pour l'impression après en avoir rembobiné - Sony DPP-EX7 | Operating Instructions - Page 118
4 Insertion du papier d'impression 1 Ouvrez le capot du magasin à papier et installez l'adaptateur papier 3,5 x 5 pouces et le séparateur suivant la taille du papier que vous souhaitez utiliser. x Pour utiliser le papier au format carte postale (10 x 15 cm) Retirez l'adaptateur papier 3,5 x 5 pouces - Sony DPP-EX7 | Operating Instructions - Page 119
Configuration 2 Installez le papier dans le magasin. Aérez le papier d'impression. Insérez-le ensuite avec sa surface d'impression (le côté dépourvu de toute marque) orientée vers le haut et la flèche pointant dans la même direction que la flèche du magasin. Insérez la feuille de protection avec le - Sony DPP-EX7 | Operating Instructions - Page 120
avoir été imprimé. - N'apposez pas d'autocollants ou autres sur la surface d'impression avant de procéder à l'impression. - Ne retirez pas le papier support du papier d'impression autocollant avant de procéder à l'impression. - Ne pliez pas et ne roulez pas le papier d'impression autocollant avant - Sony DPP-EX7 | Operating Instructions - Page 121
Opérations d'impression de base Opérations d'impression de base Impression d'images sélectionnées Vous pouvez sélectionner une image 4 enregistrée dans le "Memory Stick" ou 5 une carte PC et l'imprimer aux 3 dimensions exactes. 2 1 1 Insérez un "Memory Stick" ou une carte PC comportant - Sony DPP-EX7 | Operating Instructions - Page 122
Impression de l'image sélectionnée 4 Tapotez l'image que vous souhaitez imprimer sur l'écran. Le curseur se déplace vers cette image. Curseur et touches de défilement Pour afficher une autre page Lorsqu'il existe plusieurs pages, vous pouvez basculer entre les pages en faisant glisser le - Sony DPP-EX7 | Operating Instructions - Page 123
Opérations d'impression de base Pour imprimer l'image de l'aperçu Pour imprimer une copie de l'image de l'aperçu, appuyez sur la touche PRINT. Pour imprimer plusieurs copies, appuyez sur [+] jusqu'à ce que la quantité d'impression souhaitée s'affiche puis appuyez sur la touche PRINT. Pour réduire - Sony DPP-EX7 | Operating Instructions - Page 124
Impression de l'image sélectionnée 6 Tapotez sur [+] ou [-] pour définir le nombre de copies à imprimer. Chaque fois que vous tapotez sur [+] Quantité d'impression ou [-], la quantité d'impression augmente ou diminue. Vous pouvez définir la quantité d'impression entre 0 et 30. Pour imprimer - Sony DPP-EX7 | Operating Instructions - Page 125
de la taille des images, du type de fichier ou du type d'appareil photo numérique. •L'imprimante ne peut pas afficher les images enregistrées dans affichés sur l'écran sont les mêmes que ceux affichés sur votre appareil photo numérique. Dans le cas d'un fichier créé avec une application informatique - Sony DPP-EX7 | Operating Instructions - Page 126
toutes les images comportant un repère d'impression ( ) dans la liste des 2 images préréglées DPOF (Digital Print 1 Order Format) pour une impression avec votre appareil photo numérique. Remarques • Pour savoir comment prérégler des images pour l'impression, reportez-vous au mode d'emploi de - Sony DPP-EX7 | Operating Instructions - Page 127
de papier d'impression se trouvant dans le magasin à papier est inférieur à la quantité d'impression, vous pouvez lancer l'impression. Si un message apparaît, suivez les instructions affichées à l'écran pour remplacer le kit d'impression et poursuivre l'impression. 29 FR - Sony DPP-EX7 | Operating Instructions - Page 128
Opérations d'impression avancée Ajout d'effets à une image (Effect) Possibilités offertes par le menu Effect Le menu Effect permet de modifier, d'ajuster ou d'ajouter des filtres spéciaux à une image positionnée avec le curseur dans la liste des images, ou affichée sur l'écran d'aperçu. Pour - Sony DPP-EX7 | Operating Instructions - Page 129
permettant de sélectionner la destination pour enregistrer une image depuis le "Memory Stick" ou la carte PC s'affiche. 2 Tapotez sur le support souhaité pour enregistrer une image. L'image modifiée est enregistrée comme une nouvelle image, avec un nouveau numéro d'image. Lorsque l'enregistrement - Sony DPP-EX7 | Operating Instructions - Page 130
Ajout d'effets à une image (Effect) Modification de la taille et de la position d'une image Le sous-menu Edit permet d'agrandir, de réduire, de faire pivoter ou de retourner une image. 1 Déplacez le curseur vers l'image souhaitée dans la liste des images ou tapotez de nouveau dessus pour afficher - Sony DPP-EX7 | Operating Instructions - Page 131
Opérations d'impression avancée Remarque La qualité d'une image agrandie peut être moins bonne selon la taille de l'image. 5 Tapotez sur [Back]. Le menu Effect est de nouveau affiché. Vous pouvez sélectionner un autre sous-menu Effect, enregistrer ou imprimer l'image ou quitter le menu Effect ( - Sony DPP-EX7 | Operating Instructions - Page 132
Ajout d'effets à une image (Effect) 5 Faites glisser le curseur vers le haut ou le bas ou tapotez plusieurs fois la partie supérieure/inférieure ou [V]/[v] de la barre de défilement pour régler l'image. Eléments Brightness Saturation Tint Sharpness Procédures Déplacez le curseur vers le haut pour - Sony DPP-EX7 | Operating Instructions - Page 133
Ajout d'un filtre spécial à une image Le sous-menu Filter permet d'ajouter un effet spécial à une image pour imprimer en monochrome, peinture ou sépia. 1 Déplacez le curseur vers l'image souhaitée dans la liste des images ou tapotez de nouveau dessus pour afficher son aperçu. 2 Tapotez sur [Effect]. - Sony DPP-EX7 | Operating Instructions - Page 134
Création d'impressions diverses (Creative Print) Possibilités offertes par le menu Creative Print Le menu Creative Print permet de réaliser des impressions très variées. Pour afficher le menu Creative Print principal, tapotez sur [Creative Print] sous la liste des images ou l'écran d'aperçu : - Sony DPP-EX7 | Operating Instructions - Page 135
permettant de sélectionner la destination pour enregistrer une image depuis le "Memory Stick" ou la carte PC s'affiche. 2 Tapotez sur le support souhaité pour enregistrer une image. L'image modifiée est enregistrée comme une nouvelle image, avec un nouveau numéro d'image. Lorsque l'enregistrement - Sony DPP-EX7 | Operating Instructions - Page 136
Création d'impressions diverses (Creative Print) Création d'une carte Vous pouvez ajouter un message sélectionné et saisir des caractères vers les images afin de créer une carte originale, comme celle illustrée ci-contre. 1 Tapotez sur [Card] dans le menu Creative Print principal (page 36). L'écran - Sony DPP-EX7 | Operating Instructions - Page 137
Opérations d'impression avancée 4 Tapotez sur chaque zone de l'aperçu pour saisir un message, une ou plusieurs images ou des caractères. Vous pouvez les sélectionner dans n'importe quel ordre. x Saisie d'un message 1 Tapotez sur la zone réservée aux vœux. L'écran utilisé pour sélectionner un - Sony DPP-EX7 | Operating Instructions - Page 138
Création d'impressions diverses (Creative Print) 2 Tapotez sur l'image souhaitée. L'écran utilisé pour régler la taille, la position, l'angle et la luminosité de l'image s'affiche. 3 Tapotez sur la touche de réglage souhaitée et procédez à vos réglages. Eléments Procédures #/3 Chaque fois que - Sony DPP-EX7 | Operating Instructions - Page 139
Opérations d'impression avancée 5 Vérifiez l'aperçu. Vous pouvez imprimer ou enregistrer l'image créée (pages 3637). Création d'un calendrier Vous pouvez ajouter un calendrier sélectionné à une ou plusieurs images pour créer un calendrier original. 1 Tapotez sur [Calendar] dans le menu Creative - Sony DPP-EX7 | Operating Instructions - Page 140
Création d'impressions diverses (Creative Print) 3 Tapotez sur le modèle souhaité. Un aperçu du modèle sélectionné est affiché. Zone de l'image Zone du calendrier 4 Tapotez sur chaque zone de l'aperçu pour saisir le calendrier et ajouter une ou plusieurs images. Vous pouvez les sélectionner dans - Sony DPP-EX7 | Operating Instructions - Page 141
Opérations d'impression avancée 5 Vérifiez l'aperçu. Vous pouvez imprimer ou enregistrer l'image créée (pages 3637). Création d'une impression fractionnée en plusieurs parties Vous pouvez imprimer des images fractionnées en 2, 4, 9, 13 ou 16 parties. Images fractionnées en 4 parties 1 Tapotez sur [ - Sony DPP-EX7 | Operating Instructions - Page 142
Création d'impressions diverses (Creative Print) 3 Tapotez sur le modèle souhaité. L'aperçu du modèle sélectionné est affiché. 4 Insérez un "Memory Stick" ou une carte PC dans l'imprimante et tapotez sur la zone d'image. Lorsque vous sélectionnez un modèle avec plusieurs images, vous pouvez sé - Sony DPP-EX7 | Operating Instructions - Page 143
Opérations d'impression avancée 2 Tapotez sur le modèle en 9 parties souhaité. Un aperçu du modèle sélectionné est affiché. 3 Tapotez sur la zone d'image. Lorsque vous sélectionnez un modèle avec plusieurs images, vous pouvez sélectionner n'importe quelle zone d'image. L'écran utilisé pour sé - Sony DPP-EX7 | Operating Instructions - Page 144
Création d'impressions diverses (Creative Print) Création d'une impression d'index Vous pouvez faire une impression d'index des images enregistrées dans un "Memory Stick" ou une carte PC. Vous pouvez également saisir le titre d'une impression d'index. 1 Tapotez sur [Index Print] dans le menu - Sony DPP-EX7 | Operating Instructions - Page 145
Opérations d'impression avancée 6 Tapotez sur chaque zone de l'aperçu pour saisir un titre et une ou plusieurs images. Vous pouvez les sélectionner dans n'importe quel ordre. x Saisie d'un titre Lorsque vous sélectionnez [On] pour le titre, vous pouvez saisir des caractères pour créer un titre. - Sony DPP-EX7 | Operating Instructions - Page 146
les messages pouvant être collés sur l'aperçu. (Page 55) Save Affiche la boîte de dialogue permettant de sélectionner le support de destination pour l'enregistrement de l'image modifiée. Exit Revient à l'écran affiché avant l'écran Tool. Pour l'impression, l'enregistrement et d'autres op - Sony DPP-EX7 | Operating Instructions - Page 147
Opérations d'impression avancée Tracer une ligne à main levée ( ) Vous pouvez utiliser l'outil crayon pour tracer une ligne à main levée sur l'aperçu. 1 Dans l'écran Tool (page 48), tapotez sur (Outil crayon). L'écran Outil crayon apparaît. 2 Pour sélectionner la couleur des dessins au crayon, - Sony DPP-EX7 | Operating Instructions - Page 148
Création d'impressions diverses (Creative Print) 6 Tapotez sur [Enter]. Le dessin réalisé est validé et collé sur l'aperçu. L'écran Outil principal s'affiche. Vous pouvez utiliser un autre outil, imprimer l'image créée ou l'enregistrer (page 48). Saisie de caractères ( ) Vous pouvez utiliser l' - Sony DPP-EX7 | Operating Instructions - Page 149
Opérations d'impression avancée x Pour changer de ligne Tapotez sur # pour saisir la ligne suivante. Pour revenir à la ligne précédente, tapotez plusieurs fois sur [b] sur le côté de la zone de saisie des caractères jusqu'à ce que la ligne précédente soit affichée. Pour passer à la ligne suivante, - Sony DPP-EX7 | Operating Instructions - Page 150
Création d'impressions diverses (Creative Print) 3 Tapotez sur [Exit]. L'écran de saisie des caractères est fermé et les caractères saisis sont collés sur l'aperçu. 4 Réglez la taille, la position et l'angle des caractères. Eléments #/3 $/4/%/5 / Annuler Procédures Chaque fois que vous tapotez sur - Sony DPP-EX7 | Operating Instructions - Page 151
Opérations d'impression avancée Coller des vignettes ( ) Vous pouvez utiliser l'outil vignette pour coller une vignette sélectionnée sur l'aperçu. 1 Dans l'écran Tool (page 48), tapotez sur (Outil vignette). L'écran de sélection des vignettes apparaît. 2 Tapotez sur la vignette souhaitée. La - Sony DPP-EX7 | Operating Instructions - Page 152
Création d'impressions diverses (Creative Print) Coller des images encadrées ( ) Vous pouvez utiliser l'outil cadre pour coller une image sélectionnée avec ou sans cadre. 1 Dans l'écran Tool (page 48), tapotez sur (Outil cadre). L'écran de sélection des formes apparaît. 2 Insérez un "Memory Stick" - Sony DPP-EX7 | Operating Instructions - Page 153
4 Réglez l'image encadrée, puis tapotez sur [Enter]. Pour obtenir davantage d'informations sur le réglage d'une image, reportezvous à la page 40. L'image encadrée est collée sur l'aperçu. Pour annuler l'opération Tapotez sur [Cancel]. L'image encadrée est effacée de l'aperçu. 5 Réglez la taille et - Sony DPP-EX7 | Operating Instructions - Page 154
Création d'impressions diverses (Creative Print) 2 Tapotez sur le message souhaité. Le message sélectionné dans la couleur choisie est collé sur l'aperçu. Pour annuler l'opération Tapotez sur [Cancel]. Le message est effacé de l'aperçu. 3 Réglez la taille, la position et l'angle du message. Pour - Sony DPP-EX7 | Operating Instructions - Page 155
Configuration de l'imprimante (MENU) Fonctions du menu Le menu vous permet de modifier les paramètres de l'imprimante, de régler l'écran, d'afficher un diaporama ou de supprimer des images. Pour afficher l'écran Menu, tapotez sur la touche [Menu] située en dessous de la liste d'images ou de l'écran - Sony DPP-EX7 | Operating Instructions - Page 156
pouvez sélectionner le niveau de réglage entre "High" ou "Low". Lorsque "High" ou "Low" est sélectionné, une image prise par un appareil photo numérique compatible Exif Print (Exif 2,2) est automatiquement réglée pour obtenir une qualité d'image optimale, puis imprimée. Remarques • L'image affich - Sony DPP-EX7 | Operating Instructions - Page 157
pas réaliser d'impressions sans marge avec du papier au format Petit (9 x 10 cm). • Lors de l'impression d'une image 4:3 standard prise par un appareil photo numérique, les parties supérieure et inférieure de l'image sont coupées et l'image est imprimée au format 3:2. Glossy* Imprime une image - Sony DPP-EX7 | Operating Instructions - Page 158
Configuration de l'imprimante (MENU) Paramètres Color Setting Réglages Règle les couleurs d'une impression. Faites glisser le curseur de défilement du réglage de chaque couleur ou tapotez sur [+] ou sur [-] pour régler le niveau sur une valeur supérieure (+1, +2) ou sur une valeur inférieure (1, - Sony DPP-EX7 | Operating Instructions - Page 159
Opérations d'impression avancée Modification des préférences de l'imprimante (Options) Vous pouvez modifier les préférences d'impression et régler le contraste de l'écran LCD de l'imprimante. 1 Tapotez sur [Options] dans l'écran Menu (page 57). La fenêtre Options apparaît. 2 Tapotez sur les paramè - Sony DPP-EX7 | Operating Instructions - Page 160
Configuration de l'imprimante (MENU) Eléments Date/Clock Setting Display Contrast Réglages Vous pouvez régler l'horloge interne pour enregistrer la date que vous avez sauvegardée Réglage de l'image dans le "Memory Stick" ou la carte PC. 1 Tapotez sur [Setting] pour passer en mode de réglage de l' - Sony DPP-EX7 | Operating Instructions - Page 161
Opérations d'impression avancée Affichage d'un diaporama Vous pouvez effectuer un diaporama des images sauvegardées sur un "Memory Stick" ou sur la carte PC. 1 Tapotez sur [Diaporama] dans l'écran Menu (page 57). L'écran Diaporama apparaît. 2 Au niveau de la ligne Switch Time, tapotez sur [Fast] - Sony DPP-EX7 | Operating Instructions - Page 162
Suppression d'images Vous pouvez supprimer les images sélectionnées dans le "Memory Stick" ou la carte PC. Vous pouvez également formater le "Memory Stick". Remarques • Lors de la suppression ou du formatage, ne mettez pas l'appareil hors tension ou ne retirez pas le "Memory Stick" ou la carte PC de - Sony DPP-EX7 | Operating Instructions - Page 163
Opérations d'impression avancée 3 Tapotez sur l'image que vous souhaitez supprimer. L'image sélectionnée s'affiche sur fond jaune avec l'icône de la corbeille. Pour supprimer plusieurs images à la fois, répétez cette étape. Pour annuler la suppression Tapotez sur [Exit]. 4 Tapotez sur [Execute]. Le - Sony DPP-EX7 | Operating Instructions - Page 164
Windows Le pilote d'imprimante DPP-EX7 fourni vous permet d'imprimer des images enregistrées sur votre ordinateur à l'aide de l'imprimante photo numérique DPP-EX7 plusieurs imprimantes DPP-SV88/SV77/SV55/MP1/EX7/EX5 en même fonctionner correctement. •L'imprimante ne supporte pas le mode de veille/ - Sony DPP-EX7 | Operating Instructions - Page 165
tous les programmes en cours d'exécution avant d'installer le logiciel. • Les boîtes de dialogue mentionnées dans cette section sont celles de Windows XP Professional, sauf mention contraire. Les procédures d'installation et les boîtes de dialogue diffèrent selon le système d'exploitation. 3 Insérez - Sony DPP-EX7 | Operating Instructions - Page 166
de l'imprimante sous Windows La boîte de dialogue "Sony DPPEX5/EX7 Setup" s'affiche. der au raccordement. 8 Suivez les instructions apparaissant à l'écran pour configurer l' tape 3. • Une fois l'installation effectuée, l'imprimante "Sony DPP-EX7" n'est pas l'imprimante par défaut. Définissez - Sony DPP-EX7 | Operating Instructions - Page 167
Professional uniquement) ou "Imprimantes" dans "Panneau de configuration". Lorsque "Sony DPP-EX7" apparaît dans la fenêtre "Imprimantes et télécopieurs" ou "Imprimantes" , l'installation de l'imprimante DPP-EX7 est réussie. Si vous utilisez Windows Me La fenêtre "Assistant Ajout de nouveau matériel - Sony DPP-EX7 | Operating Instructions - Page 168
télécopieurs" (Windows XP Home Edition/XP Professional uniquement) ou "Imprimantes" dans "Panneau de configuration". 3 Cliquez sur "Sony DPP-EX7" avec le image à partir de votre ordinateur avec l'imprimante photo numérique DPP-EX7. Sous Windows XP Home Edition/Professional, vous pouvez utiliser - Sony DPP-EX7 | Operating Instructions - Page 169
îte de dialogue varie selon l'application. 1 Cliquez sur "Imprimante". La boîte de dialogue "Mise en page" apparaît. 2 Sélectionnez "Sony DPP-EX7" comme nom d'imprimante. 3 Cliquez sur "Propriétés". La fenêtre permettant de définir les propriétés du document apparaît. 4 Dans l'onglet "Disposition - Sony DPP-EX7 | Operating Instructions - Page 170
Utilisation de l'imprimante sous Windows 5 Cliquez sur l'onglet "Papier", puis configurez le papier en fonction du format de papier que vous souhaitez utiliser pour l'impression. Papier Marge Sélectionnez le format - Sony DPP-EX7 | Operating Instructions - Page 171
7 Cliquez sur "Imprimer". L'imprimante commence l'impression. L'écran de contrôle de l'imprimante DPP-EX7 apparaît et affiche le déroulement de l'impression. Pour imprimer à partir de Mes images (sous Windows XP Home Edition/Professional uniquement) 1 Insérez les images que vous souhaitez imprimer - Sony DPP-EX7 | Operating Instructions - Page 172
sous Windows 4 Cliquez sur "Suivant". La fenêtre de sélection des images apparaît. 5 Vérifiez les images que vous souhaitez imprimer, puis cliquez sur "Imprimer les images". Veillez à supprimer les coches des images que vous ne souhaitez pas imprimer. 6 Sélectionnez "DPP-EX7" comme imprimante - Sony DPP-EX7 | Operating Instructions - Page 173
la boîte de dialogue de l'assistant d'impression des photos est affichée, cliquez sur "Terminer". Pour arrêter l'impression Windows XP Home Edition/XP Professional uniquement) ou "Imprimantes" dans "Panneau de configuration". 2 Cliquez deux fois sur l'icône "Sony DPP-EX7". La fenêtre "Sony DPP-EX7 - Sony DPP-EX7 | Operating Instructions - Page 174
imprimante DPP-EX7 fourni vous permet d'imprimer des images enregistrées sur votre ordinateur à l'aide de l'imprimante photo numérique DPP-EX7. connectés à l'ordinateur. • Si vous raccordez plusieurs imprimantes DPP-SV88/SV77/SV55/MP1/EX7/EX5 en même temps, vous ne pouvez pas utiliser l'imprimante. - Sony DPP-EX7 | Operating Instructions - Page 175
lecteur de CD-ROM de votre ordinateur. 4 Cliquez deux fois sur le dossier "Mac OS 8.6-9.x". 5 Sélectionnez la langue du logiciel en cliquant deux fois dans le la langue sélectionnée s'ouvre. 6 Cliquez deux fois sur "DPP- EX5_EX7 Installer". 7 Cliquez sur "Installer". L'installation commence. - Sony DPP-EX7 | Operating Instructions - Page 176
Si vous n'utilisez plus le logiciel, supprimez-le de la façon suivante : à l'étape 6, cliquez sur "Uninstaller". Lorsque vous utilisez Mac OS X (v10.1/v10.2) 1 Vérifiez que l'imprimante n'est pas raccordée à l'ordinateur. 2 Mettez votre Macintosh sous tension et démarrez-le. Remarque Veillez - Sony DPP-EX7 | Operating Instructions - Page 177
6 Cliquez sur . Remarque Si vous utilisez Mac OS X (v10.2), cette boîte de dialogue ne s'affiche pas. 7 Saisissez le nom et le mot de passe de l'administrateur de l'ordinateur, puis cliquez sur " - Sony DPP-EX7 | Operating Instructions - Page 178
supprimez-le de la façon suivante : 1 Déconnectez le câble USB de l'imprimante et de l'ordinateur. 2 Ouvrez "Centre d'impression", sélectionnez "DPP-EX7" dans la liste des imprimantes, puis cliquez sur "Supprimer". Remarque Le "Centre d'impression" est situé dans le dossier "Utilitaires" du dossier - Sony DPP-EX7 | Operating Instructions - Page 179
des images stockées sur votre ordinateur à l'aide de l'imprimante photo numérique DPP-EX7. Remarques • Avant de procéder à l'impression, veillez à . •Les boîtes de dialogue mentionnées dans cette section sont celles de Mac OS X (v10.2). Elles peuvent varier selon le système d'exploitation. •Pour - Sony DPP-EX7 | Operating Instructions - Page 180
Utilisation de l'imprimante avec un Macintosh Réglages Sélectionnez "Attributs de page". Format Sélectionnez "DPP-EX7" à partir de la liste déroulante. Papier Sélectionnez l'un des formats de papier suivants à partir de la liste déroulante. • Carte postale: lorsque vous utilisez le papier d' - Sony DPP-EX7 | Operating Instructions - Page 181
contraire, vous risquez de provoquer un bourrage papier. Attendez que l'impression soit terminée. Si une erreur se produit au cours d'une impression sous Mac OS X (v10.1/v10.2) En cas d'erreur, procédez comme suit. 1 Si la boîte de dialogue située à droite apparaît, cliquez sur Afficher l'imprimante - Sony DPP-EX7 | Operating Instructions - Page 182
ou du liquide pénètre à l'intérieur du boîtier, débranchez l'imprimante et faites-la vérifier par un technicien qualifié avant de la remettre en service. • Ne démontez jamais l'imprimante. • Pour débrancher le cordon d'alimentation, tirez-le par sa fiche. Ne tirez jamais sur le cordon luimême. • Si - Sony DPP-EX7 | Operating Instructions - Page 183
de passeports, de titres privés ou de timbres postaux non utilisés est également interdite par la loi. • Les émissions de télévision, les films, les cassettes vidéo et les autres supports audiovisuels peuvent être protégés par des droits d'auteur (copyright). L'impression vidéo non autorisée de ces - Sony DPP-EX7 | Operating Instructions - Page 184
de la mémoire contient plusieurs unités de mémoire de 128 Mo que l'utilisateur peut sélectionner grâce à un contacteur mécanique situé au dos du support. Chaque unité de mémoire peut être utilisée pour classer divers types de données. Il est impossible de sélectionner plusieurs unités de mémoire - Sony DPP-EX7 | Operating Instructions - Page 185
Utilisez l'adaptateur spécialement conçu pour le " Memory Stick Duo " utilisé. Nous ne sommes pas en mesure de garantir le fonctionnement de tous les supports " Memory Stick ". A propos de la vitesse de lecture/ d'écriture des données La vitesse de lecture/d'écriture des données diffère selon la - Sony DPP-EX7 | Operating Instructions - Page 186
. - aux rayons du soleil - à une humidité élevée - à des substances corrosives • Pour formater un "Memory Stick", utilisez la fonction format de l'imprimante ou votre appareil photo numérique. Si vous formatez un "Memory Stick" sur votre ordinateur, l'image ne s'affiche pas correctement. 88 FR - Sony DPP-EX7 | Operating Instructions - Page 187
davantage d'informations sur l'installation de la carte et de l'adaptateur, reportezvous aux instructions de fonctionnement de l'adaptateur de carte PC. • N'insérez pas ou ne retirez pas la carte flash compacte ou le support Smart Media de l'adaptateur de carte PC lorsque celui-ci est inséré dans - Sony DPP-EX7 | Operating Instructions - Page 188
ème persiste, contactez votre revendeur Sony. Si vous imprimez à partir PC. Vérifiez que les images prises par l'appareil photo numérique ou un autre appareil sont bien enregistré enregistrée dans un format de fichier incompatible que le DPP-EX7 n'accepte pas ou l'image elle-même est endommagée. - Sony DPP-EX7 | Operating Instructions - Page 189
cela ne résout pas le problème, contactez le service clients Sony ou votre revendeur Sony. L'indicateur ou s'allume ou un message d'erreur s'affiche. m Suivez les instructions affichées à l'écran. Une ligne blanche ou des pointillés apparaissent sur les photos imprimées. m La tête d'impression ou le - Sony DPP-EX7 | Operating Instructions - Page 190
revendeur Sony. Nettoyage de l'intérieur de l'imprimante Si des lignes blanches ou des pointillés sont imprimés sur les photos, utilisez nettoyage avec la feuille de protection contenue dans le kit d'impression de la DPP-EX7. Pour utiliser la feuille de protection pour procéder à un nettoyage, ins - Sony DPP-EX7 | Operating Instructions - Page 191
1 Ouvrez le capot du compartiment de la cartouche et retirez la cartouche d'impression (page 18). 2 Insérez la cartouche de nettoyage fournie (blanche) dans l'imprimante, puis fermez le capot du compartiment de la cartouche. 3 Retirez le magasin à papier de l'imprimante. S'il y a du papier dans le - Sony DPP-EX7 | Operating Instructions - Page 192
: Exif Ver. 2.1, 2.2*3, compatible JPEG, TIFF*4-RGB (non compressé) JPEG : 4:4:4, 4:2:2, 4:2:0 (JPEG ligne de base) BMP : vraies couleurs 24 bits, format Windows JFIF (certaines versions des formats de fichier peuvent ne pas être compatibles) Format d'enregistrement de l'image Compatible DCF : Exif - Sony DPP-EX7 | Operating Instructions - Page 193
sont disponibles aux adresses suivantes : Pour les clients aux Etats-Unis : http://www.sel.sony.com/SEL/service/conselec/ Pour les clients au Canada : http://www.sony.ca/service Pour les clients en Europe : http://www.sony-imaging.com/support Pour les clients à Singapour : http://www.css.ap - Sony DPP-EX7 | Operating Instructions - Page 194
les compatibilités entre les appareils photo numériques et les appareils associés. DPOF (Digital Print Order Format) Format d'image optimale, puis imprimée. "Memory Stick" Support d'enregistrement amovible évolué, compact et léger, utilisé avec un appareil photo numérique, un caméscope ou un PC - Sony DPP-EX7 | Operating Instructions - Page 195
Carte PC Insertion/retrait 15 Remarque sur l'utilisation 89 Cartouche d'impression 17, 18 Condensation d'humidité 85 Configuration du système 13 Macintosh 76 Windows 66 Connecteur USB 16 Contraste de l'écran LCD 62 Cordon d'alimentation secteur 15 Curseur 23 D Date Print 59 DCF 96 Définition de la - Sony DPP-EX7 | Operating Instructions - Page 196
Index INPUT SELECT 16, 23 Installation du logiciel Macintosh 77 Windows 67 K Kit d'impression 17 M Magasin à papier 10, 20 "Memory Stick" Insertion/retrait 14 Remarques sur l'utilisation 89 Types utilisables 86 Protection en écriture 89 Menu - Sony DPP-EX7 | Operating Instructions - Page 197
- Sony DPP-EX7 | Operating Instructions - Page 198
Windows® Mac Sony Corporation. •Esta impresora utiliza tecnología Exif 2.2 (Exif Print). •El resto de compañías y nombres de productos mencionados pueden ser marcas comerciales o marcas comerciales registradas de sus respectivas compañías. Además, "™" y "®" no se mencionan en cada caso en este manual - Sony DPP-EX7 | Operating Instructions - Page 199
contenido del paquete, al proveedor del que lo obtuvo. Sony Corporation se reserva el derecho de realizar modificaciones en este manual o en la información que contiene en cualquier momento sin previo aviso. El programa de software descrito puede igualmente regirse por los términos establecidos en - Sony DPP-EX7 | Operating Instructions - Page 200
Índice Procedimientos iniciales Características 6 Desembalaje de la impresora 8 Identificación de los componentes ......... 9 Uso del bolígrafo de contacto y del panel de operaciones 12 Apertura del panel de operaciones ... 12 Uso del bolígrafo de contacto 13 Instalación 1 Conexión de la - Sony DPP-EX7 | Operating Instructions - Page 201
ón desde el ordenador Uso de la impresora con un ordenador con sistema operativo Windows ..... 66 Requisitos del sistema 66 Instalación del controlador de la impresora 67 Impresión desde una aplicación de software 70 Uso de la impresora con un ordenador con sistema operativo Macintosh ... 76 - Sony DPP-EX7 | Operating Instructions - Page 202
Procedimientos iniciales Características Impresión fotorealista Con su sistema de impresión por sublimación de tinta, la fotoimpresora digital DPP-EX7 realiza impresiones fotorealistas que satisfacen numerosas necesidades. Función Super Coat 2 El acabado Super Coat 2 ofrece gran durabilidad y - Sony DPP-EX7 | Operating Instructions - Page 203
PC Card sin utilizar el ordenador x Puede visualizar las imágenes de la cámara digital de imágenes fijas almacenadas en un "Memory Stick" o en una tarjeta PC cable USB suministrado e instala el software de controlador de la impresora DPP-EX7 en el ordenador, puede imprimir las imágenes desde el ordenador - Sony DPP-EX7 | Operating Instructions - Page 204
papel (1) • Bolígrafo de contacto (1) -Software de controlador de impresora Sony DPP-EX5/ EX7 para Windows 98/ 98SE/Me/2000 Professional/XP Home Edition/XP Professional - Controlador de impresora Sony DPP-EX5/EX7 para Mac OS 8.6/9.0/9.1/X (v10.1/v10.2) - Manual de instrucciones • Kit de limpieza - Sony DPP-EX7 | Operating Instructions - Page 205
Procedimientos iniciales Identificación de los componentes Para obtener más información, consulte las páginas que se indican entre paréntesis. Panel frontal de la impresora 1 Tapa del panel de operaciones 2 Botón POWER (páginas 18, 23, 25 y 28) 3 Ranura de inserción del "MEMORY STICK" (página 14) 4 - Sony DPP-EX7 | Operating Instructions - Page 206
Identificación de las piezas Panel posterior de la impresora 1 Conector USB (página 16) Se conecta al conector USB del ordenador. 2 Conector AC IN (página 15) 3 Orificios de ventilación Bandeja de papel 1 Tapa (página 20) 2 Partición (página 20) 3 Adaptador de papel de 3,5 x 5 pulgadas (9 x 13 cm) - Sony DPP-EX7 | Operating Instructions - Page 207
o que se ha seleccionado entre la totalidad de las q; imágenes. 8 Indicación de protección Indica que la imagen está protegida por una cámara digital de imágenes fijas. 9 Número de la imagen 0 Indicación de la calidad de impresión qa Botones de operaciones qs Mensaje guía qd Botones de - Sony DPP-EX7 | Operating Instructions - Page 208
Uso del bolígrafo de contacto y del panel de operaciones La mayoría de las operaciones de la DPP-EX7 se realizan tocando un elemento o botón en la pantalla sensible al tacto del panel de operaciones. En esta sección se proporciona una introducción al uso - Sony DPP-EX7 | Operating Instructions - Page 209
presión con la punta sobre una imagen o un elemento de la pantalla del panel de operaciones. En este manual, esta acción se llama "arrastrar". Al arrastrar es posible mover una imagen o un elemento, o dibujar bolígrafo suministrado, póngase en contacto con su distribuidor de productos Sony. 13 ES - Sony DPP-EX7 | Operating Instructions - Page 210
Instalación 1 Conexión de la impresora Inserción de un "Memory Stick" o tarjeta PC Card Notas •No intente forzar el "Memory Stick" o tarjeta de PC CARD cuando los introduzca o extraiga de la ranura. Si lo hace, el "Memory Stick", tarjeta de PC CARD o impresora podrían dañarse. •Mientras la impresora - Sony DPP-EX7 | Operating Instructions - Page 211
Instalación Inserción de una tarjeta PC Card Inserte la tarjeta de PC CARD en la ranura de inserción PC CARD hasta que quede encajada en su sitio. Botón de expulsión PC CARD Tarjeta de PC CARD Para expulsar la tarjeta de PC CARD Pulse el botón de expulsión PC CARD. Cuando salga, extráigala - Sony DPP-EX7 | Operating Instructions - Page 212
instalar y hacer funcionar el software, consulte "Impresión desde el ordenador" (páginas 66-83). Ordenador Windows/ Macintosh Al conector USB Al LCD. Esto no se debe a un problema de la impresora. •Consulte el manual de instrucciones de su ordenador para más información. •No es posible utilizar la - Sony DPP-EX7 | Operating Instructions - Page 213
Instalación 2 Preparación del paquete de impresión Es necesario utilizar un paquete de impresión opcional diseñado específicamente para la impresora. El paquete contiene un juego de papel de impresión y un cartucho de impresión para impresiones de tamaño tarjeta postal (10 x 15 cm), tamaño 3,5 x 5 - Sony DPP-EX7 | Operating Instructions - Page 214
de impresión en la impresora hasta que quede encajado en su sitio y cierre la tapa del compartimiento de cartuchos. El lado con el logotipo de Sony mirando hacia arriba Para sustituir el cartucho de impresión Cuando se agote el cartucho de impresión, el indicador de error de cartucho se ilumina - Sony DPP-EX7 | Operating Instructions - Page 215
Instalación Notas •No introduzca nunca la mano en el compartimiento de cartuchos. El cabezal térmico alcanza altas temperaturas, especialmente después de varias impresiones. •No rebobine la cinta de tinta ni utilice el cartucho de impresión rebobinado para una nueva impresión. Si lo hace, no se - Sony DPP-EX7 | Operating Instructions - Page 216
4 Inserción del papel de impresión 1 Abra la tapa de la bandeja de papel y coloque el adaptador de papel de 3,5 x 5 pulgadas (9 x 13 cm) y la partición según el tamaño del papel de impresión que desee utilizar. x Para utilizar papel de tamaño tarjeta postal (10 x 15 cm) Retire el adaptador de - Sony DPP-EX7 | Operating Instructions - Page 217
Instalación 2 Coloque el papel de impresión en la bandeja. Sacuda el papel de impresión. A continuación, insértelo con la superficie de impresión (el lado en blanco) mirando hacia arriba y la flecha indicando la misma dirección que la flecha de la bandeja. Inserte la hoja protectora con el papel y - Sony DPP-EX7 | Operating Instructions - Page 218
4 Inserción del papel de impresión Notas • No retire ni inserte la bandeja de papel mientras se está imprimiendo. • Si el papel de impresión no entra automáticamente, el indicador de error del papel se ilumina. Retire la bandeja de papel y compruebe si hay algún papel atascado. •Para evitar un - Sony DPP-EX7 | Operating Instructions - Page 219
Operaciones básicas de impresión Operaciones básicas de impresión Impresión de las imágenes seleccionadas Puede seleccionar una imagen grabada 4 en el "Memory Stick" o la tarjeta PC 5 Card e imprimirla a tamaño completo. 3 2 1 1 Inserte un "Memory Stick" o una tarjeta PC Card que contenga - Sony DPP-EX7 | Operating Instructions - Page 220
Impresión de la imagen seleccionada 4 Toque en la pantalla la imagen que desee imprimir. El cursor se desplaza hacia dicha imagen. Para visualizar otra página Deslizador y botones de desplazamiento Cuando hay varias páginas, puede cambiar de página arrastrando el deslizador de la barra de - Sony DPP-EX7 | Operating Instructions - Page 221
Operaciones básicas de impresión Para imprimir la vista previa de la imagen Para imprimir una copia de la vista previa de la imagen, pulse PRINT. Para imprimir varias copias, toque [+] hasta que aparezca el número de impresiones que desee y, a continuación, pulse PRINT. Para reducir el número de - Sony DPP-EX7 | Operating Instructions - Page 222
Impresión de la imagen seleccionada 6 Toque [+] o [-] para establecer el número de copias que se deben imprimir. Cada vez que toque [+] o [-], el Número de impresiones número de impresiones aumentará o se reducirá. Puede establecer el número de impresiones de 0 a 30. Para imprimir varias imá - Sony DPP-EX7 | Operating Instructions - Page 223
número de archivos que contiene el "Memory Stick" o la tarjeta PC Card, del tamaño de la imagen, del tipo de archivo o del tipo de cámara digital de imágenes fijas. •La impresora no puede mostrar las imágenes guardadas en una carpeta que tiene cuatro o más carpetas encima suyo en la estructura - Sony DPP-EX7 | Operating Instructions - Page 224
para la impresión. Notas • Para obtener información sobre cómo predefinir las imágenes para la impresión, consulte el manual de la cámara digital de imágenes fijas. • Algunos tipos de cámara digital de imágenes fijas no soportan la función DPOF o la impresora no soporta parte de las funciones de la - Sony DPP-EX7 | Operating Instructions - Page 225
Operaciones básicas de impresión Cuando selecciona el modo de impresión ALL, todas las imágenes de la lista de miniaturas se muestran con fondo amarillo. Cuando selecciona el modo de impresión DPOF, sólo se muestran con fondo amarillo las imágenes predefinidas con la indicación de impresión. Cuando - Sony DPP-EX7 | Operating Instructions - Page 226
Operaciones avanzadas de impresión Adición de efectos a una imagen (Effect) Utilidades del menú Effect El menú Effect edita, ajusta o añade filtros especiales a una imagen de la lista de miniaturas seleccionada con el cursor o que aparece en la pantalla de vista previa. Para mostrar el menú - Sony DPP-EX7 | Operating Instructions - Page 227
Operaciones avanzadas de impresión Para guardar la imagen con los efectos seleccionados Es posible guardar la imagen editada como una nueva imagen en el "Memory Stick" o la tarjeta PC Card y conservar la imagen original intacta. 1 Toque [Save]. Aparece un cuadro de diálogo que permite elegir el - Sony DPP-EX7 | Operating Instructions - Page 228
Adición de efectos a una imagen (Effect) Cambio del tamaño y la posición de la imagen El submenú Edit permite aumentar, reducir, girar o invertir una imagen. 1 Desplace el cursor hacia la imagen que desee de la lista de miniaturas o tóquela de nuevo para mostrar su vista previa. 2 Toque [Effect]. - Sony DPP-EX7 | Operating Instructions - Page 229
Operaciones avanzadas de impresión Nota La calidad fotográfica de una imagen ampliada puede verse deteriorada según su tamaño. 5 Toque [Back]. El menú Effect se muestra de nuevo. Es posible seleccionar otro submenú Effect, guardar o imprimir la imagen, o salir del menú Effect (páginas 3031). Ajuste - Sony DPP-EX7 | Operating Instructions - Page 230
Adición de efectos a una imagen (Effect) 5 Arrastre el deslizador hacia arriba o hacia abajo, toque varias veces la parte superior o inferior, o [V]/[v] en la barra de desplazamiento para ajustar la imagen. Elementos Brightness Saturation Tint Sharpness Procedimientos Mueva el deslizador hacia - Sony DPP-EX7 | Operating Instructions - Page 231
Añadir un filtro especial a la imagen El submenú Filter permite añadir un efecto especial a una imagen para imprimirla en tonos monocromo, pintura o sepia. 1 Desplace el cursor hacia la imagen que desee de la lista de miniaturas o toque dicha imagen de nuevo para mostrar su vista previa. 2 Toque [ - Sony DPP-EX7 | Operating Instructions - Page 232
Realización de varios tipos de impresiones (Creative Print) Utilidades del menú Creative Print El menú Creative Print permite realizar varios tipos de impresión. Para mostrar el menú superior Creative Print, toque [Creative Print] debajo de la pantalla de vista previa o la lista de miniaturas: - Sony DPP-EX7 | Operating Instructions - Page 233
Operaciones avanzadas de impresión Para imprimir la imagen editada Toque [+] o [-] para especificar las copias que desea imprimir y, a continuación, pulse el botón PRINT. Se imprimirá la imagen que se esté visualizando en ese momento. Para cancelar la impresión, toque [Cancel] en la pantalla. - Sony DPP-EX7 | Operating Instructions - Page 234
Realización de varios tipos de impresiones (Creative Print) Creación de tarjetas Puede añadir una felicitación y mensajes a las imágenes para crear una tarjeta original como la que se muestra a la derecha. 1 Toque [Card] en el menú superior Creative Print (página 36). Se muestra la pantalla de - Sony DPP-EX7 | Operating Instructions - Page 235
Operaciones avanzadas de impresión 4 Toque las áreas correspondientes de la vista previa para introducir un mensaje, imágenes o caracteres. Puede hacerlo en el orden que desee. x Introducción de un mensaje 1 Toque el área de saludos. Se muestra la pantalla de selección de un mensaje. Para cambiar - Sony DPP-EX7 | Operating Instructions - Page 236
Realización de varios tipos de impresiones (Creative Print) 2 Toque la imagen que desee. Aparece la pantalla para ajustar el tamaño, la posición, el ángulo y el brillo de la imagen. 3 Toque el botón del ajuste deseado y aplíquelo. Elementos #/3 $/4/%/5 / Brightness Procedimientos Cada vez que - Sony DPP-EX7 | Operating Instructions - Page 237
Operaciones avanzadas de impresión 5 Compruebe la vista previa. Es posible imprimir o guardar la imagen creada (páginas 36-37). Creación de un calendario Es posible añadir un calendario seleccionado a una o varias imágenes para crear un calendario original. 1 Toque [Calendar] en el menú superior - Sony DPP-EX7 | Operating Instructions - Page 238
Realización de varios tipos de impresiones (Creative Print) 3 Toque la plantilla que desee. Se muestra una vista previa de la plantilla seleccionada. Área de imágenes Área del calendario 4 Toque las áreas correspondientes en la vista previa para configurar el calendario y añadir imágenes. Puede - Sony DPP-EX7 | Operating Instructions - Page 239
Operaciones avanzadas de impresión 5 Toque [Enter]. Se muestra la vista previa del calendario. En el área de calendarios se muestra el calendario seleccionado. 5 Compruebe la vista previa. Es posible imprimir o guardar la imagen creada (páginas 36-37). Realización de una impresión con divisiones - Sony DPP-EX7 | Operating Instructions - Page 240
Realización de varios tipos de impresiones (Creative Print) 3 Toque la plantilla que desee. Se muestra la vista previa de la plantilla seleccionada. 4 Inserte un "Memory Stick" o una tarjeta PC Card en la impresora y toque el área de una imagen. Si utiliza una plantilla con varias imágenes, puede - Sony DPP-EX7 | Operating Instructions - Page 241
Operaciones avanzadas de impresión 2 Toque la plantilla de 9 divisiones que desee. Se muestra una vista previa de la plantilla seleccionada. 3 Toque el área de una imagen. Si utiliza una plantilla con varias imágenes, puede seleccionar cualquier imagen. Se muestra la pantalla de selección de marcos - Sony DPP-EX7 | Operating Instructions - Page 242
Realización de varios tipos de impresiones (Creative Print) Realización de una impresión de índices Es posible realizar una impresión de índices de las imágenes del "Memory Stick" o la tarjeta PC Card. También puede especificar un título para la impresión de índice. 1 Toque [Index Print] en el menú - Sony DPP-EX7 | Operating Instructions - Page 243
Operaciones avanzadas de impresión 6 Toque las áreas correspondientes de la vista previa para introducir un título e imágenes. Puede introducirlos en el orden que desee. x Introducción de un título Cuando elija [On] en Title, puede introducir caracteres. Toque el área de introducción del título - Sony DPP-EX7 | Operating Instructions - Page 244
Realización de varios tipos de impresiones (Creative Print) Adición de dibujos o caracteres a una imagen (Tool) En todos los submenús Creative Print, excepto Index Print, es posible tocar [Tool] en la pantalla de vista previa para que aparezca la pantalla Tool. La pantalla Tool añade dibujos y - Sony DPP-EX7 | Operating Instructions - Page 245
Operaciones avanzadas de impresión Realización de dibujos a mano alzada ( ) Es posible utilizar la herramienta de lápiz para dibujar a mano alzada en la vista previa. 1 En la pantalla Tool (página 48), toque (Herramienta de lápiz). Se muestra la pantalla de la herramienta de lápiz. 2 Para - Sony DPP-EX7 | Operating Instructions - Page 246
Realización de varios tipos de impresiones (Creative Print) 6 Toque [Enter]. El dibujo que ha trazado se fija y se pega en la vista previa. Se muestra la pantalla superior Tool. Puede utilizar otra herramienta, imprimir la imagen creada o guardarla (página 48). Escritura de caracteres ( ) Puede - Sony DPP-EX7 | Operating Instructions - Page 247
Operaciones avanzadas de impresión x Para cambiar de línea Toque # para introducir la siguiente línea. Para volver a la línea anterior, toque [b] varias veces junto al cuadro de introducción de caracteres hasta que aparezca dicha línea. Para ir a la siguiente línea, toque [B] varias veces junto al - Sony DPP-EX7 | Operating Instructions - Page 248
Realización de varios tipos de impresiones (Creative Print) 3 Toque [Exit]. Se cierra la pantalla de introducción de caracteres y los caracteres se pegan en la vista previa. 4 Ajuste su tamaño, posición y ángulo. Elementos #/3 $/4/%/5 / Cancelar Procedimientos Cada vez que toque 3 o #, los - Sony DPP-EX7 | Operating Instructions - Page 249
Operaciones avanzadas de impresión Pegado de sellos ( ) Es posible utilizar la herramienta de sello para pegar un sello seleccionado en la vista previa. 1 En la pantalla Tool (página 48), toque (herramienta de sello). Se muestra la pantalla de selección de sello. 2 Toque el sello deseado. Éste se - Sony DPP-EX7 | Operating Instructions - Page 250
Realización de varios tipos de impresiones (Creative Print) Pegado de imágenes cortadas ( ) Es posible utilizar la herramienta de cortar para pegar una imagen seleccionada con o sin corte. 1 En la pantalla Tool (página 48), toque (herramienta de cortar). Se muestra la pantalla de selección de forma. - Sony DPP-EX7 | Operating Instructions - Page 251
4 Ajuste la imagen cortada y, a continuación, toque [Enter]. Para obtener más información sobre cómo ajustar una imagen, consulte la página 40. La imagen cortada se pega en la vista previa. Operaciones avanzadas de impresión Para cancelar la operación Toque [Cancel]. La imagen cortada se borra de - Sony DPP-EX7 | Operating Instructions - Page 252
Realización de varios tipos de impresiones (Creative Print) 2 Toque el mensaje que desee. El mensaje con el color seleccionado se pega en la vista previa Para cancelar la operación Toque [Cancel]. El mensaje se borra de la vista previa. 3 Ajuste su tamaño, posición y ángulo. Para obtener más - Sony DPP-EX7 | Operating Instructions - Page 253
Configuración de la impresora (MENU) Utilidades de Menu Menu permite cambiar los ajustes de la impresora, configurar la pantalla, realizar una presentación de diapositivas o eliminar imágenes. Para mostrar la pantalla Menu, toque [Menu] debajo de la pantalla de vista previa o la lista de miniaturas: - Sony DPP-EX7 | Operating Instructions - Page 254
. Puede seleccionar los niveles de ajuste "High" (alto) o "Low" (bajo). Cuando se ha seleccionado "High" o "Low", las imágenes tomadas con una cámara digital de imágenes fijas compatible con Exif Print (Exif 2.2) se ajustan automáticamente en la calidad de imagen óptima y se imprimen. Notas • La - Sony DPP-EX7 | Operating Instructions - Page 255
impresiones sin bordes con el papel de impresión de tamaño pequeño (9 x 10 cm). • Cuando imprima una fotografía de 4:3 estándar tomada con una cámara digital de imágenes fijas, los márgenes superior e inferior de la imagen se cortan y ésta se imprime como una fotografía de 3:2. Imprime una imagen de - Sony DPP-EX7 | Operating Instructions - Page 256
Configuración de la impresora (MENU) Elementos Color Setting Ajustes Ajusta la reproducción del color de la impresora. Arrastre el deslizador del ajuste de cada color o toque [+] o [-] para ajustar el nivel en un valor superior (+1, +2) o en un valor inferior (-1, -2). (*R: 0/G:0/B:0) R: Ajusta - Sony DPP-EX7 | Operating Instructions - Page 257
Operaciones avanzadas de impresión Cambio de las preferencias de la impresora (Options) Puede cambiar las preferencias de la impresora y ajustar el contraste de la pantalla LCD de la impresora. 1 Toque [Options] en la pantalla Menu (página 57). Aparece la ventana Options. 2 Toque los elementos de - Sony DPP-EX7 | Operating Instructions - Page 258
Configuración de la impresora (MENU) Elementos Ajustes Date/Clock Ajuste Es posible configurar el reloj interno para registrar la fecha de grabación de la imagen en el "Memory Stick" o en la tarjeta PC Card. 1 Toque [Setting] para introducir el modo de ajuste del reloj. 2 Toque [v] /[V] para - Sony DPP-EX7 | Operating Instructions - Page 259
Operaciones avanzadas de impresión Visualización de una presentación de diapositivas Puede realizar una presentación de diapositivas de las imágenes guardadas en un "Memory Stick" o en una tarjeta PC Card. 1 Toque [Slide Show] en la pantalla Menu (página 57). Aparece la ventana Slide Show. 2 En la - Sony DPP-EX7 | Operating Instructions - Page 260
Borrado de imágenes Puede eliminar imágenes seleccionadas en el "Memory Stick" o la tarjeta PC Card. También puede formatear el "Memory Stick". Notas • Mientras borra o formatea, no desactive la alimentación ni retire el "Memory Stick" o la tarjeta PC Card de la ranura de inserción, ya que podrían - Sony DPP-EX7 | Operating Instructions - Page 261
Operaciones avanzadas de impresión 3 Toque la imagen que desee borrar. La imagen seleccionada aparece en un fondo amarillo con un icono de papelera. Para borrar varias imágenes a la vez, repita este paso. Para cancelar la eliminación Toque [Exit]. 4 Toque [Execute]. Se muestra el mensaje de - Sony DPP-EX7 | Operating Instructions - Page 262
Windows El controlador de impresora DPP-EX7 suministrado permite imprimir una imagen almacenada en el ordenador mediante la fotoimpresora digital DPPEX7. Para imprimir una imagen del ordenador, necesita una aplicación de software más de una impresora DPP-SV88/SV77/SV55/MP1/EX5/EX7 a la vez, no - Sony DPP-EX7 | Operating Instructions - Page 263
. 1 Compruebe que la impresora no esté conectada al ordenador. 2 Encienda el ordenador e inicie Windows. •Al instalar o desinstalar el software en Windows® 2000 Professional, inicie la sesión de Windows con el nombre de usuario "Administrador" o "Usuario avanzado". •Al instalar o desinstalar el - Sony DPP-EX7 | Operating Instructions - Page 264
la impresora con un ordenador con sistema operativo Windows Aparece el cuadro de diálogo "Sony DPP-EX5/EX7 Setup". 4 Haga clic en "Siguiente" instalación desde el paso 3. • Una vez instalada, la impresora "Sony DPP-EX7" no está configurada como impresora predeterminada. Configure la impresora que - Sony DPP-EX7 | Operating Instructions - Page 265
/XP Professional) o "Impresoras" en el "Panel de control". Si la impresora DPPEX7 se ha instalado correctamente, "Sony DPP-EX7" aparecerá en la ventana "Impresoras y faxes". Si utiliza Windows Me Es posible que durante la instalación aparezca el "Asistente para agregar nuevo hardware". Si aparece - Sony DPP-EX7 | Operating Instructions - Page 266
del disco duro del ordenador. Impresión desde una aplicación de software Puede utilizar el comando "Imprimir" de una aplicación de software para imprimir una imagen del ordenador con la fotoimpresora digital DPP-EX7. Si utiliza Windows XP Home Edition/Professional, puede utilizar Mis imágenes para - Sony DPP-EX7 | Operating Instructions - Page 267
1 Inicie la aplicación de software de impresión y seleccione la imagen que desea imprimir. 2 Haga clic Aparecerá el cuadro de diálogo "Configurar página". Impresión desde el ordenador 2 Seleccione ""Sony DPP-EX7" como el nombre de la impresora. 3 Haga clic en "Propiedades". Aparecerá la ventana de - Sony DPP-EX7 | Operating Instructions - Page 268
Uso de la impresora con un ordenador con sistema operativo Windows 5 Haga clic en la ficha "Papel" y, a continuación, ajuste el papel de acuerdo con el tamaño del papel de impresión que desea utilizar para imprimir. Papel - Sony DPP-EX7 | Operating Instructions - Page 269
la impresión. Aparece el monitor de la impresora DPPEX7 para mostrar el proceso de impresión. Para imprimir desde Mis imágenes (sólo si utiliza Windows XP Home Edition/Professional) 1 Inserte las imágenes que desee imprimir en "Mis imágenes". 2 Seleccione "Mis imágenes" en el menú "Inicio". Aparecer - Sony DPP-EX7 | Operating Instructions - Page 270
ordenador con sistema operativo Windows 4 Haga clic en "Siguiente". Aparecerá la ventana de selección de imágenes. 5 Compruebe las imágenes que desea imprimir y, a continuación, haga clic en "Siguiente". Elimine las marcas de las imágenes que no desee imprimir. 6 Seleccione "DPP-EX7" como impresora - Sony DPP-EX7 | Operating Instructions - Page 271
ya se han enviado a la cola de impresión 1 Abra "Impresoras y faxes" (sólo Windows XP Home Edition/XP Professional) o "Impresoras" en el "Panel de control". 2 Haga doble clic en el icono "Sony DPP-EX7". Se abre la ventana "Sony DPP-EX7". En esta ventana se muestra la lista de los documentos que se - Sony DPP-EX7 | Operating Instructions - Page 272
DPP-EX7 suministrado permite imprimir una imagen almacenada en el ordenador mediante la fotoimpresora digital DPPEX7. Para imprimir una imagen del ordenador, necesita disponer de una aplicación de software • Si conecta más de una impresora DPP-SV88/SV77/SV55/MP1/EX7/EX5 a la vez, no podrá utilizarlas - Sony DPP-EX7 | Operating Instructions - Page 273
la unidad de CD-ROM. 4 Haga doble clic en la carpeta "Mac OS 8.6-9.x". 5 Para seleccionar el idioma del software, haga doble clic en la carpeta correspondiente del CD-ROM. La carpeta se abrirá. 6 Haga doble clic en "DPP- EX5_EX7 Installer". 7 Haga clic en "Instalar". Se inicia la instalación. Una - Sony DPP-EX7 | Operating Instructions - Page 274
en el futuro. Desinstalación del controlador de la impresora Si ya no necesita el software, desinstálelo como se indica a continuación: En el paso 6, haga clic en "Uninstaller". Si utiliza Mac OS X (v10.1/v10.2) 1 Compruebe que la impresora no esté conectada al ordenador. 2 Encienda e inicie - Sony DPP-EX7 | Operating Instructions - Page 275
6 Haga clic en . Nota Si utiliza Mac OS X (v10.2), este cuadro de diálogo no aparecerá. 7 Introduzca el nombre y la contraseña del administrador del equipo y haga clic en "OK". Si desea conocer - Sony DPP-EX7 | Operating Instructions - Page 276
. Desinstalación del controlador de la impresora Si ya no necesita el software, desinstálelo como se indica a continuación: 1 Desconecte el cable USB de la impresora y el ordenador. 2 Abra "Centro de impresión", seleccione "DPP-EX7" de la lista de impresoras y, a continuación, haga clic en "Eliminar - Sony DPP-EX7 | Operating Instructions - Page 277
Puede utilizar una aplicación de software para imprimir imágenes del ordenador con la fotoimpresora digital DPP-EX7. Notas •Antes de realizar la más información, consulte el manual de la aplicación utilizada. •Los cuadros de diálogo que se muestran en esta sección pertenecen a Mac OS X (v10.2). Seg - Sony DPP-EX7 | Operating Instructions - Page 278
Uso de la impresora con un ordenador con sistema operativo Macintosh Ajustes Formato Tamaño Seleccione "Atributos de página". Seleccione "DPP-EX7" del cuadro de lista desplegable. Seleccione uno de los siguientes tamaños del papel del cuadro de lista desplegable. •Tarjeta postal: Si utiliza el - Sony DPP-EX7 | Operating Instructions - Page 279
ha cargado, no la cancele, puesto que el papel podría atascarse. Espere a que finalice la impresión. Si se produce un error durante la impresión en Mac OS X (v10.1/ v10.2) Si se produce un error, realice estos procedimientos. 1 Si aparece el cuadro de diálogo de la derecha, haga clic en "Mostrar - Sony DPP-EX7 | Operating Instructions - Page 280
Información complementaria Precauciones Seguridad • Conecte la impresora con a un suministro de 120 V CA, 60 Hz (modelo para zonas de 120 V) o 220 a 240 V CA, 50/60 Hz (modelos para otras zonas) solamente. • Tenga cuidado de no colocar ni dejar caer objetos pesados sobre el cable de alimentación, ni - Sony DPP-EX7 | Operating Instructions - Page 281
Condensación de humedad Si traslada la impresora directamente de un lugar frío a uno cálido o si la instala en una sala extremadamente cálida o húmeda, puede condensarse humedad en el interior de la unidad. En tales casos, es posible que ésta no funcione correctamente y que se originen fallos de - Sony DPP-EX7 | Operating Instructions - Page 282
Acerca del "Memory Stick" ¿Qué es un "Memory Stick"? Un "Memory Stick" es un soporte de almacenamiento IC pequeño, ligero y de nueva generación cuya capacidad es superior a la de los disquetes. Puede utilizarse para intercambiar datos entre dispositivos compatibles con este soporte. Asimismo, un " - Sony DPP-EX7 | Operating Instructions - Page 283
Información complementaria Tipos de "Memory Stick" compatibles con la impresora Éstas son las operaciones que puede realizar utilizando la impresora con cada tipo de "Memory Stick": Leer Escribir/Eliminar Formatear "Memory Stick"/ "Memory Stick (with SÍ SÍ memory select function)"/"Memory - Sony DPP-EX7 | Operating Instructions - Page 284
Acerca del "Memory Stick" • No extraiga el "Memory Stick" de la impresora mientras ésta lea o escriba datos. • Los datos pueden dañarse si: - Se extrae el "Memory Stick" o la impresora se apaga durante la lectura o escritura de datos del "Memory Stick". - El "Memory Stick" se utiliza en una ubicaci - Sony DPP-EX7 | Operating Instructions - Page 285
en el adaptador y, a continuación, en la impresora. Para obtener información acerca de la instalación de la tarjeta y el adaptador, consulte el manual de instrucciones del adaptador de tarjeta PC Card. • No inserte ni retire la tarjeta "compact flash" o Smart Media dentro o fuera del adaptador - Sony DPP-EX7 | Operating Instructions - Page 286
proveedor Sony. Cuando imprima desde un ordenador, consulte también el manual de grabadas imágenes que se han grabado mediante la cámara digital de imágenes fijas u otro dispositivo. m Compruebe que en un formato de archivo incompatible que la impresora DPP-EX7 no admite o que la imagen está dañada - Sony DPP-EX7 | Operating Instructions - Page 287
mostrar y tratar las imágenes restantes. m En función del tipo de cámara digital de imágenes fijas, la relación de aspecto de la imagen grabada difiere, por póngase en contacto con el centro de servicio técnico de Sony o con el representante de Sony. El indicador o se ilumina o aparece un mensaje de - Sony DPP-EX7 | Operating Instructions - Page 288
. Nota Si no puede retirar el papel atascado, póngase en contacto con su proveedor Sony. Limpieza del interior de la impresora Si aparecen líneas o puntos blancos en las im impresión diseñado para el modelo DPP-EX7. Introduzca esta hoja con la cara impresa mirando hacia abajo en la bandeja. 92 ES - Sony DPP-EX7 | Operating Instructions - Page 289
Información complementaria 1 Abra la tapa del compartimiento del cartucho y retire el cartucho de impresión (página 18). 2 Introduzca el cartucho de limpieza suministrado (blanco) en la impresora y cierre la tapa del compartimiento del cartucho. 3 Retire la bandeja del papel de la impresora. Si - Sony DPP-EX7 | Operating Instructions - Page 290
Exif Ver.2,1/2,2*3, compatible con JPEG, TIFF*4-RGB (sin comprimir) JPEG: 4:4:4, 4:2:2, 4:2:0 (línea de base JPEG) BMP: 24 bits color completo, formato Windows JFIF (Observe que algunas versiones de formato de archivo pueden no ser compatibles.) Formato de imagen grabada Compatible con DCF: Exif Ver - Sony DPP-EX7 | Operating Instructions - Page 291
en las siguientes direcciones de páginas principales: Para los clientes de EE.UU.: http://www.sel.sony.com/SEL/service/conselec/ Para los clientes de Canadá: http://www.sony.ca/service Para los clientes de Europa: http://www.sony-imaging.com/support Para los clientes de Singapur: http://www.css.ap - Sony DPP-EX7 | Operating Instructions - Page 292
de imagen intercambiable para cámaras 96 ES digitales fijas) Print es un estándar global para la impresión de fotos digitales. Una cámara digital fija compatible con Exif Print almacena los datos relativos a las condiciones de grabación en el momento en que se toma cada imagen*1. La impresora - Sony DPP-EX7 | Operating Instructions - Page 293
número de impresiones 26 Contraste de la pantalla LCD 62 Cursor 23 D DCF 96 Desinstalar el software 72, 78, 80 División de imágenes 43 DPOF 28, 96 E Editar 32 Especificaciones 94 16, 23 Instalar el software Macintosh 77 Windows 67 Introducir caracteres 50 Introducir un mensaje 39, 51 Continúa 97 ES - Sony DPP-EX7 | Operating Instructions - Page 294
de impresión 17, 20 Paquete de impresión 17 Pitido (Beep) 61 Plantilla 38 Presentación de diapositivas 63 R Requisitos del sistema Macintosh 76 Windows 66 S Satinado 59 Seleccionar una imagen 25, 39 Solución de problemas 90 Superficie de impresión 21 Suprimir imágenes 64 T Tamaño 3,5 x 5 pulgadas - Sony DPP-EX7 | Operating Instructions - Page 295
Información complementaria 99 ES - Sony DPP-EX7 | Operating Instructions - Page 296
Sony Corporation Printed in Japan Printed on 70% recycled paper.
-
 1
1 -
 2
2 -
 3
3 -
 4
4 -
 5
5 -
 6
6 -
 7
7 -
8
-
9
-
10
-
11
-
12
-
13
-
14
-
15
-
16
-
17
-
18
-
19
-
20
-
21
-
22
-
23
-
24
-
25
-
26
-
27
-
28
-
29
-
30
-
31
-
32
-
33
-
34
-
35
-
36
-
37
-
38
-
39
-
40
-
41
-
42
-
43
-
44
-
45
-
46
-
47
-
48
-
49
-
50
-
51
-
52
-
53
-
54
-
55
-
56
-
57
-
58
-
59
-
60
-
61
-
62
-
63
-
64
-
65
-
66
-
67
-
68
-
69
-
70
-
71
-
72
-
73
-
74
-
75
-
76
-
77
-
78
-
79
-
80
-
81
-
82
-
83
-
84
-
85
-
86
-
87
-
88
-
89
-
90
-
91
-
92
-
93
-
94
-
95
-
96
-
97
-
98
-
99
-
100
-
101
-
102
-
103
-
104
-
105
-
106
-
107
-
108
-
109
-
110
-
111
-
112
-
113
-
114
-
115
-
116
-
117
-
118
-
119
-
120
-
121
-
122
-
123
-
124
-
125
-
126
-
127
-
128
-
129
-
130
-
131
-
132
-
133
-
134
-
135
-
136
-
137
-
138
-
139
-
140
-
141
-
142
-
143
-
144
-
145
-
146
-
147
-
148
-
149
-
150
-
151
-
152
-
153
-
154
-
155
-
156
-
157
-
158
-
159
-
160
-
161
-
162
-
163
-
164
-
165
-
166
-
167
-
168
-
169
-
170
-
171
-
172
-
173
-
174
-
175
-
176
-
177
-
178
-
179
-
180
-
181
-
182
-
183
-
184
-
185
-
186
-
187
-
188
-
189
-
190
-
191
-
192
-
193
-
194
-
195
-
196
-
197
-
198
-
199
-
200
-
201
-
202
-
203
-
204
-
205
-
206
-
207
-
208
-
209
-
210
-
211
-
212
-
213
-
214
-
215
-
216
-
217
-
218
-
219
-
220
-
221
-
222
-
223
-
224
-
225
-
226
-
227
-
228
-
229
-
230
-
231
-
232
-
233
-
234
-
235
-
236
-
237
-
238
-
239
-
240
-
241
-
242
-
243
-
244
-
245
-
246
-
247
-
248
-
249
-
250
-
251
-
252
-
253
-
254
-
255
-
256
-
257
-
258
-
259
-
260
-
261
-
262
-
263
-
264
-
265
-
266
-
267
-
268
-
269
-
270
-
271
-
272
-
273
-
274
-
275
-
276
-
277
-
278
-
279
-
280
-
281
-
282
-
283
-
284
-
285
-
286
-
287
-
288
-
289
-
290
-
291
-
292
-
293
-
294
-
295
-
296
 |
 |

DPP-EX7
3-207-207-
13
(2)
2002 Sony Corporation
Digital Photo
Printer
GB
FR
Operating Instructions
Before operating this printer, please read this
manual thoroughly and retain it for future
reference.
Mode d’emploi
Avant d’utiliser cette imprimante, veuillez lire
attentivement ce manuel et le conserver pour toute
référence ultérieure.
Manual de instrucciones
Antes de utilizar esta impresora, lea este manual
atentamente y consérvelo para consultarlo en el
futuro.
Digital Photo Printer
DPP-EX7
ES