Sony HDR UX5 Instruction Manual - Page 10
Table of Contents, Enjoying Your Camcorder, Getting Started, Recording/Playback, Editing - recording time
 |
UPC - 027242701434
View all Sony HDR UX5 manuals
Add to My Manuals
Save this manual to your list of manuals |
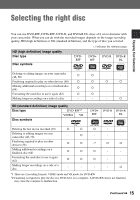
Page 10 highlights
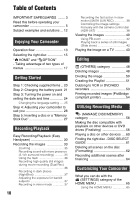
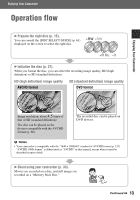
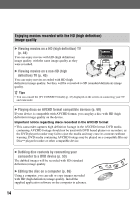
Table of Contents IMPORTANT SAFEGUARDS ........ 3 Read this before operating your camcorder 5 Subject examples and solutions ... 12 Enjoying Your Camcorder Operation flow 13 Selecting the right disc 15 " HOME" and " OPTION" - Taking advantage of two types of menus 17 Getting Started Step 1: Checking supplied items .. 20 Step 2: Charging the battery pack 21 Step 3: Turning the power on and setting the date and time 24 Changing the language setting ..... 25 Step 4: Adjusting your camcorder to suit you 26 Step 5: Inserting a disc or a "Memory Stick Duo 27 Recording/Playback Easy Recording/Playback (Easy Handycam 30 Recording the images 33 Zooming 35 Recording sound with more presence (5.1ch surround recording 35 Using the flash 36 Recording high quality still images during movie recording (Dual Rec 36 Recording in dark places (NightShot 37 Adjusting the exposure for backlit subjects 37 Recording in mirror mode 37 10 Recording the fast action in slowmotion (SMTH SLW REC 38 Controlling the image settings manually with the camera control dial (HDR-UX7 38 Viewing the images 40 Using PB zoom 42 Playing back a series of still images (Slide show 42 Playing the image on a TV 43 Editing (OTHERS) category 48 Deleting images 48 Dividing the image 50 Creating the Playlist 51 Dubbing to VCR or DVD/HDD recorders 53 Printing recorded images (PictBridge compliant printer 54 Utilizing Recording Media (MANAGE DISC/MEMORY) category 56 Making the disc compatible with playback on other devices or DVD drives (Finalizing 56 Playing a disc on other devices .... 60 Finding the right disc - DISC SELECT GUIDE 61 Deleting all scenes on the disc (Formatting 62 Recording additional scenes after finalizing 64 Customizing Your Camcorder What you can do with the (SETTINGS) category of the HOME MENU 65 Using the HOME MENU 65
-
 1
1 -
2
-
3
-
4
-
 5
5 -
 6
6 -
 7
7 -
 8
8 -
 9
9 -
 10
10 -
 11
11 -
 12
12 -
 13
13 -
 14
14 -
 15
15 -
16
-
17
-
18
-
19
-
20
-
21
-
22
-
23
-
24
-
25
-
26
-
27
-
28
-
29
-
30
-
31
-
32
-
33
-
34
-
35
-
36
-
37
-
38
-
39
-
40
-
41
-
42
-
43
-
44
-
45
-
46
-
47
-
48
-
49
-
50
-
51
-
52
-
53
-
54
-
55
-
56
-
57
-
58
-
59
-
60
-
61
-
62
-
63
-
64
-
65
-
66
-
67
-
68
-
69
-
70
-
71
-
72
-
73
-
74
-
75
-
76
-
77
-
78
-
79
-
80
-
81
-
82
-
83
-
84
-
85
-
86
-
87
-
88
-
89
-
90
-
91
-
92
-
93
-
94
-
95
-
96
-
97
-
98
-
99
-
100
-
101
-
102
-
103
-
104
-
105
-
106
-
107
-
108
-
109
-
110
-
111
-
112
-
113
-
114
-
115
-
116
-
117
-
118
-
119
-
120
-
121
-
122
-
123
-
124
-
125
-
126
-
127
-
128
-
129
-
130
-
131
-
132
-
133
-
134
-
135
-
136
-
137
-
138
-
139
-
140
-
141
-
142
-
143
 |
 |
